
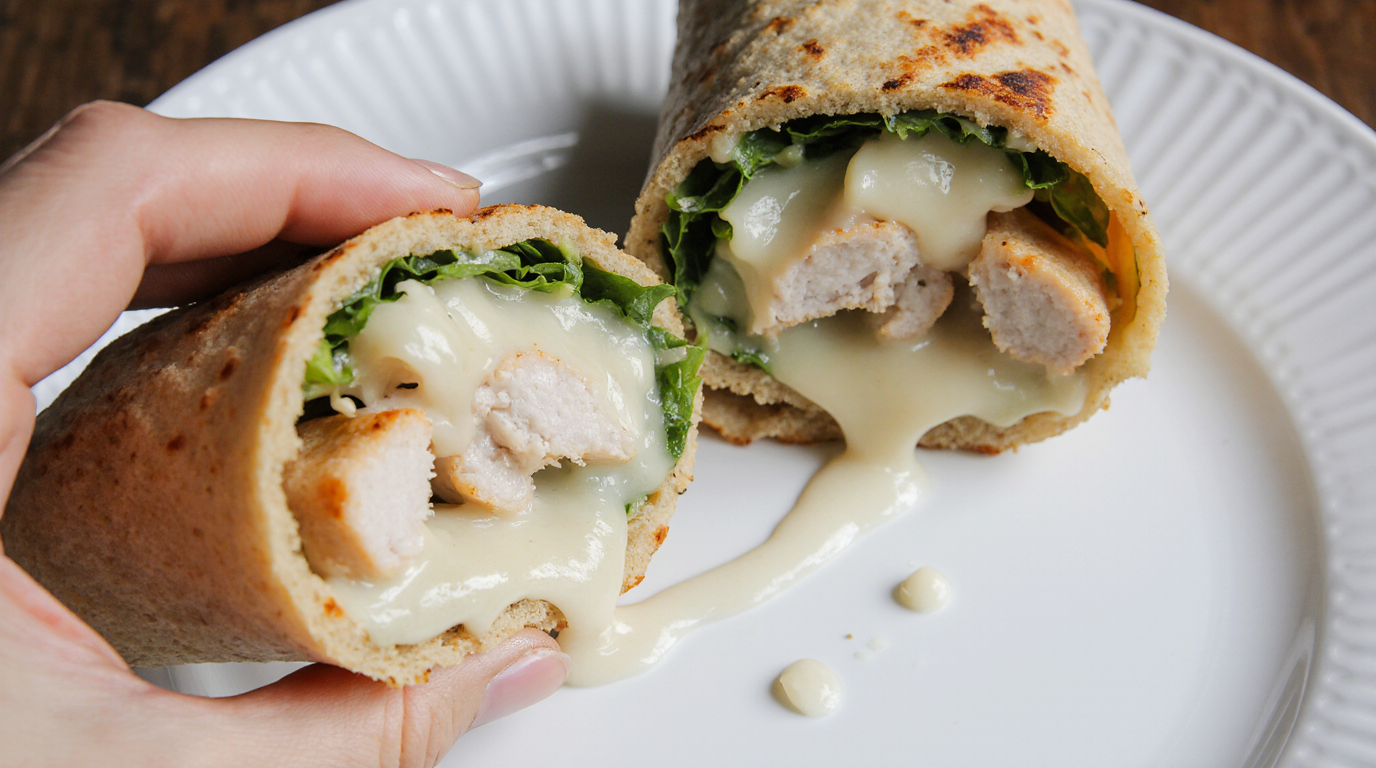
Cheesy garlic chicken wraps became my obsession after I ordered what I thought would be a simple lunch at this random food truck downtown. One bite and I was like, “Okay, I need to figure out how to make these at home.” But here’s the thing about cheesy garlic chicken wraps—they sound super easy until you try making them and everything falls apart in your hands like some kind of tortilla disaster.
I’m gonna be honest, my first attempt at cheesy garlic chicken wraps was basically just sad chicken pieces scattered across my kitchen counter with cheese stuck to everything except the actual wrap. My husband walked in, took one look, and said, “Should I order pizza?” That’s when you know you’ve truly failed at life.
But I’m stubborn as hell. Ask anyone who knows me. I spent three weeks perfecting these cheesy garlic chicken wraps, much to my family’s dismay. My kids kept asking why dinner smelled like “garlic everything” and honestly, fair question. Now they’re obsessed with them too, so I guess it worked out.
How I Finally Cracked the Code
So this whole cheesy garlic chicken wraps journey started because I was trying to meal prep for the week. You know how it is—Sunday rolls around and you’re like, “This time I’ll be organized!” Then by Wednesday you’re eating cereal for dinner again.
The problem with most recipes I found online was they made these cheesy garlic chicken wraps sound way too complicated. Like, who has time to marinate chicken for four hours on a weeknight? Not me. I need something that works when I’m standing in my kitchen at 6 PM wondering what to feed my family.
After about ten failed attempts (yes, ten—I counted), I figured out the secret to perfect cheesy garlic chicken wraps isn’t fancy ingredients or complicated techniques. It’s all about the order of operations and not being afraid of garlic. Like, seriously not afraid.
Table of Contents
The Ingredients That Actually Work
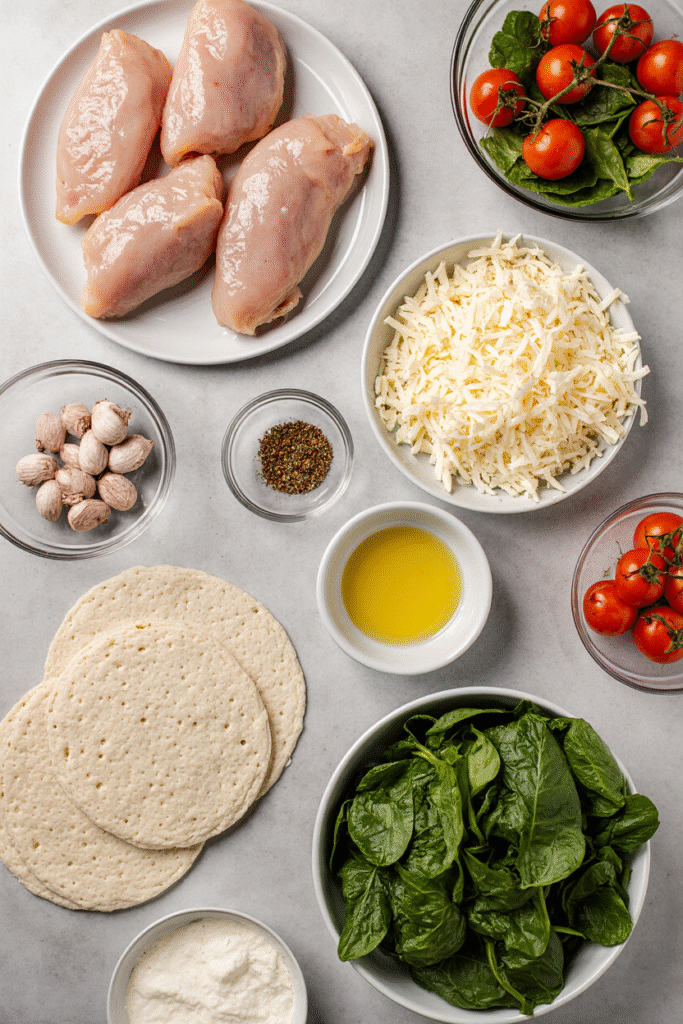
Here’s what you need for cheesy garlic chicken wraps that won’t make you want to throw things:
The Chicken Situation:
- 1.5 lbs boneless, skinless chicken thighs (NOT breasts—trust me on this)
- Cut into bite-sized pieces (don’t make them too small or they’ll dry out)
The Garlic Magic:
- 6 cloves garlic, minced (or 8 if you’re like me and have no self-control)
- 3 tablespoons butter
- 1 tablespoon olive oil
- 1 teaspoon garlic powder (yes, in addition to fresh garlic—we’re going for it)
The Cheese Component:
- 2 cups shredded mozzarella cheese (get the good stuff, not the pre-shredded sawdust)
- 1/2 cup cream cheese, softened
- 1/4 cup grated Parmesan
The Wrap Assembly:
- 6 large flour tortillas (burrito-size, not the sad little taco ones)
- 2 cups fresh spinach or lettuce
- 1 large tomato, diced
- 1/2 red onion, thinly sliced (optional, but I love the crunch)
The Seasoning Mix:
- 1 teaspoon Italian seasoning
- 1/2 teaspoon paprika
- Salt and pepper to taste
- 1/4 teaspoon red pepper flakes (optional, but it adds a nice kick)
Shopping tip: Don’t buy pre-cooked chicken for these cheesy garlic chicken wraps. Just don’t. It’s expensive and tastes like cardboard. Also, chicken thighs are your friend—they stay juicy and actually have flavor, unlike chicken breasts which turn into rubber if you look at them wrong.
How to Make These Cheesy Garlic Chicken Wraps (Without Losing Your Mind)
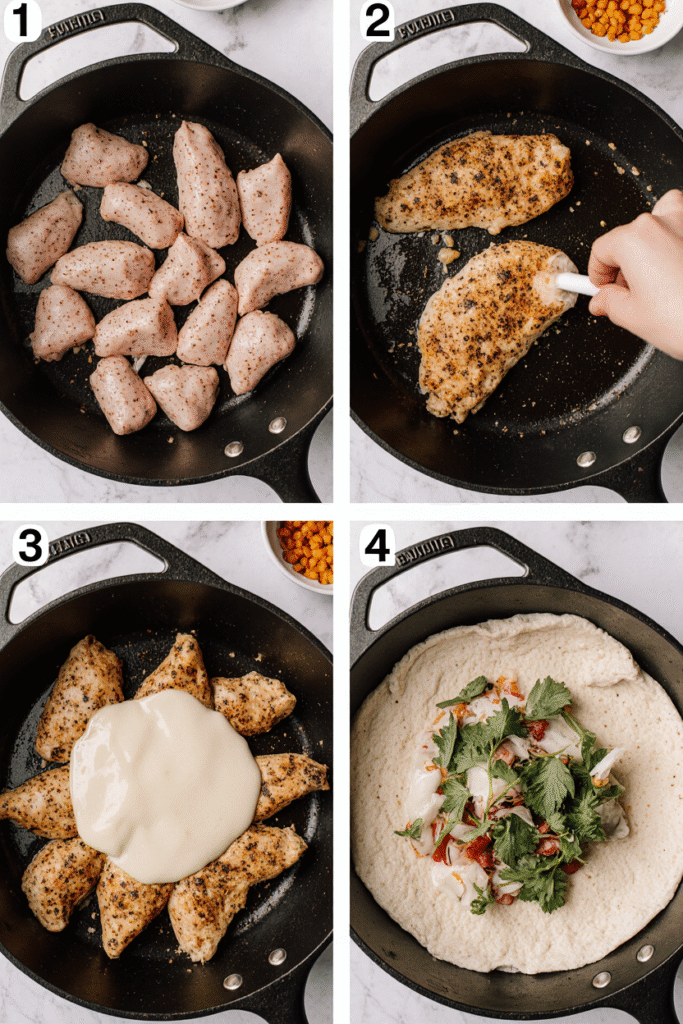
Step 1: Prep Your Chicken Cut your chicken thighs into bite-sized pieces. Don’t go crazy small—about 1-inch chunks work perfectly for cheesy garlic chicken wraps. Season them with salt, pepper, Italian seasoning, and paprika. Let them sit while you prep everything else.
Step 2: The Garlic Butter Situation This is where the magic happens. Heat your butter and olive oil in a large skillet over medium heat. Add that minced garlic and cook for like 30 seconds until it smells amazing. Don’t let it burn—burnt garlic tastes bitter and will ruin your cheesy garlic chicken wraps.
Step 3: Cook the Chicken Right Add your seasoned chicken to the skillet with the garlic butter. This is crucial—don’t overcrowd the pan. If you dump everything in at once, it’ll steam instead of brown and your cheesy garlic chicken wraps will be sad and flavorless.
Cook the chicken for about 6-8 minutes, stirring occasionally, until it’s golden brown and cooked through. The internal temp should hit 165°F if you’re being fancy with a thermometer. Sprinkle in that garlic powder during the last minute of cooking.
Step 4: The Cheese Magic Here’s where most people mess up their cheesy garlic chicken wraps. Turn the heat to low and add your softened cream cheese to the pan. Stir it around until it melts and coats the chicken. Then add about half your mozzarella and all the Parmesan.
The mixture will look weird at first—kinda lumpy and separated. Keep stirring on low heat. This is the base for your cheesy garlic chicken wraps, and it needs to be creamy, not clumpy.
Step 5: Assembly Time (The Make-or-Break Moment) Warm your tortillas. I just microwave them for 20 seconds wrapped in a damp paper towel. Lay out your tortilla and spread some of that cheesy chicken mixture down the center—not too much or your cheesy garlic chicken wraps will explode when you try to roll them.
Add your spinach, tomatoes, onion, and a sprinkle of the remaining mozzarella. Now here’s the trick: fold in the sides first, then roll from the bottom up, keeping it tight but not so tight that everything squirts out the ends.
Step 6: The Final Touch I like to toast my assembled cheesy garlic chicken wraps in a dry skillet for 2-3 minutes per side. This helps them stay together and gives you those nice crispy marks that make everything look professional.
My Hard-Won Tips for Perfect Cheesy Garlic Chicken Wraps
About the Tortillas: Size matters here. Those little street taco tortillas won’t work for cheesy garlic chicken wraps. You need the big burrito-size ones, and make sure they’re fresh. Stale tortillas crack when you try to roll them.
The Cheese Strategy: Don’t skip the cream cheese step. It acts like glue to hold your cheesy garlic chicken wraps together. I learned this the hard way after making five wraps that immediately fell apart.
Temperature Control: Keep that heat on medium-low once you add the cheese. High heat will make it seize up and get grainy. Nobody wants grainy cheese in their cheesy garlic chicken wraps.
Make-Ahead Magic: You can prep the chicken mixture a day ahead and just reheat it when you’re ready to assemble your cheesy garlic chicken wraps. Actually tastes better after the flavors have time to get acquainted.
When Things Go Horribly Wrong (Because They Will)
Wraps Keep Breaking? Your tortillas are probably too cold or too old. Warm them up and use fresher ones next time.
Chicken Is Dry? You either used chicken breasts (rookie mistake) or cooked it too long. Chicken thighs are more forgiving for cheesy garlic chicken wraps.
Cheese Won’t Melt Properly? Heat’s too high. Turn it down and be patient. Good cheese takes time.
Everything Falls Out? You overstuffed them. Less is more when it comes to filling cheesy garlic chicken wraps. I know it’s tempting to cram everything in there, but restraint is key.
Tastes Bland? More garlic. Always more garlic. These are cheesy garlic chicken wraps—the garlic should be front and center.
Serving These Bad Boys
These cheesy garlic chicken wraps are pretty much a complete meal on their own, but sometimes you want sides. Here’s what actually works:
The Classics:
- Tortilla chips and salsa (because why not double down on the Mexican-ish theme?)
- Simple green salad with ranch (my kids’ requirement)
- Sweet potato fries (surprisingly good combo)
The Discoveries:
- Pickles on the side (the acidity cuts through all that cheese)
- Fresh fruit like grapes or apple slices
- Those little baby carrots with hummus
My teenager insists these cheesy garlic chicken wraps go perfectly with chocolate milk. I don’t understand it, but I’m not arguing with someone who actually eats what I cook.
The Real Deal About This Recipe
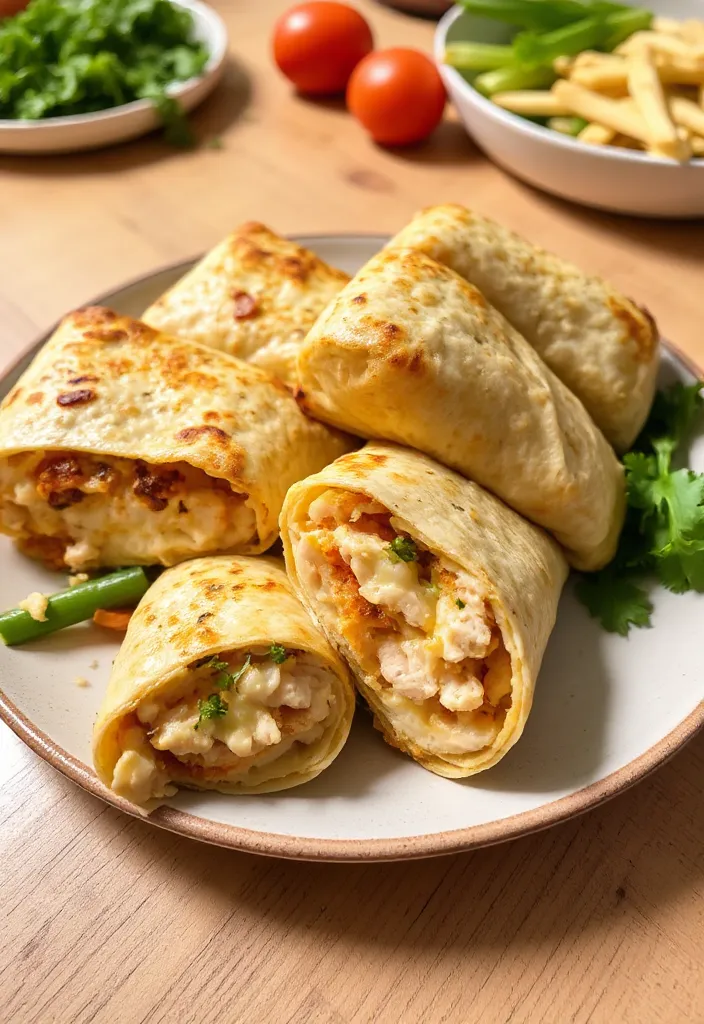
Look, I’m not gonna pretend these cheesy garlic chicken wraps are fancy or Instagram-worthy. They’re just really, really good comfort food that happens to be portable. The kind of good that makes you eat two when you planned on eating one. The kind of good that makes your kitchen smell amazing for hours afterward.
I’ve made these probably thirty times now, and they’ve become my go-to when I need something quick but still want to feel like I actually cooked. They’re also great for using up leftover chicken—just skip the cooking step and mix your leftovers with the cheese mixture.
The best part about these cheesy garlic chicken wraps? They freeze really well. I make a double batch and freeze half for those nights when I just can’t even. Just thaw and reheat in the microwave for 90 seconds.
One Last Thing: Don’t be afraid of the garlic. I know six cloves sounds like a lot, but it mellows out when you cook it with the butter. These are supposed to be cheesy garlic chicken wraps—if people can’t smell the garlic from across the room, you’re doing it wrong.
Now go make these and let me know if yours turn out better than mine! And if you figure out how to keep them from getting soggy in the fridge overnight, please share your secrets because I’m still working on that part.
Happy wrapping! (And may your tortillas never tear at the worst possible moment) 🌯
Homemade Herbed Feta Dip
This creamy homemade herbed feta dip combines fresh herbs, quality feta cheese, and Greek yogurt for a restaurant-quality appetizer. Perfect for parties, easy to make, and incredibly flavorful with fresh dill, chives, and oregano.
Ingredients
- 8 oz block feta cheese, crumbled
- 4 oz cream cheese, softened
- 1/2 cup Greek yogurt (full-fat)
- 2 tablespoons olive oil
- 1/4 cup fresh dill, chopped
- 2 tablespoons fresh chives, chopped
- 1 tablespoon fresh oregano (or 1 teaspoon dried)
- 2 cloves garlic, minced
- Juice of 1/2 lemon
- 1/4 teaspoon black pepper
- Pinch of salt (to taste)
Instructions
-
Step 1Drain feta block and crumble into chunks with your hands into a medium bowl.
-
Step 2Ensure cream cheese is softened to room temperature.
-
Step 3Mash crumbled feta with a fork until mostly broken down but still chunky.
-
Step 4Add softened cream cheese and Greek yogurt to the bowl with feta.
-
Step 5Mix with wooden spoon or clean hands until mostly combined.
-
Step 6Drizzle in olive oil while mixing to incorporate.
-
Step 7Add minced garlic, lemon juice, and all fresh herbs to the mixture.
-
Step 8Mix everything together until mostly smooth but retaining some texture.
-
Step 9Taste and adjust seasoning with salt, pepper, lemon, or herbs as needed.
-
Step 10Refrigerate for at least 1 hour before serving to allow flavors to meld.
-
Step 11Serve with pita chips, crackers, or fresh vegetables.