

Cheesy pizza pockets changed my entire relationship with lunch meal prep. I’m not even exaggerating. I used to buy those frozen pizza pockets from the store, you know the ones, and they were always either lava hot on the outside and frozen in the middle, or just… sad. Soggy and disappointing.
So I started making my own cheesy pizza pockets about a year ago, and honestly? I can’t go back. My freezer is literally full of these right now. I made a batch of 24 last Sunday while watching Netflix, and they’re already half gone. My roommate keeps “borrowing” them for her lunch, which I guess means they’re good?
The first time I attempted cheesy pizza pockets was a complete disaster though. Complete disaster. I overstuffed them like an idiot, didn’t seal the edges properly, and they exploded in the oven. Cheese everywhere. Sauce dripping onto the oven floor. Smoke alarm going off. My cat ran under the bed and stayed there for two hours. Not my finest moment in the kitchen.
How I Got Obsessed With Making These
Here’s the thing about cheesy pizza pockets—once you realize how easy they are to make, you’ll wonder why you ever bought the frozen ones. They taste better, they’re cheaper, and you can customize them however you want. Want extra cheese? Go crazy. Hate olives? Leave them out. It’s your pizza pocket.
I think the obsession started when my nephew came over and said the pizza pockets I made were “way better than the ones from the box.” This kid is eight and brutally honest, so when he asked for three more, I knew I’d done something right. Now he requests them every time he visits, and his mom (my sister) has me make batches for her to take home.
My boyfriend was skeptical at first. He’s one of those “why make it when you can buy it” people. But after trying my homemade cheesy pizza pockets, he actually admitted I was right. I made him say it twice so I could remember the moment. It was glorious.
Why These Cheesy Pizza Pockets Are Superior
Store-bought pizza pockets have that weird, rubbery dough that tastes like cardboard with a side of disappointment. These? You’re using actual pizza dough (or puff pastry if you’re feeling fancy), real cheese that actually melts, and sauce that doesn’t taste like it came from a can in 1987.
Plus, you can make them whatever size you want. I usually make mine pretty big because I’m not messing around with tiny snacks that don’t fill you up. But I’ve made mini cheesy pizza pockets for parties too, and people go INSANE for them. They disappear in like five minutes.
I tried using store-bought pizza dough the first few times, which is totally fine and I still do when I’m lazy. But I also started making my own dough sometimes, and wow, the difference is real. The homemade dough gets crispier on the outside while staying soft inside. If you’ve got the time, I highly recommend it for your cheesy pizza pockets.
And look, I’m gonna be honest with you—I’ve experimented with a LOT of fillings. Some worked great. Some were questionable. The pineapple and ham version started a legitimate argument at my dinner table. My friend Dave left early. It was dramatic. But hey, if you like Hawaiian pizza, go for it in your cheesy pizza pockets. I won’t judge. (Dave will, but ignore him.)
What You Need For Cheesy Pizza Pockets (Real Talk)
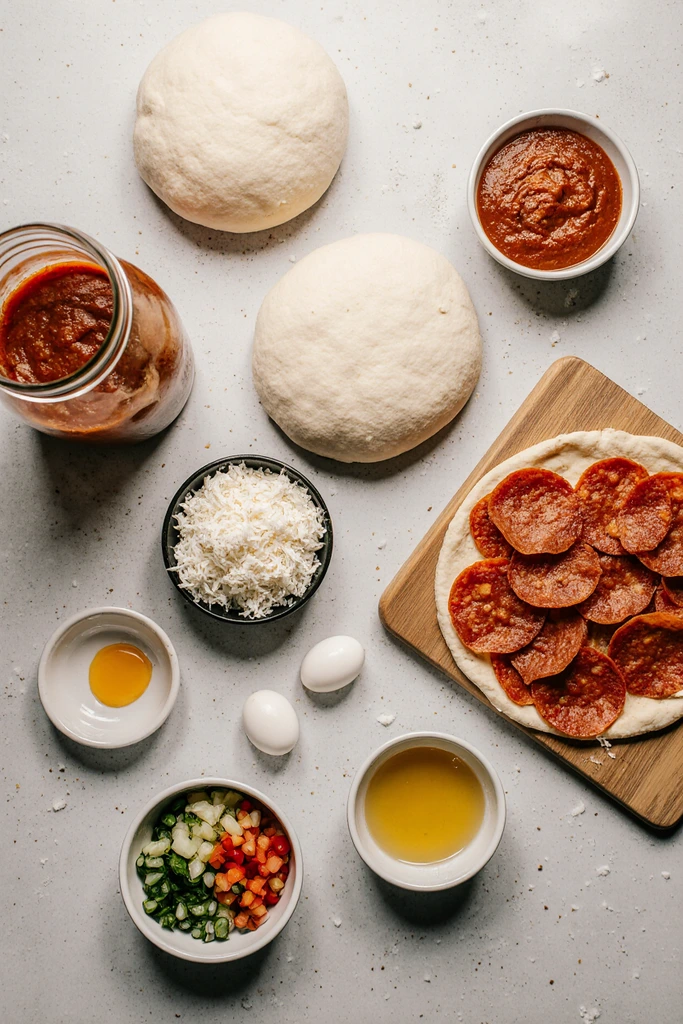
For the dough (or just buy it, I’m not your mom):
- 2 1/4 cups all-purpose flour
- 1 packet instant yeast (2 1/4 teaspoons)
- 1 teaspoon sugar
- 1 teaspoon salt
- 3/4 cup warm water
- 2 tablespoons olive oil
Or just grab store-bought pizza dough. Honestly, the Trader Joe’s one is great if you have one nearby.
For the filling (the important stuff):
- 1 1/2 cups mozzarella cheese, shredded (use the good stuff, not pre-shredded if you can help it)
- 1 cup pizza sauce (I use Rao’s because I’m bougie like that)
- 1/2 cup pepperoni slices, chopped
- 1/2 cup cooked Italian sausage (optional but recommended)
- 1/4 cup bell peppers, diced small
- 1/4 cup onions, diced small
- Italian seasoning (be generous)
- Garlic powder
- 1 egg (for egg wash)
- Parmesan cheese for sprinkling
Quick note about the cheese for cheesy pizza pockets—don’t buy the pre-shredded stuff if you can avoid it. It has that anti-caking powder that makes everything weird and doesn’t melt right. Take three extra minutes and shred it yourself. Your pizza pockets will thank you.
I learned the hard way that using too much sauce makes soggy cheesy pizza pockets. My second batch was basically sauce bombs wrapped in dough. Not cute. Stick to about a tablespoon of sauce per pocket. Maybe a tablespoon and a half if you’re feeling saucy. (See what I did there?)
Making These Things Step By Step
1. Make the dough (or skip to step 4 if you bought it). Mix flour, yeast, sugar, and salt in a big bowl. Add warm water and olive oil. Stir until it comes together into a shaggy mess. Dump it on your counter and knead for like 5-7 minutes until it’s smooth and elastic. Your arms will hurt. This is normal and means you’re doing it right.
2. Let it rise. Put the dough in a greased bowl, cover with a kitchen towel, and let it sit somewhere warm for about an hour. It should double in size. I usually stick mine near the oven or in a sunny spot. Once I forgot about it for two hours and it basically took over the entire bowl. Still worked fine for cheesy pizza pockets though.
3. While the dough rises, prep your fillings. Cook your sausage if you’re using it. Chop up your pepperoni, peppers, and onions. Grate your cheese. Get everything ready in little bowls so you’re not scrambling later. I learned this from watching cooking shows where they have everything in tiny bowls. Feels very professional even though I’m just making cheesy pizza pockets in my apartment.
4. Roll out the dough. Once your dough has risen (or if you bought it, just take it out of the package), divide it into 8 equal pieces. Roll each piece into a rectangle, maybe 6×4 inches. Don’t stress about making them perfect. They’re going to be folded anyway. My cheesy pizza pockets are always slightly different sizes and shapes, and honestly, it adds character.
5. Fill them up (but not too much). Here’s where people mess up. You want to put filling on one half of the rectangle, leaving about half an inch of space around the edges. Start with a spoonful of sauce, spread it around a bit. Then add cheese (lots of cheese for proper cheesy pizza pockets), then your pepperoni, sausage, veggies, whatever you’re using. Sprinkle with Italian seasoning and garlic powder.
6. Seal those bad boys. Fold the empty half of dough over the filling. Press the edges together firmly with your fingers, then go over them with a fork to really seal them. This is SUPER important. I cannot stress this enough. If you don’t seal them properly, they will explode in the oven and you’ll be cleaning cheese off your oven racks for days. Press that fork down like you’re angry at the dough.
7. Egg wash time. Beat an egg with a splash of water. Brush it all over the tops of your cheesy pizza pockets. This makes them golden and shiny and gorgeous. Don’t skip this step unless you want pale, sad-looking pizza pockets.
8. Cut vents. Use a knife to cut 2-3 small slits in the top of each pocket. This lets steam escape so they don’t explode. Found this out the hard way, remember? The great cheese explosion of 2024? Yeah.
9. Bake them. Preheat your oven to 400°F (seriously, preheat it, don’t just turn it on and throw them in immediately). Line a baking sheet with parchment paper and arrange your cheesy pizza pockets on it with some space between them. Sprinkle the tops with parmesan cheese because why not. Bake for 18-22 minutes until they’re golden brown and gorgeous.
10. Let them cool. I know you want to bite into them immediately. I get it. But the filling is literally molten lava right now. Give them at least 5 minutes to cool down. I burned the roof of my mouth so badly on my first batch that I couldn’t taste anything for two days. Learn from my pain.
Tips I Wish Someone Had Told Me
You can totally freeze these cheesy pizza pockets before baking. Just assemble them, put them on a baking sheet, freeze until solid, then transfer to a freezer bag. When you want one, bake from frozen—just add 5-10 extra minutes to the cooking time. This is a game changer for meal prep.
If your dough is too sticky to work with, add a little flour to your work surface. If it’s too dry and cracking, wet your hands slightly and knead it a bit more. Dough is forgiving. You can’t really mess it up that badly.
Don’t use fresh mozzarella for cheesy pizza pockets. It’s too wet and makes everything soggy. Use low-moisture mozzarella. The stuff that comes in blocks is perfect.
Speaking of moisture—if you’re using vegetables that are watery (like mushrooms or tomatoes), cook them first to get rid of excess moisture. Otherwise your cheesy pizza pockets will be soggy inside, and nobody wants that.
You can make these with puff pastry instead of pizza dough if you want something flakier. Just use thawed puff pastry sheets, cut them into squares, fill and fold. They’re a different vibe but still delicious for cheesy pizza pockets.
Flavor Combos That Actually Work
Classic pepperoni: Just pepperoni, mozzarella, and sauce. Can’t go wrong. This is what I make for my nephew because he’s suspicious of vegetables.
Meat lovers: Pepperoni, sausage, bacon, ham. Basically a heart attack wrapped in dough, but so good. My boyfriend requests these specifically.
Veggie supreme: Peppers, onions, mushrooms, black olives, spinach. Actually really good, even though I was skeptical about making vegetarian cheesy pizza pockets at first.
BBQ chicken: BBQ sauce instead of pizza sauce, cooked chicken, red onions, cilantro, cheddar cheese. This one surprised me with how good it was.
Buffalo chicken: Buffalo sauce, chicken, ranch dressing drizzle, mozzarella. Spicy and amazing.
The “kitchen sink”: Whatever’s in your fridge that needs to be used up. I’ve made some weird combinations this way, but most of them worked out surprisingly well for cheesy pizza pockets.
Why I Make These Constantly
I meal prep these cheesy pizza pockets every other Sunday now. It’s become my routine. I put on a podcast, make a huge batch, freeze most of them, and then I have easy lunches for weeks. My coworkers are jealous when I heat one up in the break room because it actually smells good, unlike their sad desk salads.
They’re also great for road trips. I packed a cooler full of cheesy pizza pockets for a camping trip last summer, and they were perfect for quick meals. Just heated them up over the camp stove. Way better than hot dogs for the third night in a row.
My sister brings them to her kids’ soccer games now. The other parents have started asking where she buys them, and she gets to be all smug about making them herself. Living vicariously through her success with my cheesy pizza pockets recipe.
Real Talk Before You Start
Look, these aren’t difficult to make, but they do take some time. If you’re making the dough from scratch, factor in that rising time. If you’re in a hurry, buy the dough. Nobody’s judging you. I do it all the time.
Your first batch might not be perfect. Mine exploded, remember? But even my disaster batch tasted good underneath all that leaked cheese. You’ll get better with practice, and honestly, even “ugly” cheesy pizza pockets taste amazing.
Don’t be afraid to experiment with fillings. The worst that happens is you make a flavor combo you don’t love and then you just… don’t make it again. But you might discover something amazing. I never thought I’d like a taco-seasoned beef version of cheesy pizza pockets, but here we are.
Let me know how yours turn out! Seriously, try these and tell me what fillings you come up with. Anyone else have genius flavor combinations I haven’t thought of? Drop a comment because I’m always looking for new ideas for my cheesy pizza pockets.
Happy cooking! (And remember—seal those edges or face the consequences.) 🍕
Check more dinner ideas : TOP 14 Crockpot dinner ideas for every season
Table of Contents
Cheesy Pizza Pockets
Homemade cheesy pizza pockets with crispy golden dough, melted mozzarella, and customizable fillings. Way better than frozen pizza pockets and perfect for meal prep, lunches, or snacks.
Ingredients
- 2 1/4 cups all-purpose flour
- 1 packet (2 1/4 teaspoons) instant yeast
- 1 teaspoon sugar
- 1 teaspoon salt
- 3/4 cup warm water
- 2 tablespoons olive oil
- 1 1/2 cups mozzarella cheese, shredded
- 1 cup pizza sauce
- 1/2 cup pepperoni slices, chopped
- 1/2 cup cooked Italian sausage (optional)
- 1/4 cup bell peppers, diced
- 1/4 cup onions, diced
- 1 teaspoon Italian seasoning
- 1/2 teaspoon garlic powder
- 1 egg (for egg wash)
- 2 tablespoons grated Parmesan cheese
Instructions
-
Step 1In a large bowl, mix flour, yeast, sugar, and salt. Add warm water and olive oil, stirring until combined into a shaggy dough.
-
Step 2Knead dough on a floured surface for 5-7 minutes until smooth and elastic.
-
Step 3Place dough in a greased bowl, cover with a kitchen towel, and let rise in a warm place for 1 hour until doubled in size.
-
Step 4While dough rises, prepare fillings: cook sausage if using, chop pepperoni, dice vegetables, and shred cheese.
-
Step 5Preheat oven to 400°F (200°C). Line a baking sheet with parchment paper.
-
Step 6Divide risen dough into 8 equal pieces. Roll each piece into a 6x4 inch rectangle.
-
Step 7On one half of each rectangle, spread 1 tablespoon pizza sauce, leaving 1/2 inch border. Top with mozzarella, pepperoni, sausage, vegetables, Italian seasoning, and garlic powder.
-
Step 8Fold empty half of dough over filling. Press edges firmly with fingers, then seal with fork tines.
-
Step 9Beat egg with 1 tablespoon water. Brush egg wash over tops of all pizza pockets.
-
Step 10Cut 2-3 small slits in top of each pocket for steam vents. Sprinkle with Parmesan cheese.
-
Step 11Arrange pizza pockets on prepared baking sheet with space between them. Bake for 18-22 minutes until golden brown.
-
Step 12Let cool for 5 minutes before serving. Pizza pockets can be frozen before baking and cooked from frozen with 5-10 extra minutes baking time.