
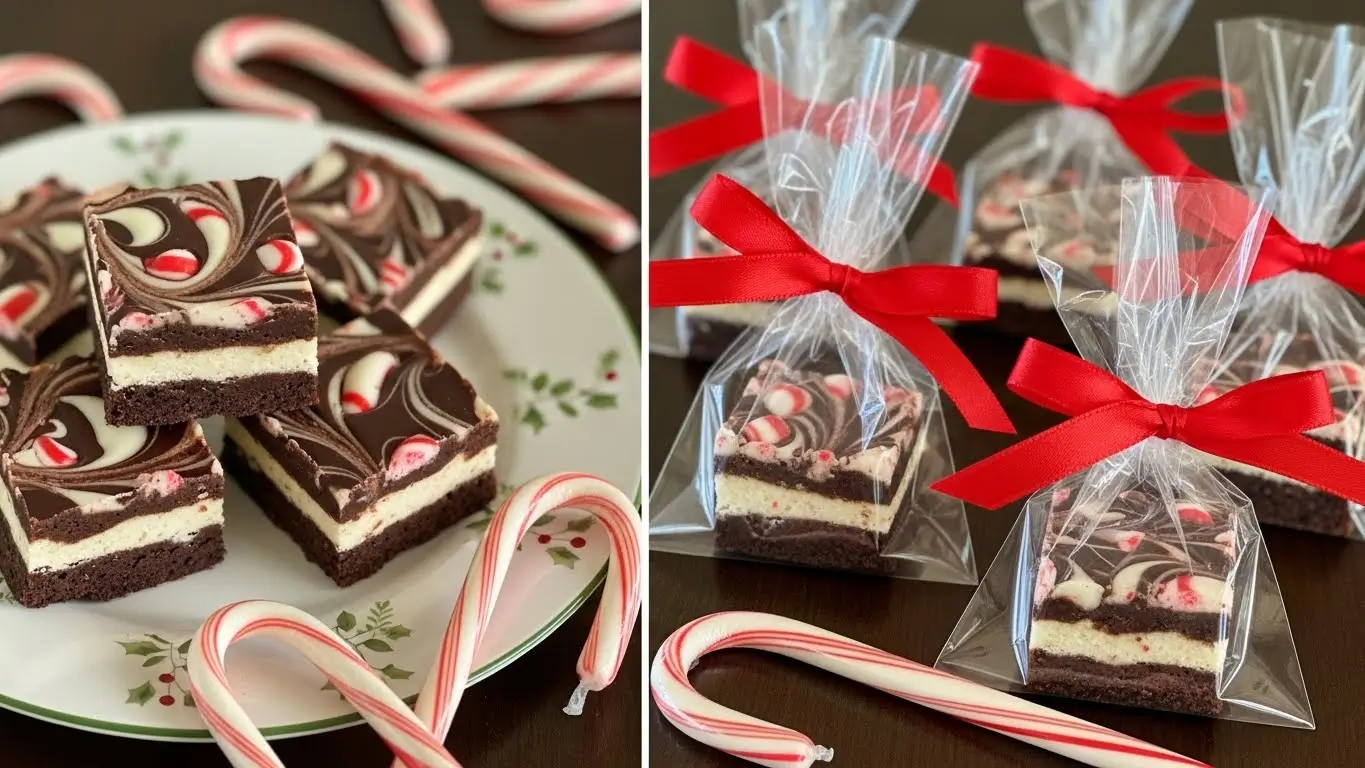
Christmas Peppermint Swirl Fudge saved my holiday baking crisis last year when I needed to make 12 dozen cookies for three different events and completely ran out of time. I threw together this ridiculously easy fudge instead, and honestly? People liked it way more than the cookies I’d stressed about. This Christmas peppermint swirl fudge became my new secret weapon for holiday gift-giving.
Look, I used to be intimidated by fudge. It seemed like something only grandmas with candy thermometers could pull off. But this peppermint swirl fudge recipe uses sweetened condensed milk, which basically makes it foolproof. No thermometer, no weird crystallization issues, just smooth, creamy fudge with those gorgeous red swirls that scream “I’m a holiday baking genius.”
The best part about this peppermint swirl fudge? It looks absolutely stunning with minimal effort. Those peppermint swirls make it look like you went to pastry school, but literally anyone can do it. My 10-year-old helped make a batch and it turned out perfect. That’s how easy this peppermint swirl fudge really is.
Also check : no-bake gingerbread cheesecake cups recipe
Why This Christmas Peppermint Swirl Fudge Actually Works
Here’s the thing about traditional fudge recipes – they’re finicky as hell. One degree too hot and you’ve got grainy disaster. This peppermint swirl fudge uses sweetened condensed milk which contains stabilizers that prevent crystallization. It’s basically cheat-mode fudge that still tastes amazing.
The peppermint flavor in this fudge isn’t overwhelming like some holiday treats. It’s that perfect balance where you definitely taste peppermint but it’s not like eating toothpaste. The white chocolate base lets the peppermint shine through without fighting for attention in this peppermint swirl fudge.
Another reason this peppermint swirl fudge works so well is the visual impact. Those red swirls make it obviously festive without needing any decorating skills. You’re not frosting or piping or doing anything complicated – just swirling with a knife. Yet it looks professional enough to gift.
Ingredients for Christmas Peppermint Swirl Fudge

White Chocolate Chips: 3 cups (about 18 oz) of good quality white chocolate chips form the base of this Christmas peppermint swirl fudge. Don’t use the super cheap stuff – it won’t melt as smoothly. I usually go with Ghirardelli or Nestle.
Sweetened Condensed Milk: One 14 oz can is what makes this Christmas peppermint swirl fudge so foolproof. This magical ingredient keeps everything smooth and creamy without needing a candy thermometer or perfect timing. Don’t confuse it with evaporated milk – they’re totally different.
Peppermint Extract: 1 teaspoon of pure peppermint extract gives this fudge that perfect minty flavor. Don’t use mint extract – peppermint is what you want for authentic candy cane flavor in your Christmas peppermint swirl fudge. A little goes a long way with extract.
Red Food Coloring: Gel food coloring works better than liquid for vibrant red swirls in your peppermint swirl fudge. You only need a few drops, but gel gives you that deep red color without thinning the mixture. I use Wilton or Americolor brands.
Butter: 2 tablespoons of butter adds richness and helps with smooth melting. Use real butter, not margarine, for the best tasting peppermint swirl fudge. Unsalted is better so you can control any salt addition.
Vanilla Extract: 1/2 teaspoon enhances all the other flavors even though this Christmas peppermint swirl fudge is peppermint-focused. It rounds everything out and adds depth. Pure vanilla extract is worth the extra cost here.
Salt: Just a pinch (about 1/8 teaspoon) balances the sweetness in this fudge. White chocolate is super sweet, and salt keeps your peppermint swirl fudge from being cloying.
Optional Toppings: Crushed candy canes sprinkled on top before the fudge sets make it extra festive. You can also add mini chocolate chips for a cookies-and-cream vibe in your Christmas peppermint swirl fudge.
Step-by-Step Instructions for Peppermint Swirl Fudge
- Line an 8×8 inch baking pan with parchment paper, leaving overhang on two sides. This is crucial for easy removal of your Christmas peppermint swirl fudge later. Spray the parchment lightly with cooking spray to prevent any sticking.
- Combine white chocolate chips, sweetened condensed milk, and butter in a large microwave-safe bowl. Make sure the bowl is big enough that the mixture won’t boil over – I learned this the hard way with a smaller bowl.
- Microwave on 50% power for 1 minute, then stir. Continue microwaving in 30-second intervals at 50% power, stirring after each interval, until completely smooth. This should take 2-3 minutes total. Don’t rush with high power or you’ll burn the chocolate in your peppermint swirl fudge.
- Stir in peppermint extract, vanilla extract, and salt until everything is well combined. The mixture should be smooth and glossy at this point. This is your base for the peppermint swirl fudge.
- Remove about 1/3 cup of the white mixture and place it in a small bowl. This portion will become the red swirl for your peppermint swirl fudge.
- Add red food coloring to the small bowl with the reserved mixture. Start with 3-4 drops of gel food coloring and stir well. Add more drops until you get a vibrant red color that you like. The color will be slightly lighter when set.
- Pour the white fudge mixture into your prepared pan. Use a spatula to spread it evenly to all corners. Work quickly because this peppermint swirl fudge mixture starts to set up as it cools.
- Drop spoonfuls of the red mixture randomly across the top of the white fudge. Don’t overthink the placement – random drops create the most natural-looking swirls in your Christmas peppermint swirl fudge.
- Use a butter knife or toothpick to swirl the red through the white. Drag the knife through the red drops in long, sweeping motions. Don’t over-swirl or the colors will muddy together. Just a few strokes creates beautiful marbling in your Christmas peppermint swirl fudge.
- If using crushed candy canes, sprinkle them on top immediately while the fudge is still soft. Press them gently into the surface so they stick. This adds texture and extra peppermint flavor to your Christmas peppermint swirl fudge.
- Refrigerate for at least 2 hours until the fudge is completely firm. Don’t try to cut it early or you’ll have a melty mess instead of clean squares of Christmas peppermint swirl fudge.
- Use the parchment overhang to lift the fudge out of the pan onto a cutting board. Peel away the parchment paper carefully.
- Cut into small squares using a sharp knife. Wipe the knife clean between cuts for the prettiest pieces. This Christmas peppermint swirl fudge is rich, so small squares are perfect. I usually cut into 1-inch pieces which makes about 64 pieces.
- Store in an airtight container with parchment or wax paper between layers to prevent sticking. Your Christmas peppermint swirl fudge is now ready to gift, serve, or devour.
Tips for Perfect Christmas Peppermint Swirl Fudge
Use good quality white chocolate chips. The cheap stuff doesn’t melt smoothly and can seize up on you. Spend the extra dollar or two for better results with your Christmas peppermint swirl fudge. Trust me, it makes a difference.
Don’t skip the parchment paper. I tried making this Christmas peppermint swirl fudge directly in a greased pan once and it was a nightmare to remove. Parchment with overhang makes it so easy to lift out and cut cleanly.
Microwave at 50% power, not full power. High heat can scorch the chocolate and make your Christmas peppermint swirl fudge grainy or separated. Low and slow is the way to go here. Be patient.
Don’t over-swirl. This is the mistake everyone makes with their first batch of Christmas peppermint swirl fudge. Two or three swirls through each red drop is plenty. More than that and you get pink fudge instead of pretty swirls.
Let it set completely before cutting. Rushing this step ruins the presentation of your Christmas peppermint swirl fudge. I know waiting sucks, but 2 hours minimum in the fridge is necessary for clean cuts.
Use a hot knife for cleaner cuts. Run your knife under hot water, dry it, then cut. The heat helps slice through the firm fudge more easily and creates prettier pieces of Christmas peppermint swirl fudge.
Storage Tips for Christmas Peppermint Swirl Fudge
This Christmas peppermint swirl fudge keeps at room temperature in an airtight container for up to 2 weeks. Layer pieces between parchment or wax paper to prevent them from sticking together. It’s perfect for making ahead for holiday parties or gifts.
You can refrigerate Christmas peppermint swirl fudge for up to a month if you want to make it way in advance. Just let it come to room temperature for about 15 minutes before serving so it’s not rock-hard.
For longer storage, this fudge freezes beautifully for up to 3 months. Wrap individual pieces or layers in plastic wrap, then store in freezer bags. Thaw in the refrigerator overnight before serving your Christmas peppermint swirl fudge.
Common Mistakes with Christmas Peppermint Swirl Fudge
The biggest mistake is using liquid food coloring instead of gel. Liquid adds too much moisture and can make your Christmas peppermint swirl fudge grainy or prevent it from setting properly. Gel food coloring is worth buying for this recipe.
Overheating the chocolate is another common issue. If you microwave too long or at too high power, the white chocolate can seize up or separate. Then your Christmas peppermint swirl fudge will be grainy instead of smooth and creamy.
Not lining the pan properly makes removal a nightmare. I’ve seen people try to cut fudge while it’s still in the pan and just make a crumbly mess. The parchment paper overhang is essential for nice, clean pieces of Christmas peppermint swirl fudge.
Adding too much peppermint extract is easy to do. More doesn’t equal better – it just makes your Christmas peppermint swirl fudge taste like toothpaste. Stick to the 1 teaspoon measurement for perfect flavor.
Why This Beats Store-Bought Fudge
Store-bought Christmas fudge costs like $15-20 per pound and honestly doesn’t taste that great. This homemade Christmas peppermint swirl fudge costs maybe $8 total and makes way more than a pound. The math is compelling.
The flavor and texture of homemade is incomparable to store-bought. Commercial fudge often has a waxy texture and artificial flavor. This Christmas peppermint swirl fudge is creamy, smooth, and tastes like actual peppermint and white chocolate.
Plus, homemade Christmas peppermint swirl fudge makes way better gifts than anything you can buy. Package it in cellophane bags with ribbons or in decorative tins, and people will be genuinely impressed. They don’t need to know it took 10 minutes of actual work.
Perfect for Holiday Gift-Giving

What makes this Christmas peppermint swirl fudge so perfect for gifts is how impressive it looks. Those red swirls make it obviously homemade and festive. Package a few pieces in clear bags tied with ribbon, and you’ve got instant teacher gifts, neighbor gifts, or coworker treats.
I make multiple batches of this Christmas peppermint swirl fudge every December specifically for gifting. It’s cheaper than buying gift cards or store-bought treats, and people genuinely appreciate homemade food gifts. Plus it travels well without getting smashed.
The fudge also works great for cookie exchanges even though it’s not cookies. Most people bring the same old sugar cookies and gingerbread. Show up with this Christmas peppermint swirl fudge and you’ll stand out as the creative one.
Make-Ahead Holiday Baking
The best thing about this Christmas peppermint swirl fudge is how make-ahead friendly it is. You can make it weeks before Christmas and it keeps perfectly. This is clutch when you’re trying to get ahead on holiday baking.
I usually make 4-5 batches in early December and store them in the fridge. Then throughout the month, I just pull out what I need for various parties and gifts. Having this Christmas peppermint swirl fudge ready to go reduces so much holiday stress.
You can also prep the ingredients ahead – measure out chocolate chips, have the condensed milk ready – so when you do have 15 minutes, you can whip up a batch. The actual hands-on time for Christmas peppermint swirl fudge is minimal.
Customizing Your Christmas Peppermint Swirl Fudge
While the classic version is perfect, you can customize this fudge in lots of ways. Try using dark chocolate chips instead of white chocolate for a different base. The peppermint flavor works beautifully with dark chocolate too in this Christmas peppermint swirl fudge variation.
Add crushed Oreos to the white base before swirling for cookies-and-cream peppermint fudge. Or stir in mini chocolate chips for a mint chocolate chip vibe. The base recipe for Christmas peppermint swirl fudge is versatile enough to handle add-ins.
For adults, add a tablespoon of peppermint schnapps along with the extract for boozy fudge. It adds a little extra kick that makes this Christmas peppermint swirl fudge perfect for adult holiday parties.
This Christmas peppermint swirl fudge proves that impressive holiday treats don’t have to be complicated. Sometimes the easiest recipes are the ones that get the most compliments 🙂
Table of Contents
Christmas Peppermint Swirl Fudge
Easy foolproof Christmas Peppermint Swirl Fudge with white chocolate base and beautiful red swirls. No candy thermometer needed! Perfect for holiday gifts and parties.
Ingredients
- 3 cups (18 oz) white chocolate chips
- 1 can (14 oz) sweetened condensed milk
- 2 tablespoons unsalted butter
- 1 teaspoon peppermint extract
- 1/2 teaspoon vanilla extract
- 1/8 teaspoon salt
- Red gel food coloring (3-5 drops)
- Crushed candy canes for topping (optional)
Instructions
-
Step 1Line 8x8 inch baking pan with parchment paper, leaving overhang on two sides. Spray lightly with cooking spray.
-
Step 2Combine white chocolate chips, sweetened condensed milk, and butter in large microwave-safe bowl.
-
Step 3Microwave on 50% power for 1 minute, stir. Continue microwaving in 30-second intervals at 50% power, stirring after each, until completely smooth (2-3 minutes total).
-
Step 4Stir in peppermint extract, vanilla extract, and salt until well combined and glossy.
-
Step 5Remove about 1/3 cup of white mixture to small bowl. Add 3-4 drops red gel food coloring and stir until vibrant red.
-
Step 6Pour remaining white mixture into prepared pan and spread evenly to corners.
-
Step 7Drop spoonfuls of red mixture randomly across top of white fudge.
-
Step 8Use butter knife or toothpick to swirl red through white in long sweeping motions. Don't over-swirl.
-
Step 9If using crushed candy canes, sprinkle on top immediately and press gently into surface.
-
Step 10Refrigerate for at least 2 hours until completely firm.
-
Step 11Use parchment overhang to lift fudge out onto cutting board. Cut into 1-inch squares with sharp knife, wiping clean between cuts.
-
Step 12Store in airtight container with parchment between layers at room temperature up to 2 weeks.