
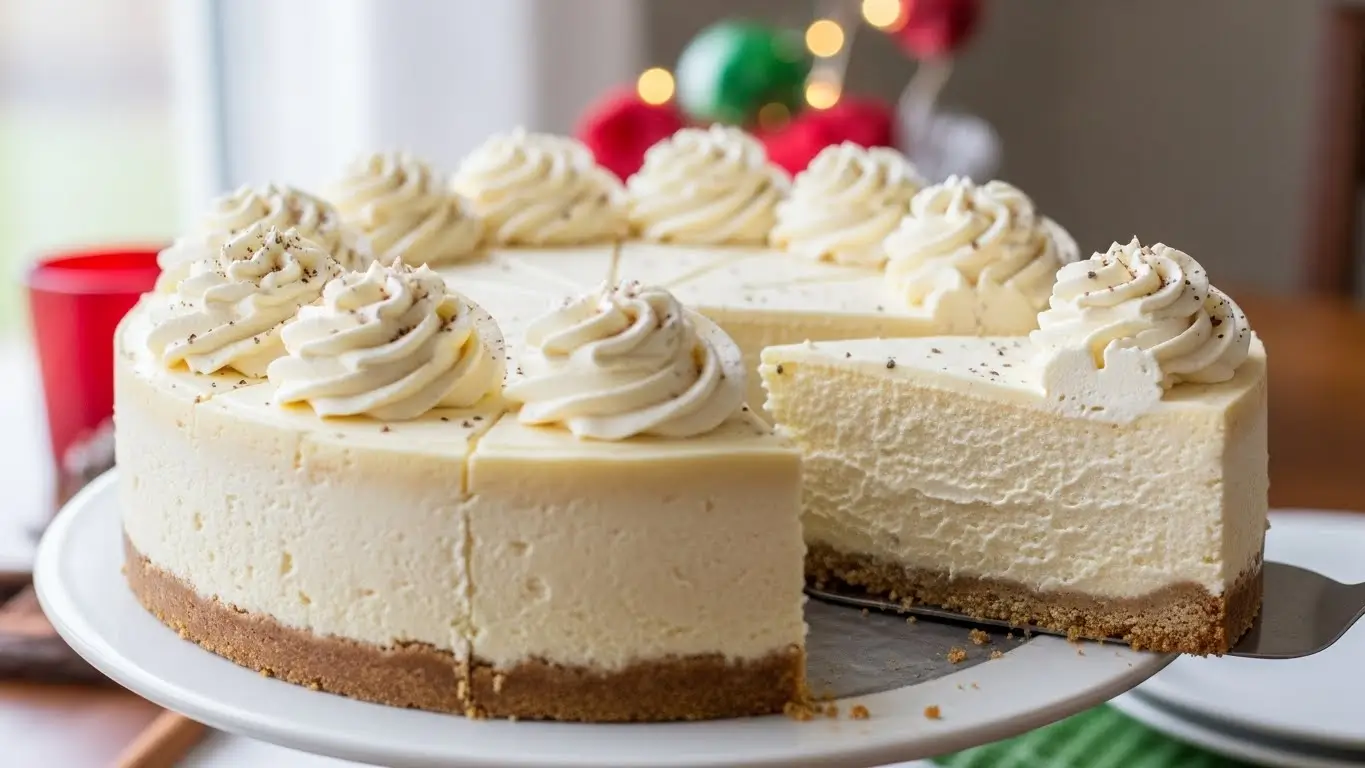
Easy eggnog cheesecake is basically the reason I look forward to December, and yeah, I know that sounds dramatic. But listen, I used to be that person buying those mediocre eggnog cheesecakes from the grocery store bakery section, thinking that was as good as it gets. Then my coworker brought homemade eggnog cheesecake to our holiday potluck three years ago, and I literally asked her for the recipe right there. No shame. It was THAT good.
Now I make this easy eggnog cheesecake every single year, sometimes twice if I’m being honest. Once for Thanksgiving (don’t judge) and definitely for Christmas. My brother-in-law has literally texted me in October asking if I’m making “the eggnog thing” this year. The answer is always yes, Michael.
Also check : No-Bake Christmas Cookie Lasagna Recipe
Why This Easy Eggnog Cheesecake Changed My Life
Okay, so full disclosure: I was terrified of making cheesecake for the longest time. Like, genuinely scared. Everyone told me about water baths and cracking and how it’s SO complicated. Lies. All lies. This easy eggnog cheesecake recipe is literally simpler than making cookies from scratch, and I will die on this hill.
The thing about eggnog cheesecake is that it’s essentially just regular cheesecake with eggnog instead of some of the cream. That’s it. That’s the magic. But somehow it tastes like Christmas exploded in your mouth in the best possible way. My 10-year-old described it as “eating a cloud that tastes like the holidays,” which honestly? Pretty accurate description.
I’ve messed this easy eggnog cheesecake up exactly twice. First time, I didn’t let my cream cheese soften enough and ended up with lumps. So lumpy. Had to pretend it was “rustic style” when serving it. Second time, I forgot to check if I had graham crackers and ended up using Nilla Wafers for the crust. Actually worked great, but my point is—even when you mess up this easy eggnog cheesecake, it’s still delicious.
What You Need for This Easy Eggnog Cheesecake
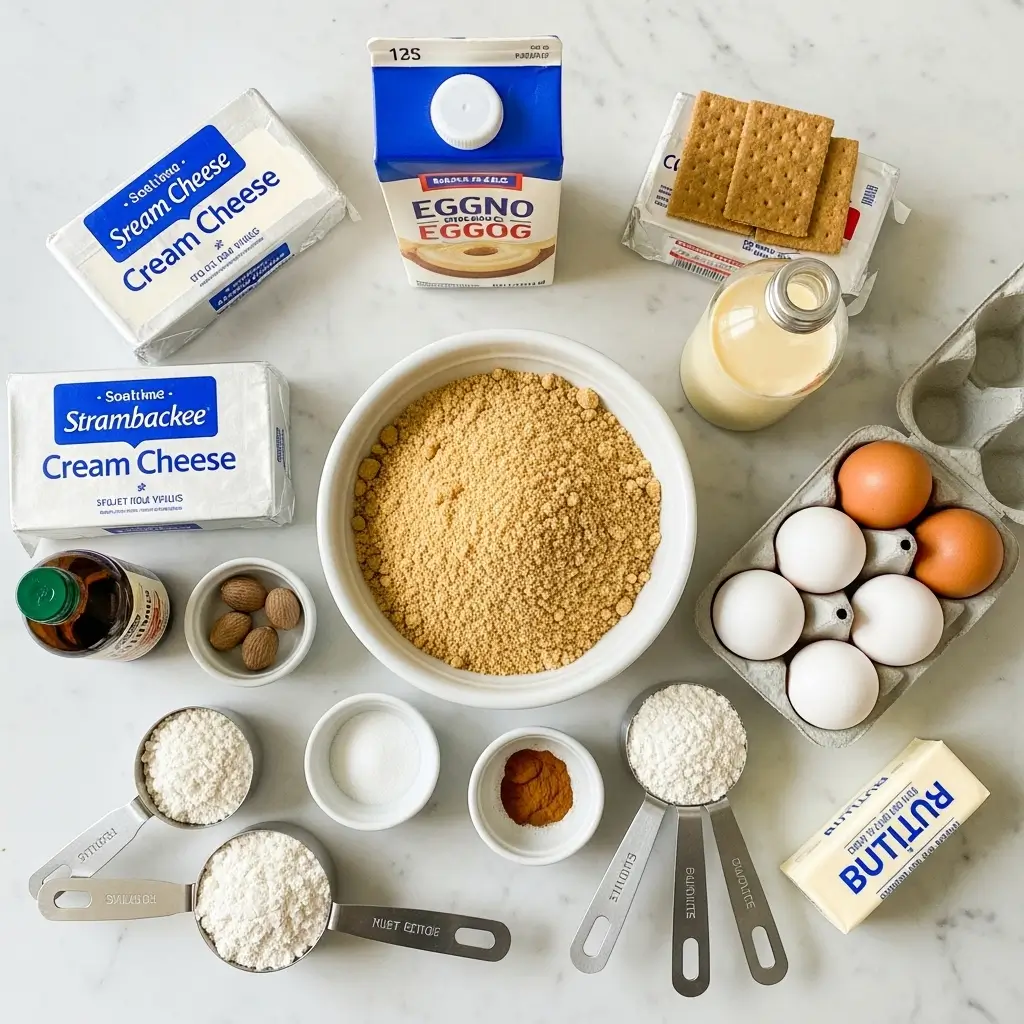
Shopping for this is pretty straightforward, though I always buy extra cream cheese because I’m paranoid. Also because last Christmas, I opened one package and my husband had already used half of it for bagels. Still annoyed about that, honestly.
For the Crust:
- 2 cups graham cracker crumbs (about 14-15 crackers, or just buy the box of crumbs like a normal person)
- 1/3 cup granulated sugar
- 1/2 cup melted butter (I use salted, don’t come at me)
- 1/2 teaspoon ground nutmeg (this is KEY for the eggnog cheesecake vibe)
- Pinch of cinnamon
For the Easy Eggnog Cheesecake Filling:
- 24 oz cream cheese (three 8-oz packages, and they MUST be softened—leave them out for at least an hour)
- 1 cup granulated sugar
- 3 large eggs (room temperature, though I always forget this step)
- 1 cup eggnog (I use Southern Comfort brand because I’m bougie like that)
- 1/4 cup all-purpose flour (this prevents cracking, thank me later)
- 2 teaspoons vanilla extract
- 1 teaspoon ground nutmeg
- 1/2 teaspoon ground cinnamon
- 1/4 teaspoon ground cloves (optional but makes it taste extra holiday-ish)
For Topping This Easy Eggnog Cheesecake:
- Whipped cream (make it fresh or use the canned stuff, I won’t tell)
- Extra nutmeg for sprinkling
- Caramel drizzle (totally optional but SO good)
- Cinnamon sticks for decoration if you’re feeling fancy
Don’t buy the cheap cream cheese. Trust me on this. I tried using the store brand once to save $2 and the texture was weird and grainy. Philadelphia or nothing for this easy eggnog cheesecake.
Also—and this is super important—make sure your eggnog is the regular kind, not the light version. Light eggnog has less fat and your cheesecake will be sad. We’re not making sad eggnog cheesecake here, people.
Making the Crust (The Easiest Part of This Easy Eggnog Cheesecake)
Honestly, if you can crush crackers and melt butter, you can do this part. My 8-year-old helped me make the crust last year and only made a moderate mess.
Step 1: Preheat your oven to 325°F. Lower temperature than you think, right? But this is what makes the easy eggnog cheesecake cook evenly without burning the edges.
Step 2: Grab a 9-inch springform pan. If you don’t have one, you can use a regular 9-inch pie pan, but getting the eggnog cheesecake out will be… challenging. Ask me how I know. Actually, don’t.
Step 3: Crush your graham crackers. You can do this fancy with a food processor, or just throw them in a plastic bag and beat them with a rolling pin. The bag method is weirdly therapeutic. I recommend it after stressful days.
Step 4: Mix your graham cracker crumbs with sugar, nutmeg, and cinnamon in a bowl. Pour in that melted butter and stir it around until everything looks like wet sand. That’s the scientific term. Wet sand.
Step 5: Press this mixture into the bottom of your pan. Use the bottom of a measuring cup to really pack it down. I learned this trick from YouTube and it changed my crust game forever. Get it nice and even, up the sides a tiny bit if you can.
Step 6: Bake the crust for 10 minutes. Just 10! Set a timer because I guarantee you’ll forget. Last week I left mine in for 15 minutes while I was on TikTok and it got too dark. Still worked, but learn from my mistakes.
Let the crust cool while you make the filling for your easy eggnog cheesecake. This is when I usually clean up the graham cracker crumbs that are somehow all over my entire kitchen. How do they spread so far? It’s one of life’s great mysteries.
The Easy Eggnog Cheesecake Filling (Where the Magic Happens)
This is where people always think it gets complicated. It doesn’t. It’s literally just mixing stuff together. However—and this is crucial—you have to do it in the right order and not overmix. Overmixing is the enemy of smooth eggnog cheesecake.
Step 1: Make sure your cream cheese is soft. Like, REALLY soft. If you can’t press your finger into it easily, it’s not ready. I usually take mine out of the fridge in the morning if I’m baking that night. You can also microwave it for like 10 seconds, but be careful—I once nuked mine too long and it basically turned into soup.
Step 2: Beat your cream cheese in a large bowl until it’s smooth and fluffy. I use my stand mixer for this (best wedding gift ever), but a hand mixer works fine. Beat it for like 2-3 minutes. This is important for a smooth eggnog cheesecake texture.
Step 3: Add your sugar and beat until combined. Scrape down the sides of the bowl because there’s always cream cheese hiding up there.
Step 4: Add eggs ONE AT A TIME. This is the most important part of making this easy eggnog cheesecake. Add one egg, mix until JUST combined, then add the next. If you dump all three in at once, bad things happen. I don’t know the science, but trust me.
Step 5: Pour in your eggnog, vanilla, and all those spices. Mix on LOW speed until just combined. You’ll see little flecks of nutmeg swirled through—that’s perfect. Don’t overmix or you’ll incorporate too much air and your eggnog cheesecake will puff up and crack.
Step 6: Add the flour last and mix for like 10 seconds. That’s it. Just enough to incorporate it.
The batter will be thinner than you expect for this easy eggnog cheesecake. That’s normal. It should pour easily but not be runny like milk. More like… thick cream? I’m bad at descriptions, but you’ll know it when you see it.
Baking Your Easy Eggnog Cheesecake (Don’t Open the Oven!)
Pour that beautiful eggnog-spiced filling into your cooled crust. Tap the pan gently on the counter a few times to release air bubbles. I do this more aggressively than necessary because it’s satisfying.
Here’s where everyone tells you to do a water bath. I’m gonna level with you—I haven’t used a water bath in two years and my easy eggnog cheesecakes turn out fine. The secret? Low temperature and the crack-prevention tips I’m about to share.
Step 1: Put your eggnog cheesecake in that 325°F oven. Set a timer for 55 minutes. Maybe 60 if your oven runs cool.
Step 2: DO NOT OPEN THE OVEN. Seriously. I know you want to check on it. Don’t. Temperature fluctuations cause cracking. Just trust the process.
Step 3: After 55-60 minutes, your easy eggnog cheesecake should be set around the edges but still jiggly in the center. Like, really jiggly. The center should wobble when you gently shake the pan. If the whole thing is solid, you’ve overbaked it. It’ll still taste good, just be a bit drier.
Step 4: Turn off the oven but LEAVE THE CHEESECAKE IN THERE. Crack the oven door open about an inch (I stick a wooden spoon in there) and let it sit for an hour. This gradual cooling is what prevents those annoying cracks in your eggnog cheesecake surface.
I usually use this hour to eat dinner and pretend I’m not obsessively thinking about the cheesecake in the oven. My family knows not to talk to me during this time. I’m focused.
The Hardest Part of Making Easy Eggnog Cheesecake: Waiting
After that hour in the cooling oven, take your easy eggnog cheesecake out and let it come to room temperature on the counter. This takes another hour. Then—and I’m sorry to tell you this—you have to refrigerate it for at least 4 hours. Preferably overnight.
I KNOW. It’s torture. The smell alone will drive you insane. Last year I tried to eat it after only 2 hours in the fridge because I have no self-control. It was still warm in the middle and kind of gloopy. Tasted amazing, looked like a disaster. Learn from my impatience.
The overnight rest is when your easy eggnog cheesecake firms up and all those flavors meld together. It’s like the cheesecake needs to sleep to become its best self. I relate to that on a spiritual level.
Cover your cooled eggnog cheesecake with plastic wrap. Don’t let the plastic touch the surface—it’ll stick and ruin your beautiful top. I learned this the hard way and had to cover my mistake with extra whipped cream. Which, honestly, not the worst problem to have.
Serving This Easy Eggnog Cheesecake (The Best Part)
Okay, so it’s finally time to eat this masterpiece. Run a knife under hot water, dry it off, and cut your first slice. Clean the knife between each cut for pretty slices. Or don’t, and just hack into it like I do when it’s just family.
Top each slice with a dollop of whipped cream and sprinkle some fresh nutmeg on top. If you’re feeling extra, drizzle some caramel sauce over it. I also sometimes stick a cinnamon stick in the whipped cream because it looks pretty in photos and my Instagram needs content.
This easy eggnog cheesecake serves about 12 people, assuming normal-sized slices. In reality, it serves 8-10 because people always want seconds. My dad has been known to eat three pieces in one sitting. No judgment, Dad, but also maybe some judgment.
You can make this easy eggnog cheesecake up to 3 days ahead. Just keep it covered in the fridge. I’ve never had leftovers last longer than two days, so I can’t tell you beyond that. The crust might soften a bit after day one, but it still tastes incredible.
Easy Eggnog Cheesecake Troubleshooting (Because I’ve Done It All Wrong)
If your cheesecake cracks: It happens. Cover it with whipped cream or crush up some gingersnap cookies and sprinkle them on top. Call it “rustic” and move on with your life. The eggnog cheesecake will taste just as good.
If the center is too jiggly after baking: Give it another 10 minutes in the oven. Check it again. The center of your easy eggnog cheesecake should wobble like Jell-O, not slosh around like liquid.
If it tastes too eggnoggy: Is that even a problem? But seriously, you can dial back the eggnog to 3/4 cup and add 1/4 cup heavy cream instead. Makes it a bit more subtle.
If the crust is soggy: Your crust wasn’t baked long enough, or your easy eggnog cheesecake filling had too much moisture. Next time, make sure that crust is golden and firm before adding the filling.
If it’s too dense: You overmixed the batter. Easy eggnog cheesecake should be creamy and smooth, not heavy. Mix just until ingredients are combined, no more.
Variations Because I Get Bored Easily

Sometimes I add a layer of caramel between the crust and filling. Just pour like 1/3 cup of caramel sauce on the baked crust before adding the filling. It’s INSANE. My sister-in-law requests this version specifically every year.
You can also do a gingersnap crust instead of graham crackers. Use 2 cups crushed gingersnaps and reduce the sugar in the crust to 2 tablespoons. The spicy-sweet combo with the eggnog cheesecake filling is incredible.
For a boozy version of this easy eggnog cheesecake, add 2 tablespoons of rum or bourbon to the filling. Don’t tell your kids. Or do, if they’re adults. I’m not your parent.
White chocolate eggnog cheesecake is also amazing. Melt 4 oz of white chocolate and mix it into your filling. Tastes like fancy coffee shop holiday drinks but in cheesecake form.
My Honest Take on This Easy Eggnog Cheesecake
Look, I’ve made this easy eggnog cheesecake probably 20 times now. Some attempts were prettier than others. Some had cracks. One had a weird brown spot on top (still don’t know what caused that). But every single one tasted amazing.
The eggnog cheesecake is forgiving, it’s festive, and people genuinely get excited when they see it. My neighbor actually knocked on my door last December because she smelled it through the walls and wanted to know what I was making. That’s the power of this recipe.
Is it healthier than store-bought? Absolutely not. Is it worth the calories? Absolutely yes. Is it actually easy? Yes, despite my rambling stories about all the ways I’ve messed it up. Those were learning experiences, okay?
The best part about this easy eggnog cheesecake is that it makes your house smell like Christmas threw up in the best possible way. Nutmeg, cinnamon, vanilla, butter—all those good holiday smells baking together. I should bottle this scent and sell it.
So yeah, make this easy eggnog cheesecake. Make it for your family. Make it for that holiday potluck. Make it just for yourself because you deserve nice things. And when people ask for the recipe (they will), send them here.
Happy baking, and may your eggnog cheesecakes be crack-free and your patience strong during the waiting period! 🎄✨
Table of Contents
Easy Eggnog Cheesecake
A rich and creamy eggnog cheesecake with a spiced graham cracker crust, perfect for holiday celebrations. This easy recipe requires no water bath and features warm nutmeg and cinnamon flavors that capture the essence of the holiday season. Make-ahead friendly and guaranteed to impress at any gathering.
Ingredients
- 2 cups graham cracker crumbs
- 1/3 cup granulated sugar (for crust)
- 1/2 cup melted butter
- 1/2 teaspoon ground nutmeg (for crust)
- Pinch of cinnamon (for crust)
- 24 oz cream cheese, softened
- 1 cup granulated sugar
- 3 large eggs, room temperature
- 1 cup eggnog
- 1/4 cup all-purpose flour
- 2 teaspoons vanilla extract
- 1 teaspoon ground nutmeg
- 1/2 teaspoon ground cinnamon
- 1/4 teaspoon ground cloves
- Whipped cream for topping
- Extra nutmeg for garnish
Instructions
-
Step 1Preheat oven to 325°F. Mix graham cracker crumbs with 1/3 cup sugar, nutmeg, and cinnamon. Add melted butter and stir until mixture resembles wet sand.
-
Step 2Press graham cracker mixture firmly into bottom of 9-inch springform pan. Use the bottom of a measuring cup to pack it down evenly.
-
Step 3Bake crust for 10 minutes until lightly golden. Remove and let cool while preparing filling.
-
Step 4Beat softened cream cheese in large bowl for 2-3 minutes until smooth and fluffy. Scrape down sides of bowl.
-
Step 5Add 1 cup sugar to cream cheese and beat until well combined.
-
Step 6Add eggs one at a time, mixing on low speed until just combined after each addition. Do not overmix.
-
Step 7Pour in eggnog, vanilla extract, nutmeg, cinnamon, and cloves. Mix on low speed until just combined.
-
Step 8Add flour and mix for 10 seconds until just incorporated. Batter should be smooth and pourable.
-
Step 9Pour filling into cooled crust. Tap pan gently on counter to release air bubbles.
-
Step 10Bake at 325°F for 55-60 minutes until edges are set but center still jiggles slightly when gently shaken.
-
Step 11Turn off oven and crack door open about 1 inch. Leave cheesecake in oven for 1 hour to cool gradually.
-
Step 12Remove from oven and cool to room temperature on counter for 1 hour.
-
Step 13Cover with plastic wrap (not touching surface) and refrigerate for at least 4 hours or overnight until fully set.
-
Step 14Before serving, run a hot knife around edges. Release springform pan sides. Top with whipped cream and sprinkle with nutmeg.