
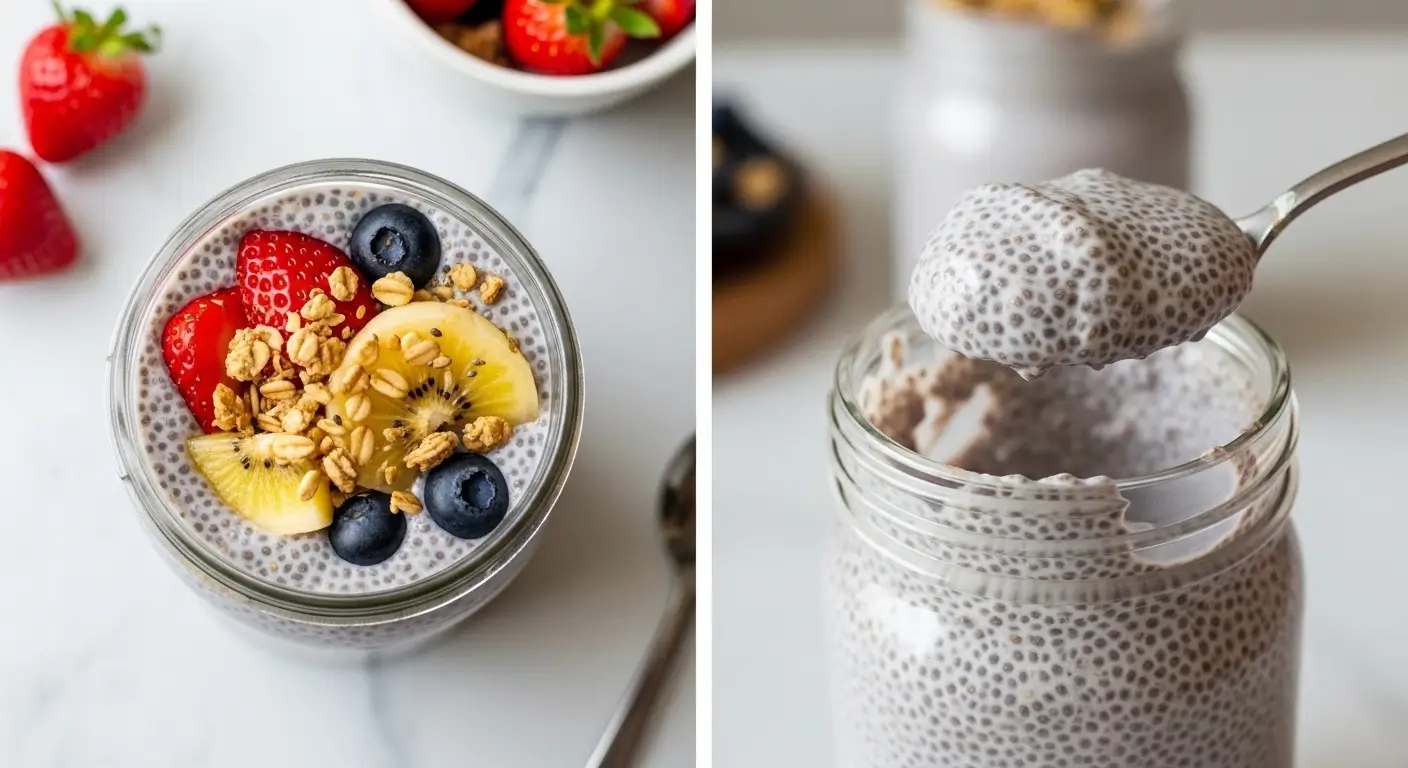
Extra thick chia pudding is the reason I stopped being annoyed at chia pudding in general. Because for the longest time — honestly like two years — I thought I just didn’t like chia pudding. I’d make it, it’d come out this thin, slightly gelatinous, vaguely seed-flavored liquid situation, and I’d eat it with zero enthusiasm while scrolling through my phone trying not to think about what I was consuming. It wasn’t bad exactly. It just wasn’t… good.
And then one night I was tired and distracted and I accidentally used way less milk than the recipe called for. Like, significantly less. I grabbed the jar from the fridge the next morning not even remembering what I’d done differently, took one spoon, and just stopped. Stood in my kitchen in my pajamas. Actually said out loud — to no one, my family was still asleep — “oh. OH.”
It was thick. Genuinely thick. Almost like a proper dessert. Like the texture of a good rice pudding or a panna cotta that hadn’t fully set. You could flip the jar upside down and it would hold for a second before slowly moving. THAT is what chia pudding is supposed to be. Everything before that was just a rumor.
Also check : Almond Milk Chia Pudding — The Recipe I Almost Gave Up On (And Then Couldn’t Stop Making)
The Actual Problem With Most Chia Pudding Recipes
Okay so here’s what I’ve figured out, and I want to say this clearly because I feel strongly about it: most chia pudding recipes online use too much liquid. There. I said it. The standard ratio floating around everywhere is 3 tablespoons of chia seeds to 1 cup of milk. And that gives you a pudding that’s, at best, medium consistency. Fine for some people. Not for me and apparently not for the significant number of people who’ve complained about watery chia pudding in every comment section I’ve ever stumbled into.
Extra thick chia pudding requires a different ratio. And a couple of other tricks that I figured out through trial and error and one very happy accident.
The extra thick chia pudding ratio that actually works — based on my extensive and somewhat obsessive testing — is 5 to 6 tablespoons of chia seeds per 1 cup of liquid. That sounds like a lot. It is a lot. It’s exactly the right amount.
What You Need for Extra thick chia pudding
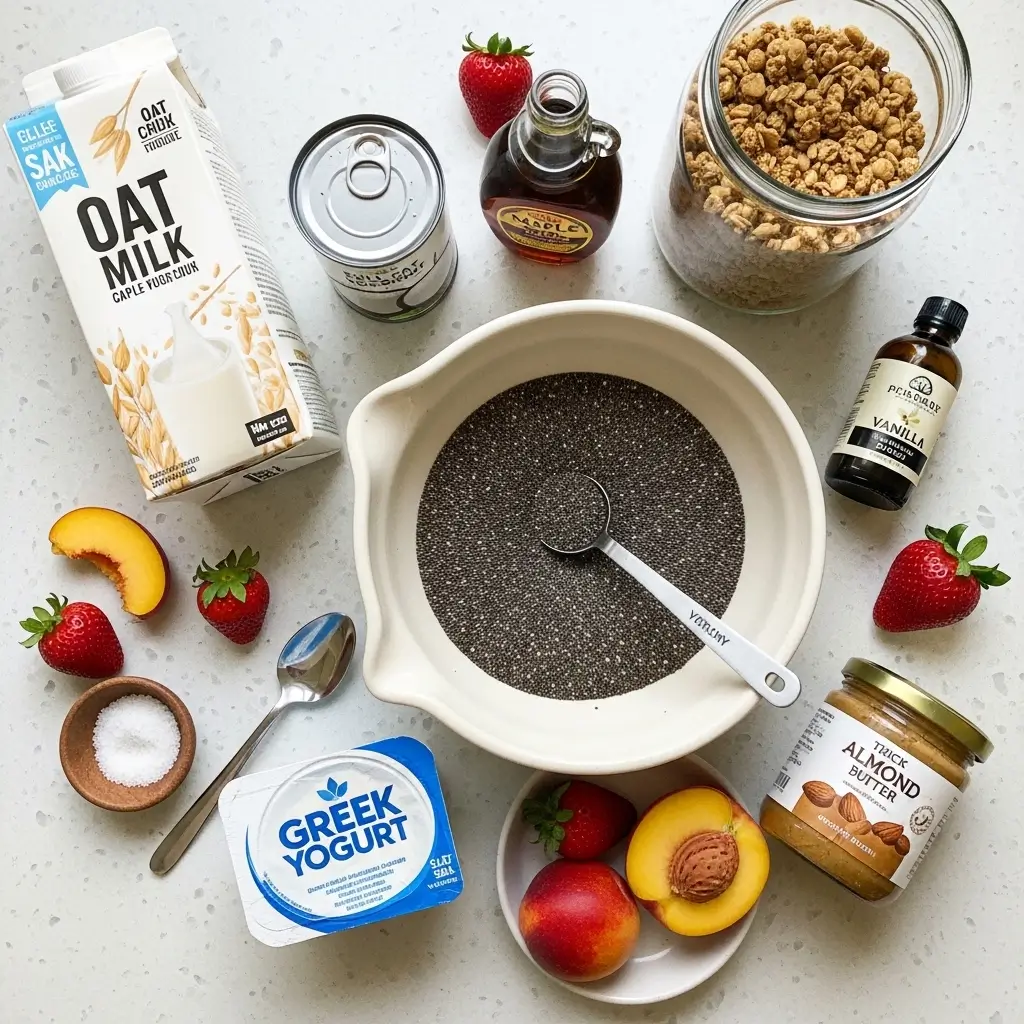
For 2 generous servings of extra thick chia pudding:
- 1 cup milk of your choice — I’ve tested this with full-fat coconut milk (richest, most indulgent), whole dairy milk (classic, creamy), and oat milk (my everyday choice). All work. Full-fat coconut milk gives the absolute thickest result if that’s your goal.
- 5 to 6 tablespoons chia seeds — start with 5, see how you feel about the texture, go to 6 next time if you want it even denser
- 2 tablespoons maple syrup or honey
- 1 teaspoon vanilla extract
- Pinch of salt — I know I keep saying this in every recipe but it matters, it genuinely matters
- Optional: 2 tablespoons Greek yogurt stirred in — this is my secret weapon for extra thickness and a slight tang that I find really pleasant. My husband thinks I’m putting too many things in it. He still eats two jars a week so I don’t take his feedback seriously.
Toppings — go generous, the thick base can handle it:
- Sliced fresh fruit — peaches, strawberries, mango, whatever’s actually ripe
- Thick granola clusters — the clumpier the better
- A big spoonful of nut butter — almond, peanut, cashew, doesn’t matter, it all works
- Toasted coconut flakes
- A drizzle of honey right before eating
- Fresh berries pressed into the top because it looks beautiful and I care about that
How to Make Extra thick chia pudding Properly Thick
This is the part where I share everything I’ve learned. Pay attention to steps 3 and 4 especially because those are where most people go wrong.
Step 1: Choose your container wisely. I use wide-mouth 16oz mason jars. Wide mouth means you can actually stir properly without doing that awkward narrow-jar spoon scraping thing that accomplishes nothing. The extra thick chia pudding needs proper stirring to set correctly.
Step 2: Pour your milk into the jar. If you’re using full-fat coconut milk from a can — which I highly recommend for maximum thickness — shake the can really well before opening or whisk it in a bowl first because the cream and liquid separate in the can and you want them fully combined.
Step 3: Add your chia seeds, maple syrup, vanilla, salt, and Greek yogurt if using. Now stir. And when I say stir, I mean really stir — for about 60 full seconds, making sure you’re scraping the bottom and sides of the jar. Set a timer. Count to 60. This is not the moment for a half-hearted stir and hoping for the best.
Step 4 — THE MOST IMPORTANT STEP: Put the jar in the fridge for 20 minutes. Take it out. Stir vigorously again for another 30-45 seconds. Put it back in the fridge. This double-stir method — oh wait, I should explain why this matters — when chia seeds start absorbing liquid they want to clump together. The first stir disperses them. But then they start gelling immediately and can re-clump before you’ve put the lid on. The 20-minute check-in stir breaks up any early clumps before they set permanently. This is the difference between smooth, even, genuinely thick pudding and a jar with a weird chia gel ball in the middle surrounded by thin liquid. I know which one I want.
Step 5: After the second stir, put the lid on and leave it alone. Minimum 6 hours for extra thick chia pudding — I know most recipes say 4 hours but for this thicker ratio, 6 hours is really the minimum to get proper gel throughout. Overnight is honestly ideal. I make mine at 9pm and eat it at 7am and it is perfect every single time.
Step 6: In the morning — don’t add anything yet. First open the jar and just look at it. It should be visibly thick, almost mousse-like. Run a spoon through it. It should hold shape for a second before settling. If it does that, you’ve nailed it. If it still seems a little loose, give it another hour.
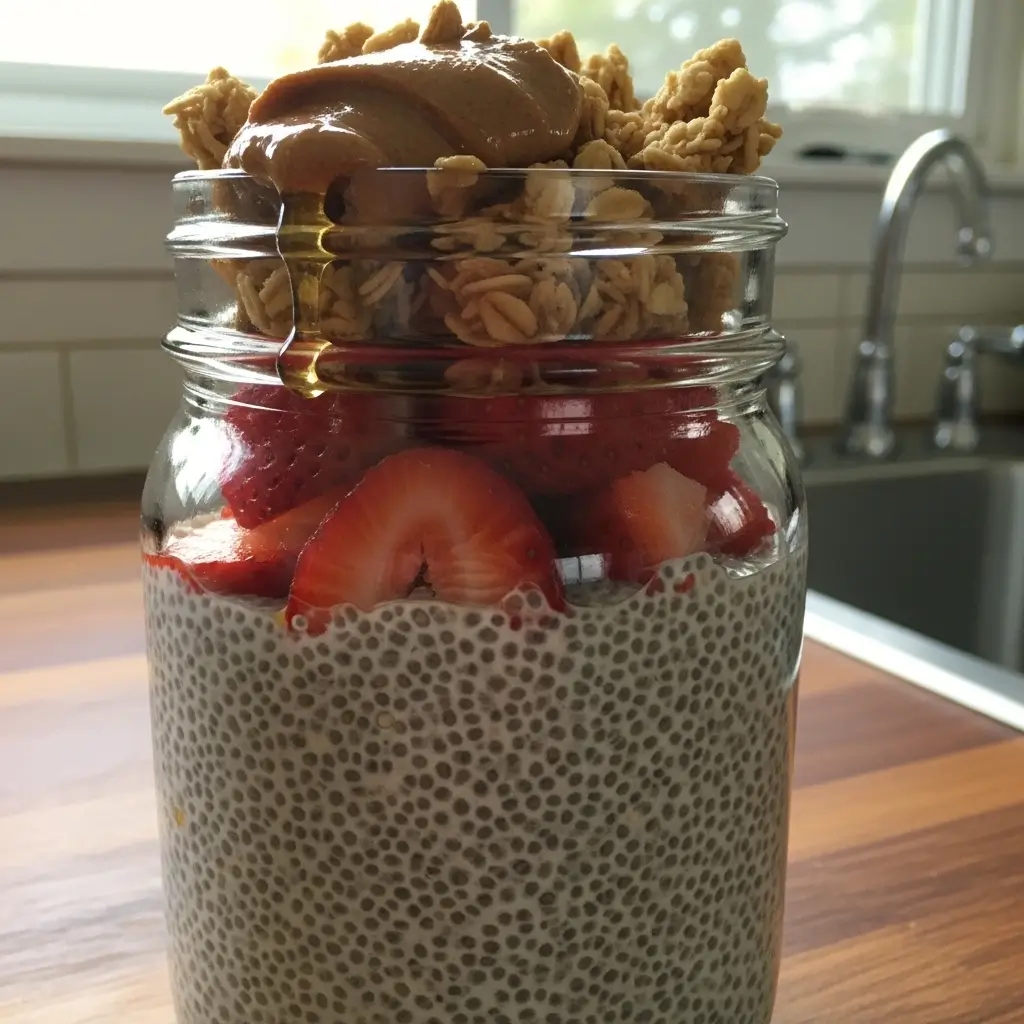
Step 7: Add your toppings right before eating. Everything fresh, everything at the last second. The extra thick chia pudding is substantial enough that heavy toppings like granola and nut butter won’t sink — they’ll sit right on top like a proper parfait. This is very satisfying.
The Mistakes on Extra thick chia pudding I Made Getting Here
Because I feel like being transparent about this:
The thin jar problem: Used a narrow jar and couldn’t stir properly. The seeds clumped along the sides in a ring and the middle was under-seeded and thin. Wide jar. Always wide jar.
The coconut cream confusion: Opened a can of coconut milk without shaking it, just poured the separated watery liquid sitting on top, leaving all the thick cream behind. Wondered why my “full-fat coconut milk” version was thin. It was not full-fat coconut milk. It was coconut water basically. Shake the can. Shake it like you mean it.
The impatient version: Set it for 3 hours because I’d read “minimum 4 hours” and thought “well 3 is close.” It wasn’t set. Not even close. Ate it anyway with a straw essentially. Wait the full time.
The over-sweetened situation: Added maple syrup AND honey AND vanilla-flavored milk. Couldn’t taste the actual pudding under all that sweetness. Scale back to one sweetener, let the thickness be the star.
The over-seeded experiment: Tried 8 tablespoons of seeds to 1 cup of milk because I thought more seeds equals more thickness. The result was genuinely alarming. It was basically a solid. I could have cut it with a knife. Six tablespoons is the maximum I’d recommend. Beyond that you’re making something that belongs in a different category entirely.
Why Thickness Changes Everything for Extra thick chia pudding
Look — I want to talk about this for a second because I think it matters. Extra thick chia pudding isn’t just a texture preference thing. The thickness actually changes how the flavors work.
When chia pudding is thin, it kind of dilutes everything — the sweetness, the vanilla, all of it floats around in liquid and tastes mild and watery. When extra thick chia pudding is properly set and dense, every spoonful has concentrated flavor. The vanilla hits differently. The sweetness is more present. The milk flavor — whether that’s oat, coconut, or dairy — is more pronounced and more satisfying.
It also means toppings interact with the base in a much better way. Fresh strawberries on thin chia pudding just kind of sink and make it even more watery. Fresh strawberries on extra thick chia pudding sit there beautifully, and when you drag your spoon through both layers you get this perfect combination of fruity, creamy, slightly crunchy from the seeds. That’s the experience. That’s what chia pudding is supposed to be.
My mom tried it last week when she came over for lunch — she’s been skeptical of chia seeds since I started talking about them, bless her — and she asked me for the recipe before she left. She texted me at 10pm that same night to say hers had set and looked “like a real pudding.”
Am I a little smug about that? Yes. A little bit yes.
Make this tonight. Use more seeds than feels reasonable. Wait the full six hours. And please, please stir it twice — once right after mixing and once at the 20-minute mark. You’ll see exactly what I mean when you open that jar in the morning 🥄✨
Table of Contents
Extra Thick Chia Pudding
A genuinely thick, creamy, and satisfying chia pudding made with the perfect seed-to-milk ratio and a simple double-stir technique. No more watery, disappointing results — this extra thick chia pudding sets into a rich, mousse-like texture perfect for breakfast or a healthy dessert. Dairy-free, vegan, and ideal for weekly meal prep.
Ingredients
- 1 cup milk of choice (full-fat coconut milk, whole dairy milk, or oat milk)
- 5 to 6 tablespoons chia seeds (black or white)
- 2 tablespoons maple syrup or honey
- 1 teaspoon vanilla extract
- Pinch of salt
- 2 tablespoons Greek yogurt (optional, for extra thickness and creaminess)
- Fresh sliced fruit for topping (strawberries, peaches, or mango)
- Thick granola clusters for topping
- Almond butter or peanut butter for topping (optional)
- Toasted coconut flakes for topping (optional)
- Drizzle of honey for topping (optional)
Instructions
-
Step 1Pour milk into a wide-mouth 16oz mason jar or airtight container. If using canned full-fat coconut milk, shake the can thoroughly before opening to combine the cream and liquid.
-
Step 2Add chia seeds, maple syrup, vanilla extract, salt, and Greek yogurt if using. Stir vigorously for a full 60 seconds, scraping the bottom and sides of the jar to ensure everything is fully combined.
-
Step 3Place the jar uncovered in the refrigerator for 20 minutes.
-
Step 4Remove from fridge and stir vigorously again for 30 to 45 seconds to break up any early clumps and redistribute seeds evenly throughout the mixture.
-
Step 5Cover the jar with a lid and refrigerate for a minimum of 6 hours or overnight for best results.
-
Step 6In the morning, open the jar and test the texture — it should be visibly thick and hold its shape briefly when a spoon is dragged through it. If slightly loose, refrigerate for an additional hour.
-
Step 7Add toppings just before serving — fresh fruit, granola, nut butter, coconut flakes, or a honey drizzle.
-
Step 8Serve immediately. Store remaining jars covered in the refrigerator for up to 5 days.