
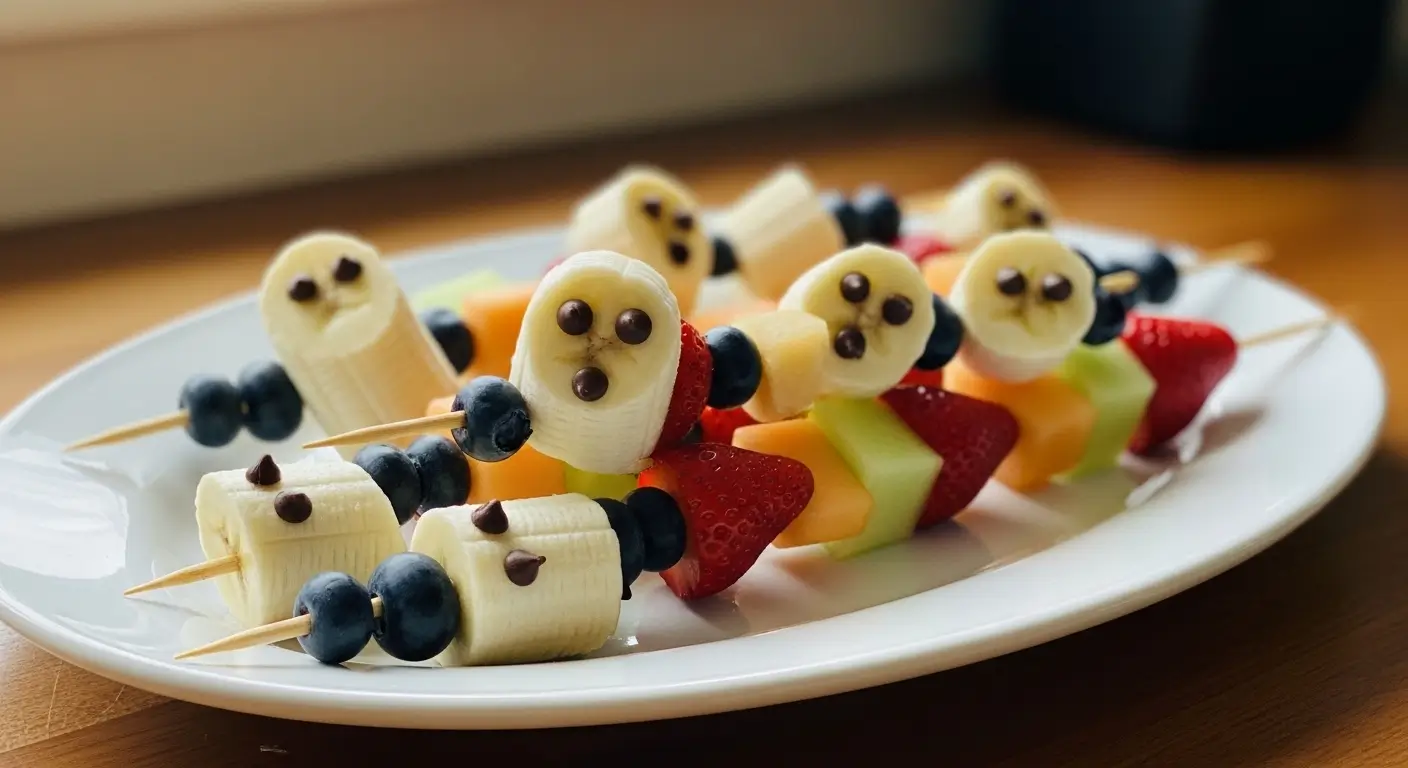
Okay, so ghostly fruit skewers became my accidental Halloween hero last year when I completely forgot about the school party until 6 AM that morning. I’m talking full panic mode—my daughter’s standing there in her witch costume asking where her “healthy snack” was, and I’m staring at a fridge full of random fruit thinking, “How do I make this Halloween-y without just dumping candy on everything?”
Look, I’m gonna be honest with you. These ghostly fruit skewers saved my parenting reputation that day. And now? Everyone asks me to bring them to every single Halloween event. My neighbor Carol even tried to recreate them after the PTA meeting (spoiler alert: hers looked more like sad clouds than ghosts, but hey, we don’t talk about that).
The thing about ghostly fruit skewers is they’re ridiculously simple, but somehow they look like you spent hours being all Pinterest-perfect. You basically just need white fruit, dark berries for eyes, and skewers. That’s it. But here’s where it gets interesting—and where I learned some stuff the hard way.
My Ghostly Fruit Skewers Origin Story (AKA How I Became the “Fun Mom”)
So this whole ghostly fruit skewers thing started because my kid’s teacher sent home one of those notes. You know the ones: “Please bring a healthy Halloween snack that’s nut-free, gluten-free, and fun for 28 kids.” Right. No pressure or anything.
I was scrolling through Pinterest at like midnight (because that’s when all good parenting decisions happen), and I saw these amazing ghostly fruit skewers that looked professional. The problem? The recipe was basically “arrange fruit to look like ghosts” with zero actual instructions. Super helpful, right?
Fast forward to 6 AM, and I’m at the grocery store in my pajama pants buying every white fruit they had. Bananas, white grapes, mini marshmallows (technically not fruit, but whatever), and blueberries for the eyes. The cashier looked at me like I’d lost my mind, which… fair.
But you know what? Those ghostly fruit skewers were a massive hit. Kids were actually excited about eating fruit, which is basically a Halloween miracle. And the best part? They’re genuinely healthy, so you don’t feel like garbage after eating five of them. Not that I did that or anything.
What You Actually Need for Ghostly Fruit Skewers
Here’s where I’m gonna save you from my mistakes. Don’t just grab random white fruit and hope for the best. There’s a method to this madness.
For the ghost bodies (the white stuff):
- White grapes – like 2-3 pounds if you’re making a lot of ghostly fruit skewers
- Bananas – maybe 6-8, but they brown fast so have extras
- Mini marshmallows – not traditional fruit, but kids don’t care
- White strawberries if you can find them (fancy grocery stores sometimes have these)
For the spooky faces:
- Fresh blueberries – small ones work better for eyes
- Mini chocolate chips (I know, I know, not fruit, but they stick better than berries sometimes)
- Black sesame seeds if you want to get really fancy
The boring but necessary stuff:
- Wooden skewers – get the short cocktail ones, not the long BBQ skewers
- A big plate or serving tray
- Maybe some parchment paper if you’re transporting these ghostly fruit skewers
Shopping tip from someone who learned this the hard way: buy your bananas a day or two before you need them. Too ripe and they’ll turn into mushy ghost soup on your skewers. Too green and they taste like sadness.
How to Actually Make These Ghostly Fruit Skewers (Without Losing Your Mind)
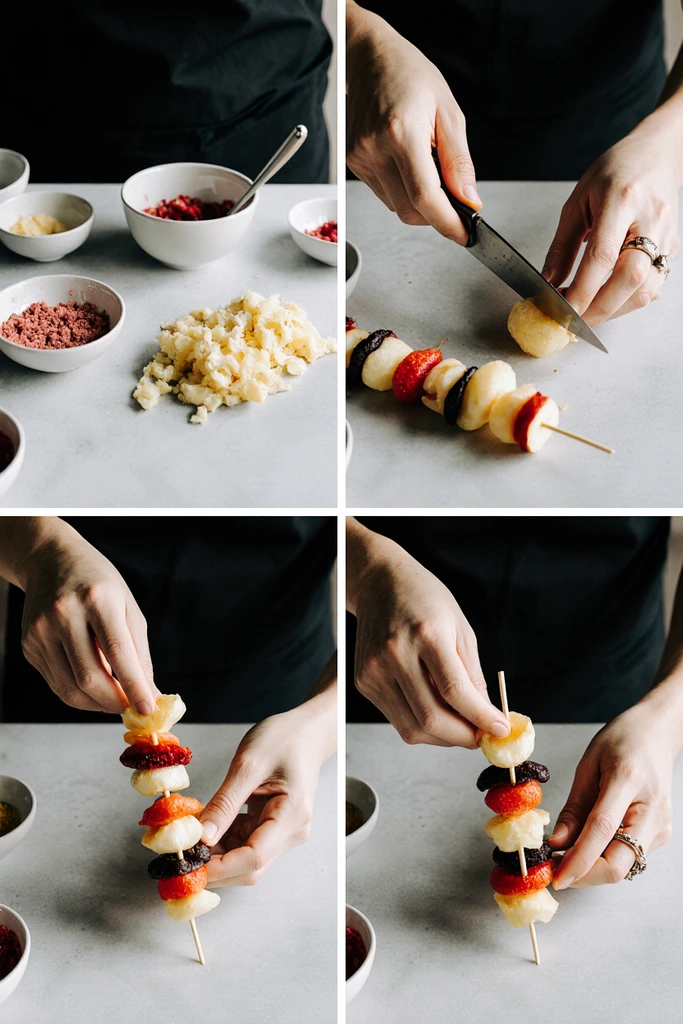
Okay, so here’s the thing about ghostly fruit skewers—there’s no real wrong way to do this, but there are definitely ways that work better than others. Let me walk you through what actually works.
Step 1: Prep your fruit like you mean it
Wash everything first. I know this seems obvious, but I once forgot and served slightly dirty grapes at a school event. Mortifying.
For the bananas, peel and cut them into roughly 2-inch chunks. They’re gonna be your ghost bodies, so you want them chunky enough to look ghost-like but not so big that kids can’t eat them. Pro tip: brush them with a tiny bit of lemon juice if you’re making these ghostly fruit skewers more than an hour ahead of time. Keeps them from looking like zombie fruit.
Step 2: The ghost assembly line (where the magic happens)
This is where making ghostly fruit skewers becomes actually fun instead of just stressful. Set up everything in front of you like you’re running a little fruit factory.
Start with a skewer, then thread on your ghost body fruit. I usually go banana chunk, couple of white grapes, maybe a marshmallow if I’m feeling fancy. The key is to make each ghostly fruit skewer look a little different—real ghosts aren’t identical, right?
Here’s something I figured out after making approximately a million of these: push the fruit onto the skewer gently. If you stab too hard, your bananas will split and your grapes will explode. And then you’re standing in your kitchen at 7 AM covered in grape juice wondering where your life went wrong.
Step 3: Face time (the make-or-break moment)
This is where your ghostly fruit skewers either look adorable or like something from a horror movie. The eyes are everything.
For blueberry eyes, just gently press two small berries into the top fruit piece. If you’re using mini chocolate chips, they’ll stick better if your fruit is slightly wet. For black sesame seeds, you might need to use a tiny dab of honey to make them stick, but honestly? That’s probably overkill unless you’re competing for parent of the year.
The mouth is optional. Some ghosts are just surprised-looking with big round eyes, and that’s totally fine. If you want mouths, a small piece of blueberry or even a tiny chocolate chip works.
My Real-Life Ghostly Fruit Skewers Tips (Learned Through Trial and Many Errors)
Timing is everything: Don’t make these ghostly fruit skewers the night before. The fruit gets soggy and weird, and the faces start sliding off. Morning of the event is perfect.
Transport carefully: I learned this one the hard way when I showed up to my daughter’s class with what looked like a fruit massacre. Now I use a flat container with parchment paper and drive like I’m transporting fine china.
Make extras: Kids (and let’s be honest, adults) will eat way more of these than you think. I now automatically make 50% more ghostly fruit skewers than I think I need.
The marshmallow debate: Some parents get weird about marshmallows because sugar. My take? It’s Halloween, they’re tiny, and it makes the kids happy. Pick your battles.
Storage situation: If you need to store these for a few hours, keep them in the fridge loosely covered. Don’t wrap them tight or the fruit gets gross and condensation makes the eyes slide off your ghostly fruit skewers.
When These Ghostly Fruit Skewers Go Wrong (And How to Fix It)
Let’s talk about the disasters, because they happen and nobody prepares you for them.
The banana browning crisis: Even with lemon juice, bananas brown. If this happens, just embrace it. Call them “antique ghosts” or something. Kids don’t care as much as you think they will.
The rolling eye problem: Blueberries have minds of their own and will roll off if your fruit isn’t the right texture. If this keeps happening, switch to mini chocolate chips or just make cyclops ghosts. One eye is easier than two anyway.
The skewer rebellion: Sometimes your fruit just won’t stay on the skewer. This usually means your fruit is either too ripe or you’re being too aggressive. Take a breath, get gentler, maybe switch to firmer fruit.
The transportation disaster: I once arrived at a party with what looked like a ghostly fruit skewer crime scene. Now I bring extras and just accept that a few casualties are part of the process.
The Verdict on Ghostly Fruit Skewers
Here’s the thing—these aren’t just cute Halloween decorations that happen to be edible. They’re actually good. Kids love them because they look fun, parents love them because they’re not pure sugar, and they’re easy enough that you can make them without having a breakdown.
I’ve made probably hundreds of these ghostly fruit skewers over the past year, and they never get old. Halloween parties, fall festivals, random Tuesday afternoons when my kid needs a snack that doesn’t make her bounce off the walls—they work for everything.
The best part? You can make them your own. Some people add different fruits, some get fancy with the faces, some make mini versions for toddlers. There’s no ghostly fruit skewer police coming to check if you’re doing it right.
And honestly? Even when they don’t look perfect, they still taste great. My eight-year-old has never once complained that a ghost looked wonky. She just eats it and asks for another one.
So next time you need a Halloween snack that won’t send kids into a sugar coma, try these ghostly fruit skewers. Just maybe make them the morning of, not the night before. Trust me on that one.
Now go make some ghosts. Your kid (and your reputation as the fun parent) will thank you later. 🎃👻
check more Halloween treats : 20 Spooky Halloween Appetizers That’ll Actually Get Eaten (Not Just Instagrammed)
Table of Contents
Ghostly Fruit Skewers
Easy and healthy Halloween ghostly fruit skewers made with white grapes, bananas, and blueberries. Perfect spooky snacks for kids' Halloween parties that look adorable and taste great without the sugar crash.
Ingredients
- 2-3 pounds white grapes, washed
- 6-8 ripe bananas, peeled and cut into 2-inch chunks
- 1 cup fresh blueberries for eyes
- 1/2 cup mini marshmallows (optional)
- 12-15 wooden cocktail skewers
- 1 tablespoon lemon juice (optional, to prevent browning)
Instructions
-
Step 1Wash all fruit thoroughly and dry completely.
-
Step 2Peel bananas and cut into 2-inch chunks. Optional: brush lightly with lemon juice to prevent browning.
-
Step 3Thread white fruit onto skewers to create ghost bodies - typically banana chunk, 2-3 white grapes, and optional marshmallow.
-
Step 4Gently press two small blueberries into the top fruit piece to create ghost eyes.
-
Step 5Optional: add a small piece of blueberry for a mouth expression.
-
Step 6Arrange completed ghostly fruit skewers on serving platter.
-
Step 7Serve immediately or refrigerate for up to 2 hours before serving.