
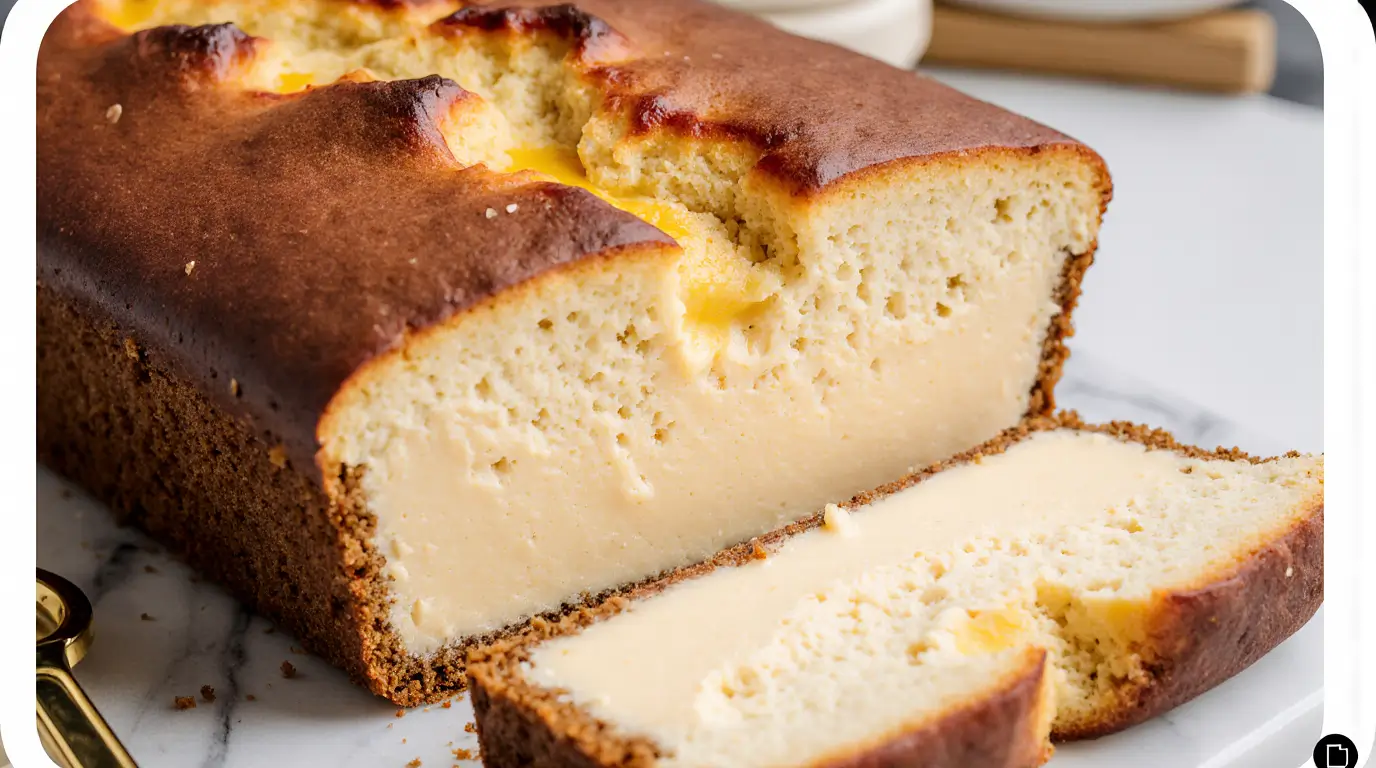
Loaf Pan Basque Cheesecake is literally the reason I stopped buying dessert from restaurants. I mean it. This burnt, caramelized beauty changed everything I thought I knew about cheesecake. And the best part? You can make it in a regular loaf pan instead of hunting down some fancy springform thing that takes up half your cabinet.
Look, I’m gonna be honest – I discovered this Loaf Pan Basque Cheesecake recipe because I was trying to impress my mother-in-law. She’s one of those people who bakes everything from scratch and judges store-bought desserts like they personally offended her ancestors. I needed something that looked impressive but wouldn’t require me to learn actual pastry skills overnight.
Now, here’s the thing about Basque cheesecake – it’s supposed to look burnt. Like, aggressively burnt on top. The first time I made it, I literally thought I’d ruined it. That dark, almost black top made me panic and start googling “how to fix burnt cheesecake” at 9 PM. Turns out, that’s exactly what makes this Loaf Pan Basque Cheesecake so special.
The Accidental Discovery (Or How I Learned to Love Burnt Desserts)
So there I was, scrolling through food videos at 2 AM because apparently that’s what I do with my life now. This Spanish chef was making this cheesecake that looked like someone forgot it in the oven. But people in the comments were going absolutely crazy for it. “Life-changing,” they said. “Better than sex,” one person wrote. (Okay, maybe they were exaggerating, but still.)
The original version uses this massive round pan and serves like twelve people. Great if you’re feeding an army, not so great when it’s just me, my husband, and our dog who isn’t supposed to eat people food but somehow always gets scraps anyway.
That’s when I had my genius moment – why not make this Loaf Pan Basque Cheesecake in a regular loaf pan? Smaller portions, easier storage, and I already had the pan. Sometimes the best ideas come from pure laziness, and I’m not ashamed to admit it.
First attempt was… interesting. I burned the top way too much because I got distracted by a Netflix episode. Second attempt, I chickened out and took it out too early – it was basically expensive scrambled eggs. Third time was the charm, and now I’ve made this thing probably twenty times.
Table of Contents
What You Actually Need for Loaf Pan Basque Cheesecake

Here’s where this gets beautiful – the ingredient list is stupid simple, but the results are restaurant-quality fancy:
Cream Cheese (2 pounds) – Yeah, two full pounds. Don’t use the light stuff or I’ll personally come to your kitchen and judge you. Get the full-fat, real deal Philadelphia cream cheese. I’ve tried other brands, and honestly, they just don’t hit the same.
Heavy Cream (1 cup) – The good stuff. Not half-and-half, not milk, not that weird “light” cream. Heavy whipping cream or go home.
Sugar (3/4 cup) – Regular granulated sugar works fine. Don’t get fancy with coconut sugar or whatever’s trending. This isn’t the place for experimentation.
Eggs (4 large ones) – Room temperature is better, but I’ve used cold eggs straight from the fridge when I forgot to plan ahead. Still works.
Vanilla Extract (2 teaspoons) – Real vanilla, not the fake stuff. Your taste buds will thank you.
Salt (Pinch) – Just a tiny pinch. Don’t skip it though – it makes everything taste better.
That’s it. Six ingredients for this Loaf Pan Basque Cheesecake that’ll make people think you went to culinary school. Sometimes simple is genius.
The Method of Loaf Pan Basque Cheesecake
Preheat your oven to 400°F. Yes, 400°F. I know it sounds hot, but that’s what creates the magic burnt top on this Loaf Pan Basque Cheesecake. Trust the process.
Step 1: Let your cream cheese come to room temperature. This is crucial. Cold cream cheese will give you lumps, and lumpy cheesecake is sad cheesecake. If you forgot (like I always do), cut it into chunks and microwave for 30 seconds. Just don’t cook it.
Step 2: Line your 9×5 loaf pan with parchment paper. Leave some overhang so you can lift the whole thing out later. I learned this the hard way after trying to dig a cheesecake out of a pan with a spatula. Disaster.
Step 3: Beat the cream cheese until it’s smooth and fluffy. I use my hand mixer, but you could probably do it by hand if you’re feeling ambitious. Add the sugar and beat until combined.
Step 4: Add eggs one at a time. Don’t dump them all in at once or you’ll get scrambled eggs mixed with cream cheese. Nobody wants that. Beat each egg in completely before adding the next one.
Step 5: Pour in the heavy cream, vanilla, and salt. Mix until everything’s smooth and gorgeous. The mixture should be pretty liquidy – that’s normal for this Loaf Pan Basque Cheesecake.
Step 6: Pour into your prepared loaf pan. It’ll come up pretty high, maybe 3/4 of the way. Don’t worry, it won’t overflow. Much.
Step 7: Bake for 50-60 minutes until the top is deeply golden brown and looks almost burnt. It should jiggle slightly in the center when you shake the pan. Don’t be afraid of the dark color – that’s the whole point!
The Waiting Game (Hardest Part of the Whole Process)
Here’s where your patience gets tested worse than waiting for Amazon delivery. This Loaf Pan Basque Cheesecake needs to cool completely, then chill in the fridge for at least 4 hours. Preferably overnight.
I know, I know. It smells incredible and you want to cut into it immediately. Don’t. I repeat, DO NOT cut into it warm. I made this mistake exactly once and ended up with expensive cheese soup. Delicious cheese soup, but still soup.
The cooling and chilling process is what transforms this from a hot mess into the creamy, dense perfection that makes this Loaf Pan Basque Cheesecake so addictive. Something magical happens during those hours in the fridge – the texture becomes this perfect balance between dense and creamy.
Real Talk About the “Burnt” Top
Let’s address the elephant in the room. The first time you make this, you’re going to think you screwed up. That top is going to be dark. Really dark. Maybe even black in spots. This is EXACTLY what you want.
The caramelized top isn’t just for show – it adds this incredible slightly bitter, caramel-like flavor that balances out the rich, sweet interior. It’s like the dessert equivalent of that perfect char on a good steak. Don’t you dare try to scrape it off.
My neighbor saw me pulling this out of the oven once and literally gasped. “Did you burn it?” she asked. When I told her it was supposed to look like that, she thought I was lying. Two hours later, she was at my door asking for the recipe.
Personal Discoveries and Kitchen Wisdom
After making this Loaf Pan Basque Cheesecake more times than I care to admit, here’s what I’ve learned:
The cream cheese temperature thing is real. I used to think room temperature ingredients were just fancy baking nonsense. Nope. Cold cream cheese equals lumpy filling, and nobody has time for that.
Don’t open the oven door. I know you want to peek. Don’t. The temperature shock can cause cracks, and while cracks don’t affect taste, they do make you look like you don’t know what you’re doing.
Every oven is different. Mine runs hot, so I sometimes need to lower the temperature to 375°F after 30 minutes. Yours might need the full 400°F the whole time. Watch for that deep golden color, not just the timer.
The parchment paper overhang is genius. Makes removing the cheesecake so much easier. I use those pre-cut parchment loaf liners now because I’m fancy like that. Or lazy. Probably lazy.
Flavor Variations (Because I Can’t Help Myself)
The original is perfect, but sometimes you want to mix things up:
Lemon Version: Add the zest of 2 lemons and 2 tablespoons of lemon juice. Bright, tangy, and still has that gorgeous burnt top.
Coffee Version: Mix 2 tablespoons of instant coffee into the cream before adding it. Coffee and burnt caramel? Yes, please.
Orange Version: Orange zest and a splash of Grand Marnier if you’re feeling fancy. Or just orange extract if you’re not.
What doesn’t work: Chocolate (makes it too dense), fruit pieces (they sink and get weird), nuts (why would you ruin perfection?).
Serving This Beauty
This Loaf Pan Basque Cheesecake is perfect on its own, but here’s how I usually serve it:
Cut thick slices – about an inch thick. This isn’t regular cheesecake; it’s dense and rich, so smaller pieces are actually better. Serve it cold, straight from the fridge.
Fresh berries are beautiful on the side. The tartness cuts through the richness perfectly. A drizzle of honey is nice too, though honestly, it doesn’t need anything.
I’ve served this at dinner parties, and people always ask where I bought it. When I tell them I made it in a loaf pan, they literally don’t believe me. Had one friend insist I was hiding the “real” recipe and this was just a decoy.
Storage and Leftovers (If They Exist)
This Loaf Pan Basque Cheesecake keeps beautifully in the fridge for up to a week. Just cover it with plastic wrap or keep it in the pan with foil over the top.
It actually gets better after the first day. The flavors develop and the texture becomes even more perfect. Day 3 is peak deliciousness, in my opinion.
Can you freeze it? Absolutely. Wrap individual slices in plastic wrap and freeze for up to 3 months. Thaw slowly in the fridge. The texture might be slightly different, but still delicious.
The Reality Check
Let’s be honest – this isn’t some light, fluffy dessert. This Loaf Pan Basque Cheesecake is rich. Like, eat-a-small-slice-and-be-satisfied rich. It’s dense, creamy, and incredibly indulgent.
But that’s exactly why it’s so good. One slice feels like a proper dessert experience. Unlike regular cheesecake where you eat a piece and immediately want another, this actually satisfies you.
My husband, who usually demolishes entire desserts in one sitting, can only handle one slice of this. And he keeps going back to it over several days instead of finishing it immediately. That’s saying something.
Final Thoughts
If you’re looking for a dessert that looks complicated but is actually foolproof, this is it. The Loaf Pan Basque Cheesecake has become my signature dessert – the thing people specifically request when they’re coming over.
It’s the kind of recipe that makes you look like a better baker than you actually are. Simple ingredients, minimal technique, maximum impact. And that burnt top? It’s conversation starter gold.
Seriously, make this once and you’ll understand why I stopped buying cheesecake. Nothing from a store or restaurant compares to that perfect balance of burnt caramel bitterness and creamy richness.
Let me know how yours turns out! I’m always curious if other people become as obsessed with this Loaf Pan Basque Cheesecake as I did.
Happy baking! (And don’t panic when it looks burnt – that’s the whole point) 😊

Frequently Asked Questions
Q: Is it supposed to look that burnt on top? A: YES! This is the most common question I get. That dark, almost black top is exactly what makes Basque cheesecake special. It’s not burnt in a bad way – it’s caramelized and adds incredible flavor. Don’t you dare try to “fix” it by covering it with foil or anything.
Q: Can I use a different pan for this Loaf Pan Basque Cheesecake? A: You could use a round 8-inch pan, but you’ll need to adjust the baking time – probably 45-50 minutes instead of the full hour. The loaf pan shape is actually perfect because it gives you nice thick slices and it’s easier to store.
Q: Why is my cheesecake cracked? A: Honestly? Cracks happen sometimes, especially if you open the oven door or your oven runs hot. But here’s the thing – it doesn’t matter! The taste is exactly the same, and you can cover any cracks with the burnt top anyway. This isn’t a beauty contest.
Q: Can I make this without heavy cream? A: Don’t. Just don’t. I tried it once with half-and-half because that’s all I had, and it was disappointing. The heavy cream is what gives this Loaf Pan Basque Cheesecake its incredible creamy texture. It’s worth the extra calories.
Q: How do I know when it’s done? A: The top should be very dark golden brown (almost black in spots), and the center should still jiggle slightly when you shake the pan. Think Jell-O jiggle, not soup jiggle. If it’s still really wobbly, give it another 10 minutes.
Q: Can I add flavoring to this recipe? A: Keep it simple for your first attempt, but yes – lemon zest, vanilla extract, or coffee work great. Don’t go crazy though. Start with small amounts. I learned this the hard way when I added too much lemon juice and it never set properly.
Q: Why didn’t my cheesecake set? A: Either you didn’t bake it long enough, or you cut into it too early. This needs to cool completely, then chill for at least 4 hours. I know it’s torture to wait, but patience is key with this Loaf Pan Basque Cheesecake.
Q: Can I halve this recipe? A: You could, but honestly, it keeps so well that I just make the full batch. If you really want to halve it, use a smaller loaf pan and reduce the baking time to about 35-40 minutes. But seriously, just make the whole thing.
Q: Is this supposed to be this dense? A: Absolutely! This isn’t light, fluffy New York cheesecake. Basque cheesecake is supposed to be dense, rich, and incredibly creamy. That’s what makes it so satisfying – one slice actually fills you up instead of leaving you wanting more immediately.
Loaf Pan Basque Cheesecake
This authentic Loaf Pan Basque Cheesecake features the signature burnt caramelized top and incredibly creamy interior. Made with simple ingredients in a standard loaf pan, it's easier to slice and store than traditional round versions.
Ingredients
- 2 pounds cream cheese, room temperature
- 1 cup heavy cream
- 3/4 cup granulated sugar
- 4 large eggs, room temperature
- 2 teaspoons vanilla extract
- Pinch of salt
Instructions
-
Step 1Preheat oven to 400°F (200°C). Line a 9x5-inch loaf pan with parchment paper, leaving overhang.
-
Step 2Beat cream cheese until smooth and fluffy using electric mixer.
-
Step 3Add sugar and beat until well combined.
-
Step 4Add eggs one at a time, beating well after each addition.
-
Step 5Pour in heavy cream, vanilla extract, and salt. Mix until smooth.
-
Step 6Pour mixture into prepared loaf pan.
-
Step 7Bake for 50-60 minutes until top is deeply golden brown and almost burnt-looking.
-
Step 8Cool completely at room temperature, then refrigerate for at least 4 hours or overnight before serving.