
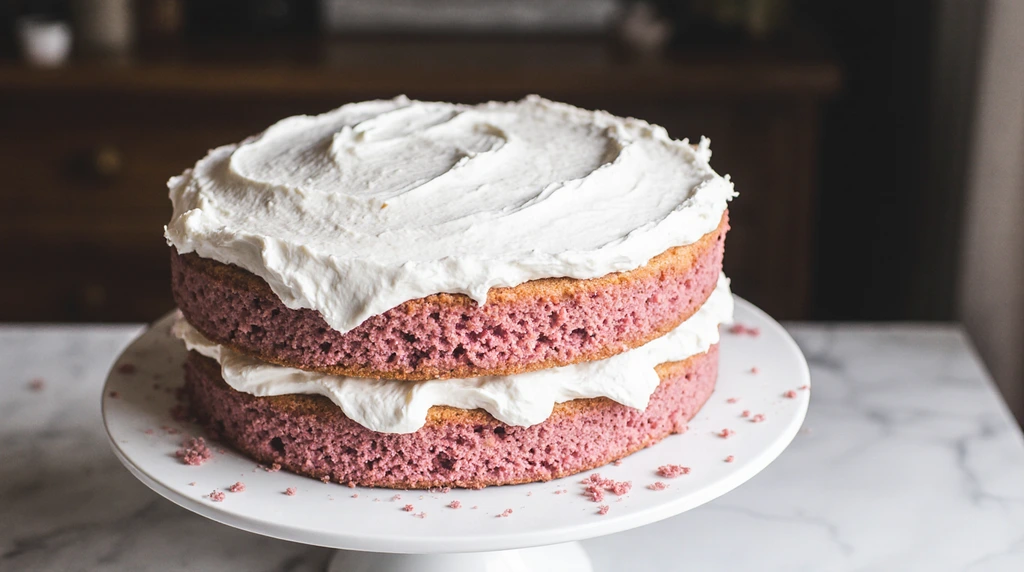
Okay, so moist pink velvet cake wasn’t even on my radar until my daughter’s 6th birthday party last March. She wanted “a pink cake but not strawberry” and honestly, I panicked a little. Red velvet? Sure, done that a million times. But pink? I think… no, I know this turned into one of those happy accidents where you mess up so spectacularly that you accidentally create something amazing.
Here’s the thing about making a moist pink velvet cake—everyone assumes it’s just red velvet with less food coloring. Wrong. So wrong. I learned this the hard way when my first attempt came out looking like a sad, pale ghost of a cake. My husband took one look and said, “Is it… raw?” It wasn’t. It was just tragically bad. The moist pink velvet cake I eventually figured out has its own personality, its own ratio of ingredients, and honestly? It’s better than the red version. (Don’t @ me, red velvet fans.)
How I Accidentally Became the Pink Velvet Cake Person
So basically what happened was this: I was scrolling through Pinterest at like 11 PM—as one does—and saw this gorgeous pink velvet cake. But the recipe was in grams and I’m an American who stubbornly refuses to buy a kitchen scale. Started converting measurements, got distracted by my cat knocking over a plant, came back to my calculator, and somehow ended up with completely different proportions. Made the moist pink velvet cake anyway because I’d already cracked the eggs.
Best mistake ever.
Now everyone at my daughter’s school asks me to make this moist pink velvet cake for their kids’ birthdays. I’ve made it probably 15 times in the last seven months. My neighbor Sarah swears by the boxed mix version, but come on—this is way better and barely more effort.
The Ingredients for moist pink velvet cake (And My Opinions About Them)
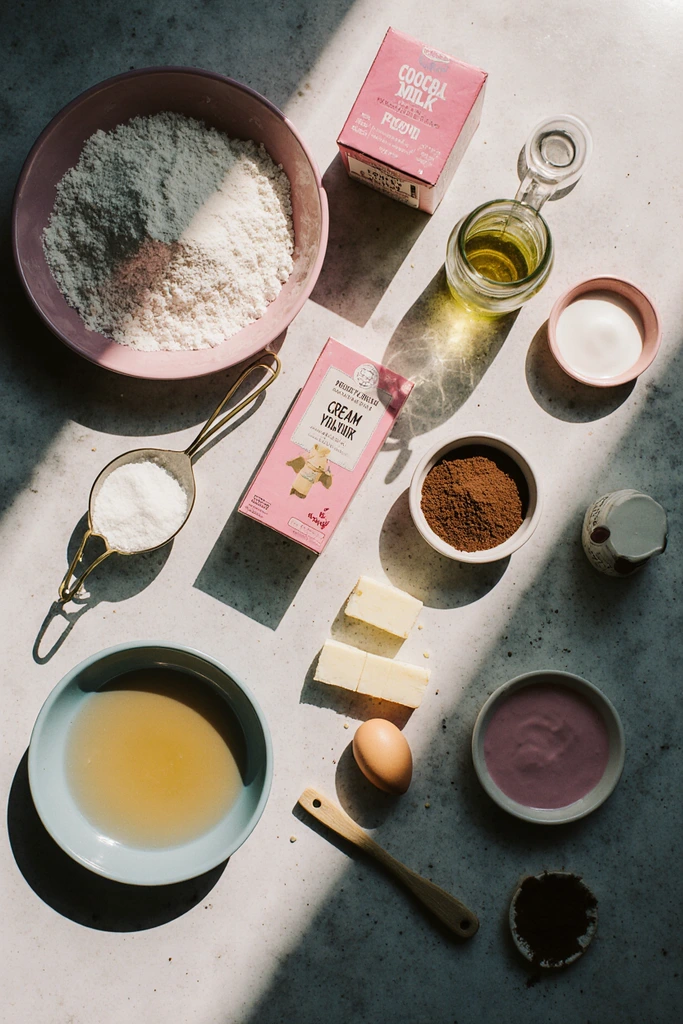
For the Cake:
- 2 ½ cups all-purpose flour (use the measuring cup, level it off with a knife, don’t pack it down)
- 2 cups granulated sugar (I use regular white sugar, nothing fancy)
- 3 tablespoons cocoa powder (yes, really—trust me on this one)
- 1 teaspoon baking soda
- 1 teaspoon salt (sea salt if you’re fancy, regular salt if you’re normal like me)
- 2 large eggs (room temperature, which I always forget until it’s too late)
- 1 cup buttermilk (or make fake buttermilk with milk + vinegar like I usually do)
- 1 cup vegetable oil (not olive oil—learned THAT lesson the gross way)
- 1 tablespoon white vinegar
- 2 teaspoons vanilla extract (the real stuff, not imitation)
- Pink gel food coloring (NOT liquid—this is crucial for a moist pink velvet cake)
For the Cream Cheese Frosting:
- 16 oz cream cheese, softened (leave it out for like 2 hours, or microwave for 10 seconds if you’re impatient)
- 1 cup unsalted butter, softened
- 4 cups powdered sugar (maybe more, maybe less—depends on how sweet you like it)
- 2 teaspoons vanilla extract
- Pinch of salt
Shopping tip? Good luck finding gel food coloring at a regular grocery store. I had to order mine from Amazon after visiting three stores and finding only the liquid stuff. Also, don’t buy pre-softened cream cheese in a tub. Just don’t. It’s not the same and your frosting will be weird.
Making This Moist Pink Velvet Cake (Real Talk)
Step 1: Preheat your oven to 350°F. Grease two 9-inch round cake pans and line the bottoms with parchment paper. I always forget the parchment paper step and then regret it when the cake sticks.
Step 2: Mix all your dry ingredients—flour, sugar, cocoa powder, baking soda, and salt—in a big bowl. Like, actually big. I used a medium bowl once and flour went EVERYWHERE when I started mixing.
Step 3: In another bowl, whisk together eggs, buttermilk, oil, vinegar, and vanilla. This is gonna look kinda weird and separated. That’s normal. For a moist pink velvet cake, this weird-looking mixture is exactly what you want.
Step 4: Here’s where it gets interesting—oh wait, I forgot to mention—add your pink food coloring to the wet ingredients NOW, not later. Start with a tiny amount (like 1/4 teaspoon of gel color) and add more until you get that perfect pink. I usually use about 1/2 teaspoon but it depends on the brand. Last Tuesday I used a different brand and needed way more. It’ll look super bright in the batter but bakes down to a softer pink.
Step 5: Pour wet ingredients into dry ingredients. And here’s the thing everyone gets wrong—don’t overmix. Seriously. Mix until JUST combined. It’ll look lumpy and kinda gross, but that’s what keeps your moist pink velvet cake actually moist. Overmix it and you’ll get a dense, dry cake that tastes like disappointment.
Step 6: Divide batter between your two pans. They’ll be pretty full, which freaked me out the first time, but it’s fine. Just don’t fill them more than 2/3 full or you’ll have a volcano situation. (Been there.)
Step 7: Bake for 25-30 minutes. Set timer for 25 minutes, then inevitably forget and panic at 32 minutes when you smell cake. Check with a toothpick—it should come out with just a few moist crumbs. If you burn the edges (been there), just trim them off and cover with extra frosting. No one will know.
Step 8: Let cakes cool in pans for 10 minutes, then turn out onto wire racks. If you try to frost them while they’re still warm, the frosting will melt and you’ll cry. Ask me how I know.
The Frosting (Which Makes or Breaks Everything)
Beat softened cream cheese and butter together until fluffy—like actually fluffy, not just “mixed together.” This takes longer than you think. Maybe 3-4 minutes with an electric mixer.
Add powdered sugar one cup at a time. I always get impatient and dump it all in at once, then end up covered in a sugar cloud. Learn from my mistakes.
Add vanilla and salt. Taste it. Need more sugar? Add more. Too sweet? Add a tiny pinch more salt. This is your frosting, make it how YOU like it.
The key to making this moist pink velvet cake look good is getting the frosting consistency right. Too soft and it’ll slide off. Too stiff and you’ll tear the cake trying to spread it. Should be like… thick peanut butter? Does that make sense?
Assembly (The Scary Part)

Put first layer on your serving plate. Spread about 3/4 cup frosting on top. I use an offset spatula but honestly a butter knife works fine.
Add second layer. Try to line it up straight. (I never do.)
Crumb coat the whole thing—that’s a thin layer of frosting to trap the crumbs. Stick it in the fridge for 20 minutes. This step seems annoying but trust me, it makes the final frosting SO much easier.
Final frosting layer. Take your time. Or don’t—rustic looks are in, right? I always tell people my messy frosting is “intentional texture.”
Things I’ve Learned About Moist Pink Velvet Cake
The cocoa powder is NOT optional. I tried making it without once, thinking “it’s pink, who cares about chocolate?” Me. I care. It tasted flat and boring. The tiny bit of cocoa gives it that signature velvet flavor that makes a moist pink velvet cake different from just “pink cake.”
Room temperature ingredients actually matter for this one. Cold eggs make the batter weird and lumpy—not the good kind of lumpy, the bad kind where it won’t mix properly.
The vinegar reacts with the baking soda to make it super fluffy. Chemistry! I’m not a scientist, but this works. Don’t skip it.
You can make this as cupcakes! Same recipe, just bake for 18-20 minutes. I did this for my daughter’s class party because carrying a whole cake on the bus seemed like asking for trouble.
Leftover cake (if that exists in your house) stays moist if you cover it well. Like, really well. I use plastic wrap pressed directly on the cut side, then aluminum foil over the whole thing. Stays good for 3-4 days, but good luck making it last that long.
My Random Tips That Actually Help
Found out by accident that adding an extra tablespoon of buttermilk makes the cake even more moist. The recipe works fine as written, but if you want to make an extra-moist pink velvet cake, try it.
Don’t use a whisk for mixing the batter. Trust me. Spoon or spatula works way better for folding. Whisk makes you want to overmix.
If your frosting gets too soft while you’re working (especially in summer), just stick the whole bowl in the fridge for 10 minutes. Game changer.
Kids eat this with sprinkles on top. Adults pretend sprinkles are beneath them but secretly love it. Add the sprinkles.
Some people swear you need cake flour for a more tender crumb. I’ve made this moist pink velvet cake with both all-purpose and cake flour. Honestly? Can’t tell the difference. Save your money.
Why This Recipe Works (When Others Don’t)
Look, I’ve tried probably 10 different pink velvet cake recipes. Some were too dry. Some tasted like nothing. Some had that weird chemical taste from too much food coloring. This one actually stays moist (that’s why I keep saying “moist pink velvet cake”—it’s the whole point), has real flavor, and doesn’t taste like you’re eating food dye.
The oil instead of butter keeps it moist longer. The buttermilk adds tanginess that balances the sweet. The tiny bit of cocoa adds depth without making it taste like chocolate cake. Everything works together.
And honestly? This is way better than the restaurant version. I had a $7 slice of pink velvet cake at some fancy bakery last month and it was DRY. Like eating pink sawdust. Mine is better and I’ll die on this hill.
Real Talk About Food Coloring
I know some people freak out about food coloring. My sister refuses to eat anything with artificial colors. That’s fine! You can use beet powder or freeze-dried strawberry powder for natural pink color. I tried it once—the cake was more beige-pink than hot pink, and had a subtle earthy taste that my daughter hated. But if that’s your thing, go for it. Start with 2 tablespoons beet powder and adjust.
For everyone else who doesn’t mind a little gel color? Use the good stuff. Wilton or AmeriColor gel food coloring works great. The cheap liquid stuff from the grocery store makes the cake taste metallic and you need SO much that the batter gets too wet.
The Verdict
People keep asking for this moist pink velvet cake recipe, so I guess I did something right. My daughter asks for it instead of regular cake for every occasion now. Last week her friend came over and said, “Can we have that pink cake?” See? Even other people’s kids are obsessed.
It’s not fancy. The frosting might be a little crooked. Sometimes the layers aren’t perfectly even. But it’s good—like, really good—and that’s what matters. The moist pink velvet cake texture is perfect, the flavor is there, and everyone always wants seconds.
If I can make this without burning down my kitchen (which I’ve almost done twice), anyone can. Just follow the steps, don’t overthink it, and remember that even if it looks messy, it’ll taste amazing.
Seriously, try this and tell me what you think. Does your pink velvet cake turn out as moist? Anyone else have tricks for making the layers more even? Let me know because I’m still working on that part.
Happy baking! (and may your smoke alarms stay quiet) 🎂💗
Table of Contents
Moist Pink Velvet Cake
A perfectly moist pink velvet cake with cream cheese frosting that's better than any bakery version. This easy recipe creates a tender, flavorful cake with beautiful pink color and rich frosting—perfect for birthdays and special celebrations.
Ingredients
- 2 ½ cups all-purpose flour
- 2 cups granulated sugar
- 3 tablespoons cocoa powder
- 1 teaspoon baking soda
- 1 teaspoon salt
- 2 large eggs, room temperature
- 1 cup buttermilk
- 1 cup vegetable oil
- 1 tablespoon white vinegar
- 2 teaspoons vanilla extract
- ½ teaspoon pink gel food coloring
- 16 oz cream cheese, softened
- 1 cup unsalted butter, softened
- 4 cups powdered sugar
- 2 teaspoons vanilla extract (for frosting)
- Pinch of salt (for frosting)
Instructions
-
Step 1Preheat oven to 350°F (175°C). Grease two 9-inch round cake pans and line bottoms with parchment paper.
-
Step 2In a large bowl, whisk together flour, sugar, cocoa powder, baking soda, and salt.
-
Step 3In another bowl, whisk together eggs, buttermilk, oil, vinegar, and vanilla extract.
-
Step 4Add pink gel food coloring to wet ingredients, starting with 1/4 teaspoon and adjusting to desired shade.
-
Step 5Pour wet ingredients into dry ingredients and mix until just combined. Do not overmix—batter should be slightly lumpy.
-
Step 6Divide batter evenly between prepared pans, filling each about 2/3 full.
-
Step 7Bake for 25-30 minutes, until toothpick inserted in center comes out with just a few moist crumbs.
-
Step 8Cool cakes in pans for 10 minutes, then turn out onto wire racks to cool completely.
-
Step 9For frosting: Beat softened cream cheese and butter together for 3-4 minutes until fluffy.
-
Step 10Add powdered sugar one cup at a time, beating well after each addition. Mix in vanilla and salt.
-
Step 11Place first cake layer on serving plate and spread 3/4 cup frosting on top. Add second layer.
-
Step 12Apply thin crumb coat of frosting over entire cake. Refrigerate for 20 minutes.
-
Step 13Apply final layer of frosting, smoothing with offset spatula or butter knife. Decorate as desired.