
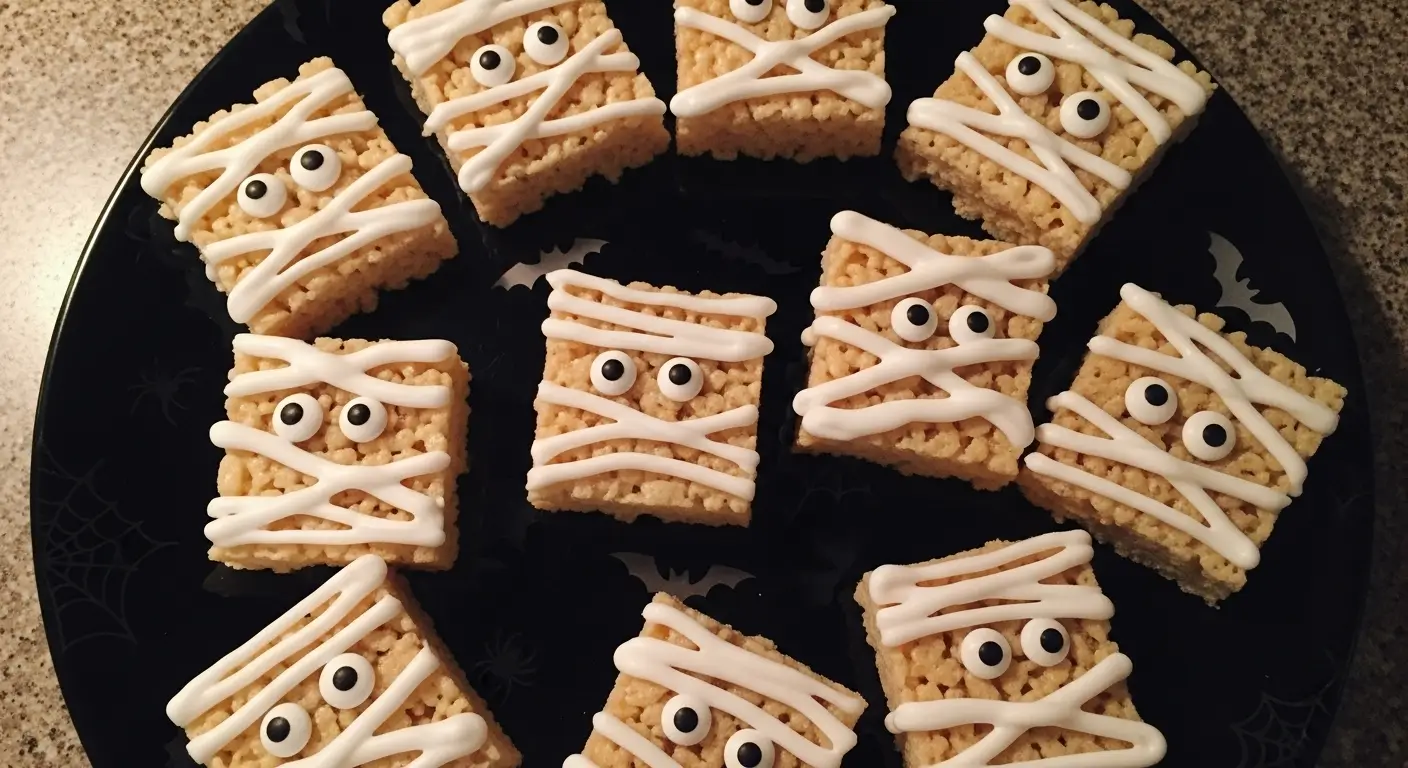
Mummy Halloween Rice Krispie treats seemed like the easiest Halloween project ever—just drizzle some white stuff over regular treats and stick on some eyes, right? Well, my first attempt looked less like ancient Egyptian mummies and more like someone had sneezed marshmallow fluff all over some Rice Krispies. The “bandages” were either too thick and globby or so thin you couldn’t see them.
But after four attempts and one minor kitchen disaster involving melted white chocolate everywhere except where it was supposed to be, I finally figured out how to make mummy Halloween Rice Krispie treats that actually look like mummies instead of abstract art projects gone wrong.
The Mummy Halloween Rice Krispie Treats Evolution
This whole mummy Halloween Rice Krispie treats obsession started because my 7-year-old announced that mummies were “way cooler than ghosts” and demanded mummy treats for his Halloween party. How hard could it be? They’re just white Rice Krispies with some drizzled icing and candy eyes.
Turns out, there’s a fine art to making mummy bandages that don’t look like someone just randomly squirted frosting on dessert squares. My first batch of mummy Halloween Rice Krispie treats looked like they’d been in some kind of bakery explosion. The white chocolate was too thick, the pattern was random, and honestly, they looked more like modern art than ancient mummies.
The breakthrough with mummy Halloween Rice Krispie treats came when I stopped trying to be perfect and started thinking about what actual mummy bandages look like—layered, slightly messy, but with a definite pattern. These treats now look intentionally wrapped instead of accidentally decorated.
What Makes Mummy Halloween Rice Krispie Treats Actually Work
The secret to good mummy Halloween Rice Krispie treats isn’t just the white chocolate drizzle—it’s the technique. The bandages need to look like they’re actually wrapped around something, not just randomly drizzled on top. And the eyes need to peek through the bandages like a real mummy, not just sit on top like afterthoughts.
These mummy Halloween Rice Krispie treats hit that sweet spot between “looks professionally made” and “actually doable on a weeknight when you’re already tired.”
What You Need for Mummy Halloween Rice Krispie Treats:
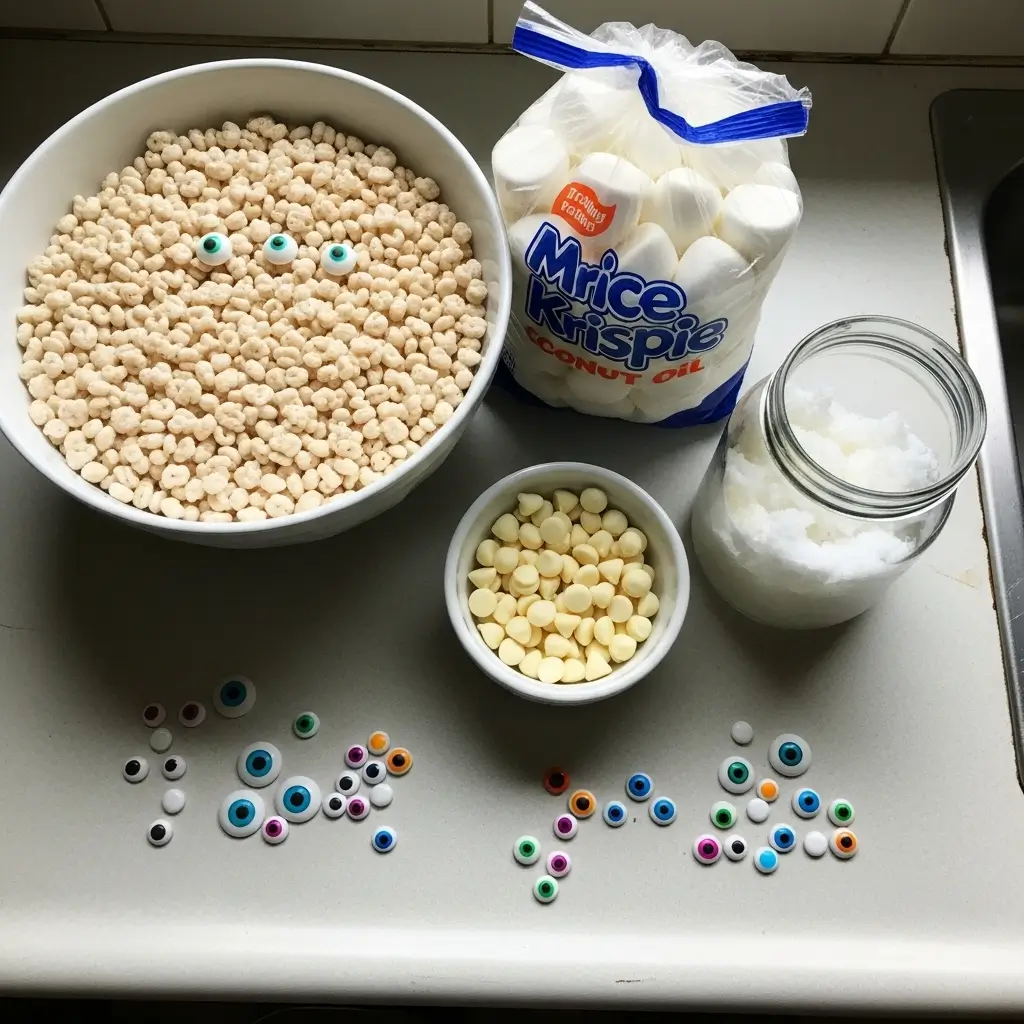
For the Base:
- 6 cups Rice Krispies cereal
- 4 cups mini marshmallows
- 3 tablespoons butter
- 1/4 teaspoon vanilla extract
- Cooking spray
For the Mummy Wrapping:
- 1 cup white chocolate chips (the good kind, not the waxy ones)
- 2 tablespoons coconut oil
- OR 1 cup white candy melts (easier to work with)
For the Eyes:
- Candy eyes (various sizes)
- OR mini chocolate chips for a more subtle look
Tools You’ll Need:
- Fork or spoon for drizzling
- Toothpicks for adjusting drizzle patterns
- Parchment paper
The coconut oil is crucial for mummy Halloween Rice Krispie treats—it makes the white chocolate flow better and gives you more working time before it hardens. Trust me on this one.
Making Mummy Halloween Rice Krispie Treats Step by Step
Step 1: Create Your Base Grease your 9×13 pan with cooking spray. Make your basic Rice Krispies treats—melt butter for 30 seconds, add marshmallows and microwave for 90 seconds (stirring halfway), add vanilla, then quickly mix in cereal and press into pan.
Let these cool completely. This is important for mummy Halloween Rice Krispie treats because you need a stable base that won’t melt when you add warm white chocolate.
Step 2: Cut Your Mummy Shapes Once cooled, cut your treats into rectangles about 3 inches by 2 inches. I make mine slightly taller than they are wide—it looks more mummy-like than perfect squares. You should get about 12 mummy Halloween Rice Krispie treats from one batch.
Step 3: Prepare Your Bandage Mixture Melt white chocolate chips with coconut oil in the microwave in 30-second intervals, stirring between each. Don’t overheat—white chocolate is finicky and can seize up on you. The mixture should be smooth and flow easily off a spoon.
If you’re using candy melts instead, just follow the package directions. They’re more forgiving than real white chocolate for mummy Halloween Rice Krispie treats.
Step 4: Wrap Your Mummies Here’s where the magic happens with mummy Halloween Rice Krispie treats. Using a fork or spoon, drizzle the white chocolate back and forth across each treat in horizontal lines. Don’t make them perfectly straight—real bandages would be slightly uneven.
Let the first layer set for about 2 minutes, then add more drizzle going in slightly different directions. You want to build up layers that look like actual wrapped bandages, not just white lines on top.
Step 5: Add the Eyes While the top layer of chocolate is still slightly soft, gently press in candy eyes. I usually use different sized eyes for each mummy—it gives them personality. Place them at slightly different heights and angles so your mummy Halloween Rice Krispie treats look like they have individual expressions.
Step 6: Final Details Use a toothpick to adjust any bandage lines that look too perfect or to create small gaps where the eyes peek through. The goal is to make your mummy Halloween Rice Krispie treats look authentically wrapped, not artificially decorated.
Pro Tips for Perfect Mummy Halloween Rice Krispie Treats
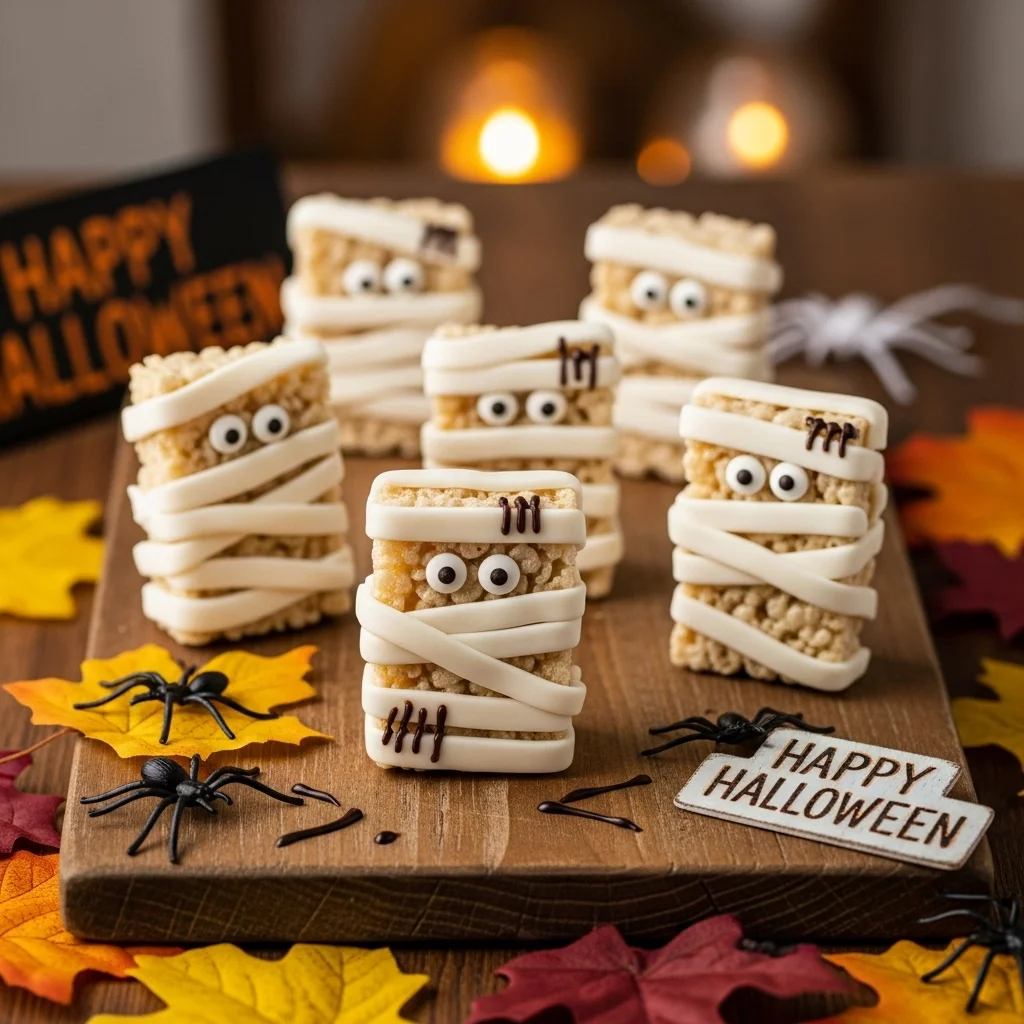
Temperature Control: The white chocolate needs to be warm enough to flow smoothly but not so hot that it melts the Rice Krispies underneath. Test on one treat first.
Layering Technique: Build up the bandages in layers rather than trying to create the whole look at once. This gives your mummy Halloween Rice Krispie treats more realistic depth.
Eye Placement: The eyes should look like they’re peeking through gaps in the bandages, not just sitting on top. Press them in slightly and adjust the chocolate around them.
Working Time: White chocolate starts to thicken as it cools, so work on 3-4 mummy Halloween Rice Krispie treats at a time rather than trying to do them all at once.
The Bandage Pattern Strategy
I’ve found that the best mummy Halloween Rice Krispie treats have bandages that go in multiple directions—some horizontal, some slightly diagonal, some wrapping around the edges. Think about how you’d actually wrap a bandage around something.
Start with horizontal lines across the middle, then add some that go slightly diagonal. Finally, add some shorter lines that look like the ends of bandages wrapping around the sides. This layered approach makes your mummy Halloween Rice Krispie treats look three-dimensional instead of flat.
Real Talk About Mummy Halloween Rice Krispie Treats
These look way more complicated than they actually are. The most challenging part is getting the white chocolate consistency right, and once you nail that, you’re basically just drawing lines and sticking on eyes.
Some of your mummy Halloween Rice Krispie treats will look like they came from a professional bakery, others will look charmingly homemade. Both are perfect—mummies should look a little rough around the edges anyway.
The white chocolate can be a little temperamental, but even if it’s not perfect, it still looks like mummy bandages. I’ve had batches where the chocolate was too thick and others where it was too thin, and honestly, they all looked appropriately mummy-like.
Storage and Serving Mummy Halloween Rice Krispie Treats
These keep well covered at room temperature for up to three days. The white chocolate stays put pretty well, though it can get a little soft in very warm weather.
For parties, I like to arrange the mummy Halloween Rice Krispie treats on a black plate or tray—the contrast makes the white bandages pop and the treats look extra spooky.
Variations I’ve Accidentally Created
The Chocolate Mummy Version: Use chocolate Rice Krispies treats as the base instead of regular ones. The dark base makes the white bandages even more dramatic for these mummy Halloween Rice Krispie treats.
The Colorful Bandage Version: Add a tiny bit of food coloring to make “aged” bandages that look more yellow or gray. Gives your mummy Halloween Rice Krispie treats a more authentic ancient look.
The Double-Eyed Version: Use four eyes instead of two for a more otherworldly look. These mummy Halloween Rice Krispie treats look properly supernatural.
The Messy Mummy Version: Make the bandages extra drippy and uneven for mummies that look like they’re falling apart. Kids love these chaotic mummy Halloween Rice Krispie treats.
Why These Mummy Halloween Rice Krispie Treats Work
They’re instantly recognizable as mummies without being scary enough to upset little kids. The white chocolate bandages are sweet and familiar, the candy eyes are more cute than creepy, and they still taste like everyone’s favorite childhood treat.
The technique is simple enough that even people who claim they can’t decorate anything can make mummy Halloween Rice Krispie treats that look intentional. And kids absolutely love helping with the bandage-wrapping part.
What I Learned Making Mummy Halloween Rice Krispie Treats
Patience is everything with the white chocolate. Rushing the melting or trying to use it too hot will ruin your mummy Halloween Rice Krispie treats. Taking time to get the consistency right makes all the difference between professional-looking treats and hot messes.
Also, imperfection is your friend here. The best mummy Halloween Rice Krispie treats look slightly uneven and wrapped by hand, not like they were made by a machine. Embrace the handmade look.
The Kid Factor
Children are obsessed with making these mummy Halloween Rice Krispie treats. There’s something satisfying about drizzling the white chocolate and watching the mummies come to life. My kids have made these for school parties, scout meetings, and random Tuesday afternoons when they were bored.
The great thing about mummy Halloween Rice Krispie treats is that kids can help with almost every step, and their slightly chaotic decorating style actually works better than adult perfectionism. Their mummies look more authentically wrapped and way more charming.
Final Thoughts on Mummy Halloween Rice Krispie Treats
These have become my go-to Halloween treat because they look impressive but aren’t actually that difficult to make. The mummy Halloween Rice Krispie treats always get compliments, kids think they’re hilarious, and they photograph well for social media if that’s your thing.
The best part about mummy Halloween Rice Krispie treats is that even when they don’t turn out exactly as planned, they still look like mummies. Messy bandages? That’s character. Uneven eyes? That’s personality. They’re supposed to look ancient and slightly worn, not perfect.
Try making these mummy Halloween Rice Krispie treats and watch how excited people get when they see them. There’s something about cute mummies that makes everyone smile, even people who usually avoid Halloween treats.
Happy haunting, and may your mummy Halloween Rice Krispie treats be perfectly imperfect! 👻🏺
Check more Halloween desserts like this : 10 Easy Halloween Rice Krispie Treats That Won’t Make You Want to Scream (In Frustration)
Mummy Halloween Rice Krispie Treats
Adorable Mummy Halloween Rice Krispie treats with white chocolate bandage drizzles and candy eyes. Easy Halloween dessert that looks professional but is simple enough for kids to help make.
Ingredients
- 6 cups Rice Krispies cereal
- 4 cups mini marshmallows
- 3 tablespoons butter
- 1/4 teaspoon vanilla extract
- Cooking spray
- 1 cup white chocolate chips
- 2 tablespoons coconut oil
- Candy eyes (various sizes)
- Mini chocolate chips (optional for eyes)
Instructions
-
Step 1Grease 9x13 pan with cooking spray and set aside.
-
Step 2Melt butter in large microwave-safe bowl for 30 seconds.
-
Step 3Add marshmallows and microwave for 90 seconds, stirring halfway through until smooth.
-
Step 4Stir in vanilla extract and mix well.
-
Step 5Quickly stir in Rice Krispies cereal until evenly coated.
-
Step 6Press mixture into prepared pan and let cool completely, about 30 minutes.
-
Step 7Cut cooled treats into rectangles about 3x2 inches for mummy shapes.
-
Step 8Melt white chocolate chips with coconut oil in microwave in 30-second intervals, stirring between each, until smooth.
-
Step 9Using fork or spoon, drizzle white chocolate across treats in horizontal lines to create bandage pattern.
-
Step 10Let first layer set for 2 minutes, then add more drizzle in slightly different directions for layered bandage effect.
-
Step 11While top layer is still soft, gently press candy eyes into treats where they peek through bandage gaps.
-
Step 12Use toothpick to adjust bandage lines and create realistic wrapped appearance.
-
Step 13Let white chocolate set completely, about 15 minutes, before serving.
-
Step 14Store covered at room temperature for up to 3 days.