
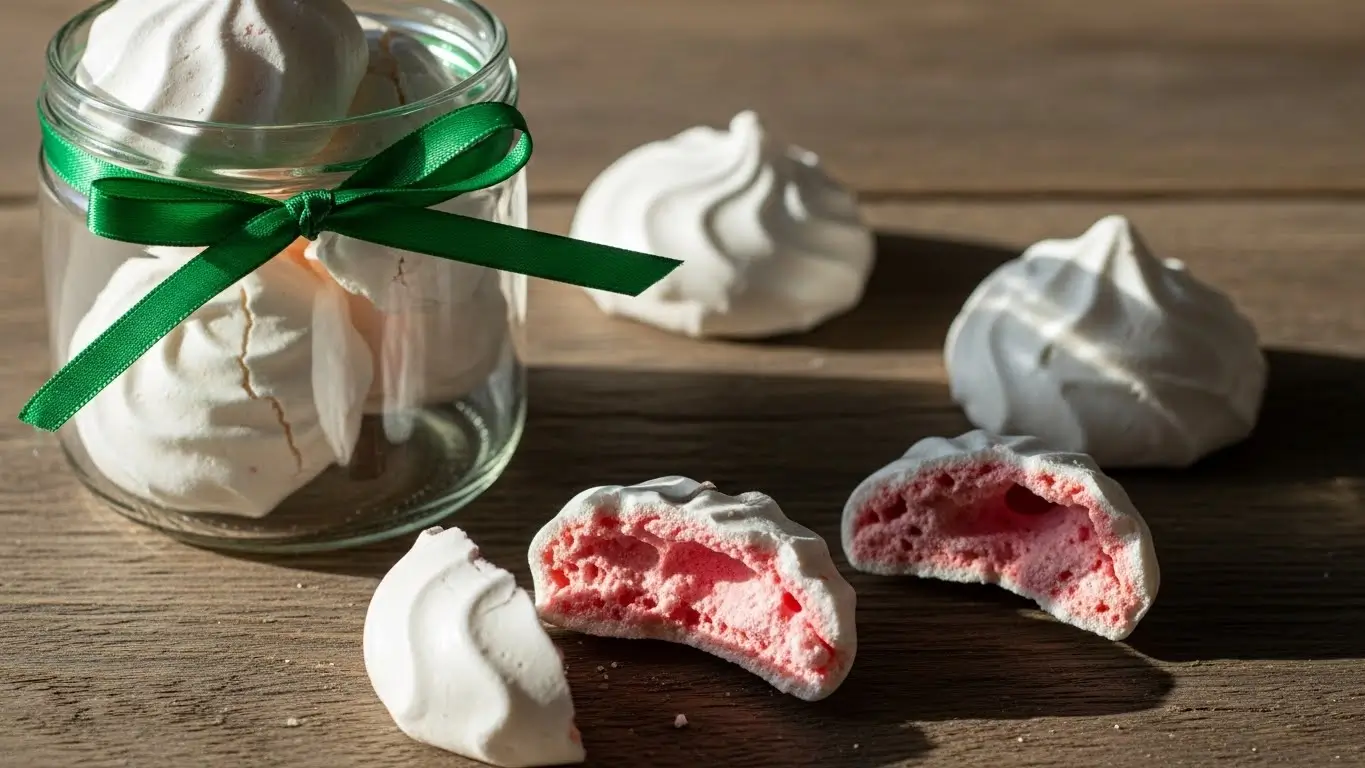
Peppermint meringues are basically edible clouds, and I’m obsessed with them. Like, weirdly obsessed. I made my first batch last December thinking they’d be this super complicated fancy thing, and then I realized they’re literally just egg whites and sugar whipped into oblivion with some peppermint thrown in. Mind. Blown.
So, full disclosure – my first attempt at peppermint meringues was an absolute disaster. I mean, we’re talking flat, weepy, sad little puddles that stuck to the pan like glue. My roommate walked in, looked at my baking sheet, and goes, “Are those… cookies?” No, Jessica. They were supposed to be beautiful peppermint meringues. They were supposed to be AMAZING.
But here’s the thing about this recipe – once you figure out the weird science behind them (and yes, it’s actual science), they’re actually not that hard. They just require patience. Which, look, I don’t really have. But I figured it out anyway because these peppermint meringues are SO worth it.
Also check : 16 Easy Christmas Cookies That Won’t Destroy Your Sanity
Why I Started Making These
Everyone keeps asking for this recipe, and honestly? I started making these meringues because I had a bunch of egg whites left over from making custard. I was gonna throw them away, then I Googled “what to do with egg whites” at like 11 PM and fell down this whole meringue rabbit hole.
Peppermint meringues became my thing after my neighbor Sarah (who bakes everything perfectly, it’s annoying) told me meringues were “too finicky” for her. Challenge accepted. If Sarah thinks peppermint meringues are hard, I’m gonna master them out of pure spite. And you know what? I did. Take that, Sarah.
These peppermint meringues remind me of those mints they give you at fancy restaurants, except better because they melt in your mouth and you made them yourself. My 8-year-old nephew refuses to eat anything that’s not chicken nuggets, but somehow loves these. Kids are so weird.
The Ingredient Situation (It’s Simpler Than You Think)
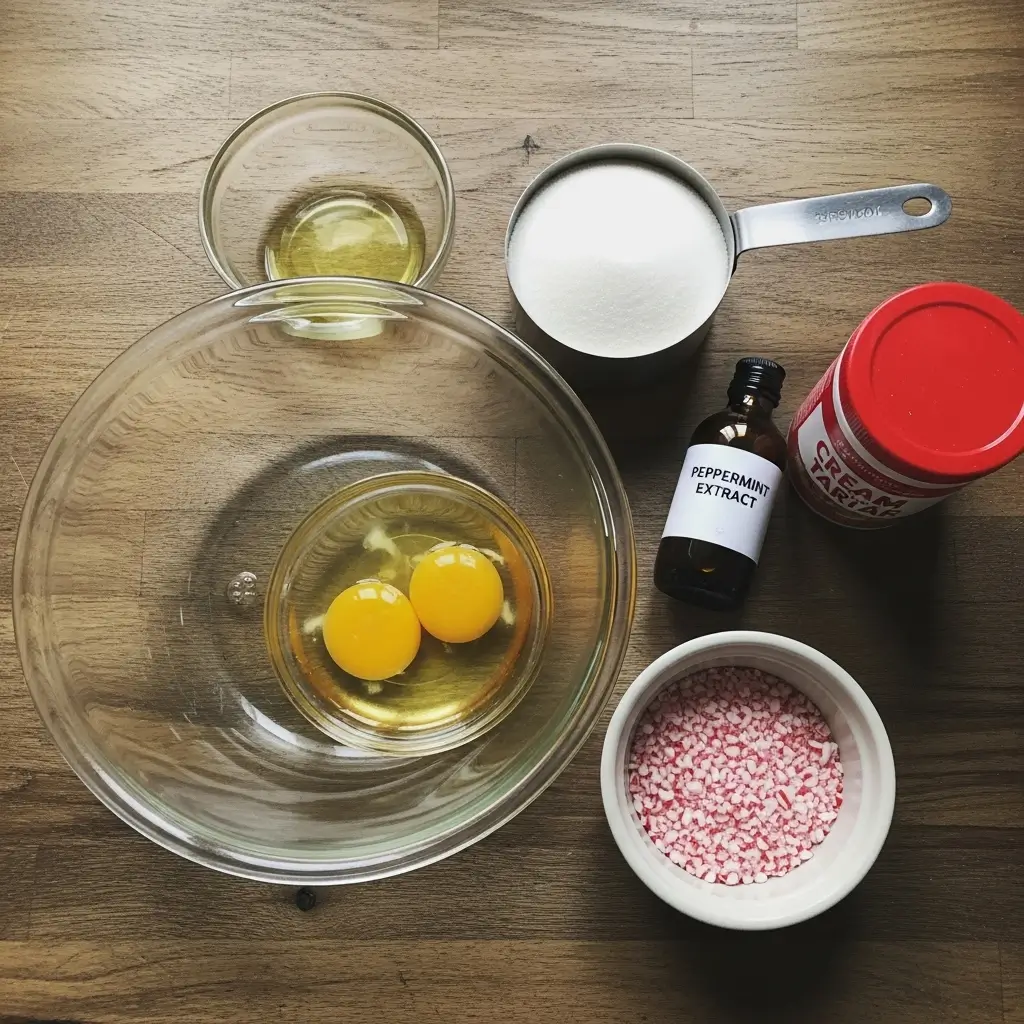
Okay, so peppermint meringues need barely any ingredients, which is both amazing and terrifying. Like, if you mess up, you can’t blame it on having too many things going on. It’s just you and the eggs.
What You Actually Need:
- 4 large egg whites (room temperature – this is IMPORTANT for peppermint meringues)
- 1 cup superfine sugar (or regular sugar pulsed in a food processor)
- 1 teaspoon peppermint extract (start with 1, add more if you’re like me)
- ¼ teaspoon cream of tartar (or a squeeze of lemon juice if you forgot to buy it)
- Pinch of salt
- Red or green food coloring (optional but makes peppermint meringues look festive)
- Crushed candy canes for topping (because why not)
That’s it. That’s literally the entire list for peppermint meringues.
Shopping Fails and Wins
Good luck finding superfine sugar if you don’t shop at fancy stores. I couldn’t find it anywhere the first time, so I just blended regular sugar in my food processor for like 30 seconds. Worked fine. Don’t tell the baking police.
The egg whites need to be room temperature or they won’t whip properly. I learned this by trying to make peppermint meringues with cold eggs straight from the fridge and wondering why they weren’t getting fluffy. Science, apparently. Who knew?
Speaking of eggs – when you separate them, make SURE no yolk gets in the whites. Like, not even a tiny bit. One speck of yolk and your peppermint meringues won’t whip up properly. I ruined a whole batch once because I was lazy and didn’t care about a little yolk. Big mistake. Huge.
Also, don’t buy that artificial peppermint flavoring. Get the real extract. Your peppermint meringues will taste like toothpaste with the fake stuff. Trust me on this one.
Let’s Make These Magical Peppermint Meringues
Alright, preheat your oven to 200°F. Yeah, you read that right. TWO HUNDRED. We’re not baking these peppermint meringues, we’re basically drying them out super slowly. It takes forever but that’s what makes them crispy and perfect.
Line your baking sheets with parchment paper. Don’t use wax paper (been there, melted paper onto cookies, cried a little). Parchment paper or a silicone mat. Those are your only options for peppermint meringues.
Step 1: Getting Set Up
Make sure your bowl and beaters are completely clean and dry. Like, spotless. Any grease or water and your peppermint meringues won’t whip properly. I wipe my bowl with a paper towel and a tiny bit of vinegar before starting. Sounds weird but it works.
Separate your eggs very carefully. I do this by cracking the egg and passing the yolk back and forth between the shell halves over a small bowl. If you break a yolk, start over with a new egg. Save the yolks for scrambled eggs or whatever.
Let the egg whites sit on the counter for like 30 minutes to come to room temperature. I know you want to start immediately, but cold egg whites won’t make good peppermint meringues. Just… trust the process.
Step 2: The Whipping Begins
Put your room temperature egg whites in your super clean bowl. Add the cream of tartar (or lemon juice) and that pinch of salt. The key is—oh wait, I forgot to mention—you need an electric mixer for this. Don’t try to whisk by hand unless you have superhuman arm strength and infinite patience.
Start beating on medium speed until the egg whites get foamy. This takes maybe a minute. They’ll look like bubble bath. That’s normal for peppermint meringues.
Step 3: Sugar Time
Now here’s where it gets real. With the mixer running, start adding your sugar one tablespoon at a time. And I mean SLOWLY. Don’t dump it all in at once or you’ll deflate your whites and end up with sad peppermint meringues.
Last Tuesday, I completely forgot I was adding sugar because I got distracted by my phone, and I added like half the cup at once. They turned out okay but not as fluffy as they should be. So maybe put your phone away.
Keep beating and adding sugar until all the sugar is incorporated. This takes like 5-7 minutes total. Your arm will hurt if you’re using a hand mixer. That’s how you know you’re making real peppermint meringues.
Step 4: The Stiff Peak Situation
Keep beating on medium-high speed until you get stiff peaks. This means when you lift the beater, the meringue stands straight up and doesn’t flop over. It should look glossy and smooth, not grainy.
To test if it’s ready for peppermint meringues: rub a little between your fingers. If you feel sugar crystals, keep beating. If it’s completely smooth, you’re good. Also, turn the bowl upside down over your head. If it doesn’t fall out, it’s ready. (Okay, don’t actually do that. Unless you’re brave. I did it once and it was fine but my roommate thought I was insane.)
Step 5: Flavoring Your Peppermint Meringues
Add your peppermint extract and food coloring if you’re using it. Fold it in gently with a spatula. Don’t use the mixer at this point or you’ll knock out all the air you just spent 10 minutes putting in.
Now, here’s where I’ll be real with you – I use way more peppermint than normal people. I’m talking 2 teaspoons instead of 1. But start with 1 teaspoon for normal peppermint meringues, then add more if you want that punch of mint.
For coloring, just a couple drops of red or green. Or do both and make swirled peppermint meringues. I like to put a stripe of red food coloring down the inside of my piping bag before adding the meringue. Makes them look fancy.
Step 6: Piping (Or Not)
You can pipe peppermint meringues into perfect little swirls using a piping bag with a star tip. OR you can just spoon them onto the baking sheet like I do 90% of the time because who has energy for piping?
If you’re spooning them, use two spoons to make little mounds. They won’t look as pretty but they’ll taste the same. And honestly, imperfect peppermint meringues have more character.
If you’re piping (fancy), fill a piping bag fitted with whatever tip you want, and pipe little swirls about 1 inch apart. They don’t spread much, so you can fit a lot on one sheet.
Sprinkle crushed candy canes on top before baking. Press them in very slightly so they actually stick to your peppermint meringues.
Step 7: The Waiting Game
Bake your peppermint meringues for 90 minutes to 2 hours. I know. It’s ridiculous. You’re basically dehydrating them in a low oven.
Set timer for 90 minutes, then inevitably forget what time you put them in and panic. They should be dry to the touch and easily peel off the parchment when they’re done. If they’re still sticky, give them another 15-30 minutes.
They’ll look weird in the oven – kind of the same as when you put them in. That’s normal. Peppermint meringues don’t really change color much, they just dry out.
Step 8: The Cooling Drama
Here’s the crucial part that nobody tells you about peppermint meringues: turn OFF the oven and leave them inside with the door closed for at least an hour. Preferably overnight.
I know you want to take them out immediately. I KNOW. But if you do, they might crack or weep or get chewy instead of crispy. Peppermint meringues are divas. They need to cool down gradually.
The first time I made these, I opened the oven door right away because I was impatient, and they all cracked like little broken dreams. So just… leave them alone. Go watch Netflix. Resist the urge.
My Random Peppermint Meringues Wisdom
Anyway… here are some things I learned while making approximately 23 batches of peppermint meringues (yes, I counted):
- Humidity is your enemy. Don’t make peppermint meringues on a rainy day. They’ll absorb moisture from the air and get sticky and sad. I tried once during a thunderstorm and they never dried out properly. Disaster. Complete disaster.
- Room temperature eggs are non-negotiable. I keep saying this because it’s THAT important for peppermint meringues. Cold eggs don’t whip up properly. Science.
- Cream of tartar helps stabilize. But if you don’t have it, a tiny squeeze of lemon juice or white vinegar works for peppermint meringues. Don’t use balsamic vinegar. Obviously.
- They’re done when they sound hollow. Tap the bottom gently. If it sounds hollow, your peppermint meringues are ready. If it sounds solid or soft, give them more time.
- Store them properly. Keep peppermint meringues in an airtight container with a little packet of rice or silica gel to absorb moisture. They’ll stay crispy for weeks. Mine never last weeks because I eat them, but theoretically they could.
Wait, I almost forgot – if you accidentally get yolk in your whites, you can try to scoop it out with an eggshell. The yolk sticks to the shell like magic. Found out by accident that this actually works for saving your peppermint meringues.
What Can Go Wrong (And Will)
Some recipes online are just wrong about peppermint meringues, so let me tell you the actual problems you’ll face:
Weeping meringues: This is when liquid pools under your peppermint meringues. Happens when you underbake them or the humidity is too high. Solution: bake longer, make them on a dry day.
Cracking: Your peppermint meringues look like they went through an earthquake. This happens when the oven is too hot or you cool them too fast. Solution: check your oven temperature with a thermometer (mine runs hot), and let them cool in the oven.
Won’t stiffen: You probably got yolk in the whites, or your bowl wasn’t clean, or you added sugar too fast. Start over. I know it sucks, but there’s no saving it.
Chewy instead of crispy: Your peppermint meringues needed more time in the oven. Or you opened the oven door too soon. Be patient, young grasshopper.
Brown meringues: Your oven is too hot. Peppermint meringues should stay white or very slightly ivory. If they’re browning, turn your oven down.
Flavor Variations for Peppermint Meringues
Look, once you master basic peppermint meringues, you can go wild:
- Chocolate peppermint meringues: Add 2 tablespoons cocoa powder with the last bit of sugar. So good.
- Extra minty: Use 2-3 teaspoons peppermint extract if you’re obsessed like me.
- Candy cane crush: Mix crushed candy canes right into the meringue before piping.
- Dipped: Dip the bottoms in melted chocolate after they’re completely cool. This is extra but amazing.
I tried making lemon peppermint meringues once by adding both extracts. Would not recommend. Weird combo. Stick to just peppermint for your peppermint meringues.
Serving These Little Clouds

Peppermint meringues are perfect with coffee or hot chocolate. They’re also great for gifting because they look fancy but are actually made of like five ingredients.
I like to pile them in a glass jar tied with a ribbon and give them to people during the holidays. Makes me look like I have my life together when I absolutely don’t. The perfect illusion.
Kids eat these and get sugar-high within minutes. Consider yourself warned if you’re making peppermint meringues for a party. Actually, definitely make them for parties. The chaos is worth it.
My neighbor Sarah finally admitted these peppermint meringues are better than store-bought ones, and honestly? I was so proud. These are my one baking achievement that actually turned out.
The Real Talk About Peppermint Meringues
Is it just me or are meringues weirdly satisfying to make? Like, watching egg whites turn into glossy peaks feels like magic. These peppermint meringues are basically edible science experiments.
Am I the only one who thinks the best part of peppermint meringues is how they dissolve on your tongue? They’re there and then they’re gone, like some kind of delicious ghost.
Why don’t more people make peppermint meringues at home? Everyone thinks they’re too hard but they’re literally just whipped eggs and sugar. The hardest part is waiting for them to dry out in the oven.
Speaking of waiting – the patience required for peppermint meringues has taught me nothing about having patience in other areas of my life. I’m still impatient. But at least I can make good meringues now.
Final Thoughts
Look, I’m not saying peppermint meringues will change your life, but they might change how you think about baking. They seem impossible and fancy, but they’re actually pretty straightforward once you understand the rules.
These peppermint meringues are my go-to when I need to impress people with minimal actual ingredients. Three main ingredients (eggs, sugar, peppermint) and you’ve got something that looks like it came from a fancy bakery.
If I can make perfect peppermint meringues after starting with those sad puddles of failure, anyone can. And trust me, after multiple batches of weeping, cracking, and general meringue disasters, I’ve earned my stripes.
The key to peppermint meringues is basically: clean bowl, room temp eggs, add sugar slowly, low oven, patience. That’s it. That’s the secret.
Let me know how yours turn out! Seriously, try these peppermint meringues and tell me what you think. Anyone else make them on rainy days and regret it, or is that just me?
Happy baking! (and may your peaks be stiff and your meringues stay crispy) ☁️🎄
Table of Contents
Peppermint Meringues
Light, crispy peppermint meringues that melt in your mouth. Made with egg whites, sugar, and peppermint extract, these festive holiday cookies are easier than they look and perfect for gifting.
Ingredients
- 4 large egg whites, room temperature
- 1 cup superfine sugar (or regular sugar pulsed in food processor)
- 1 teaspoon peppermint extract (up to 2 teaspoons for stronger flavor)
- ¼ teaspoon cream of tartar (or ½ teaspoon lemon juice)
- Pinch of salt
- Red or green food coloring (optional)
- Crushed candy canes for topping
Instructions
-
Step 1Preheat oven to 200°F (93°C). Line baking sheets with parchment paper or silicone mats.
-
Step 2Ensure mixing bowl and beaters are completely clean and dry. Wipe with vinegar and dry thoroughly.
-
Step 3Separate eggs carefully, ensuring no yolk gets into whites. Let egg whites sit at room temperature for 30 minutes.
-
Step 4Place room temperature egg whites, cream of tartar, and salt in mixing bowl. Beat on medium speed until foamy, about 1 minute.
-
Step 5With mixer running, add sugar one tablespoon at a time, allowing each addition to incorporate before adding more. This takes 5-7 minutes total.
-
Step 6Continue beating on medium-high speed until stiff glossy peaks form, 3-5 more minutes. Test by rubbing meringue between fingers - it should feel completely smooth with no sugar crystals.
-
Step 7Gently fold in peppermint extract and food coloring if using, being careful not to deflate the meringue.
-
Step 8Transfer meringue to piping bag fitted with star tip, or use two spoons to create mounds on prepared baking sheets, spacing 1 inch apart.
-
Step 9Sprinkle crushed candy canes on top of each meringue, pressing very lightly to adhere.
-
Step 10Bake for 90 minutes to 2 hours, until meringues are dry to the touch and easily peel off parchment.
-
Step 11Turn off oven and leave meringues inside with door closed for at least 1 hour, preferably overnight, to cool gradually.
-
Step 12Store in airtight container with rice packet or silica gel to keep crispy. Will keep for up to 2 weeks.