

Valentine’s Day Cookies saved my sanity last year when I volunteered to bring treats for my daughter’s class party without thinking it through first. I panicked for about 24 hours until I remembered this ridiculously easy recipe that looks impressive but takes maybe 30 minutes start to finish. These Valentine’s day cookies ended up being so popular that three other moms asked for the recipe before pickup time.
Look, I’m gonna level with you – I used to think homemade Valentine’s day cookies had to be these elaborate decorated masterpieces with royal icing and perfect piping. But these cookies prove that simple can be just as special. They’re soft, buttery, perfectly sweet, and the pink color makes them obviously festive without any fancy decorating skills required.
The genius of these Valentine’s day cookies is that they use one simple dough that you can customize however you want. Make them heart-shaped, add sprinkles, sandwich them with frosting, or keep them plain. The base recipe is foolproof, which means even baking-challenged people can nail these Valentine’s day cookies on the first try.
also check : 15 Easy Valentine’s Day Treats
Why These Valentine’s Day Cookies Actually Work
Here’s the thing about sugar cookies – most recipes make them either too crispy (basically crackers) or too cakey (not cookies anymore). These Valentine’s day cookies hit that perfect middle ground where they’re soft but still have structure. They don’t spread too much, they don’t puff up weird, they just bake into perfect cookies.
The butter content in these cookies is what makes them taste amazing. We’re not skimping on the good stuff here. Real butter creates that melt-in-your-mouth texture that makes these Valentine’s day cookies actually worth eating instead of just looking pretty.
Another reason these Valentine’s day cookies work so well is how they hold their shape. If you cut them into hearts, they stay hearts. No weird spreading or distortion during baking. This makes decorating so much easier because you’re working with clean shapes on your Valentine’s day cookies.
Ingredients for Valentine’s Day Cookies
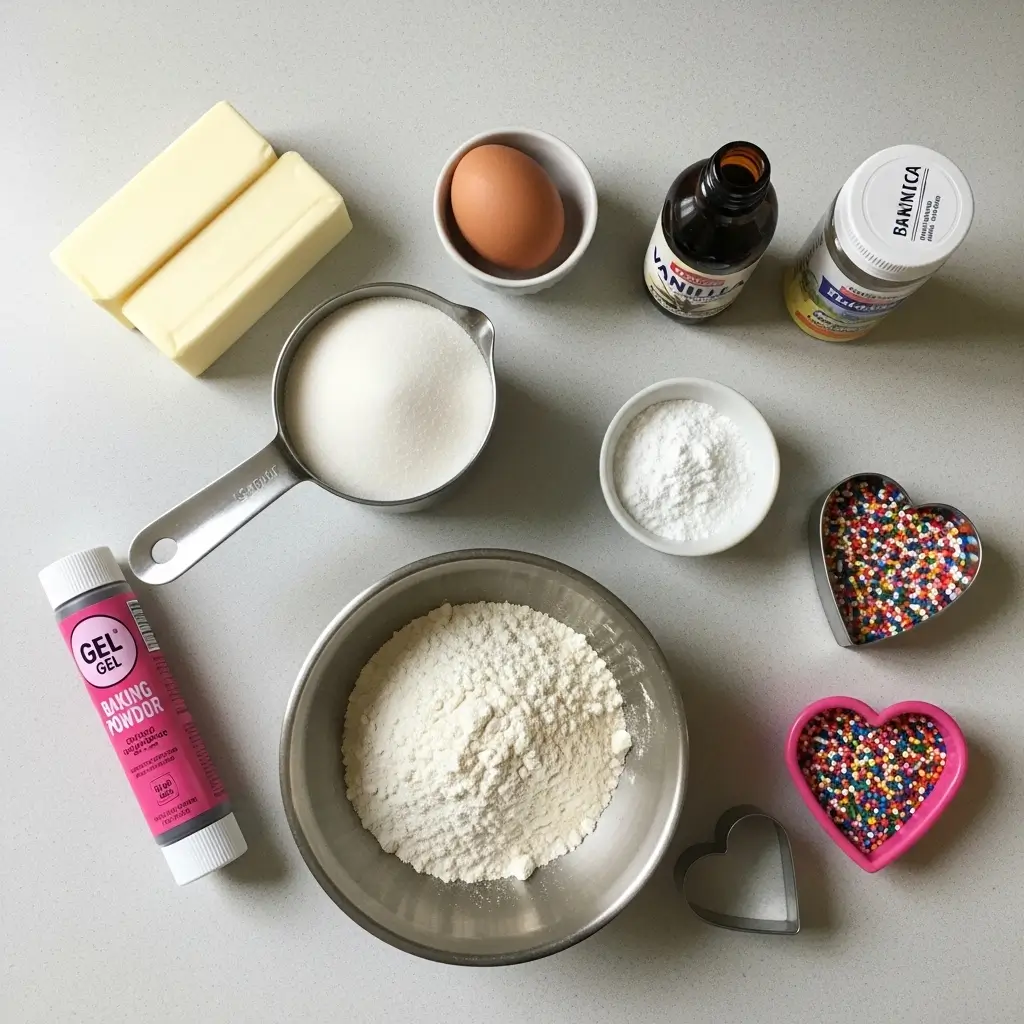
Unsalted Butter: 1 cup (2 sticks) softened to room temperature is the base of these Valentine’s day cookies. Don’t use margarine or salted butter – real unsalted butter is essential for proper flavor and texture. Let it sit out for at least an hour before starting.
Granulated Sugar: 3/4 cup sweetens these cookies without making them too sweet. The sugar also helps create that slightly crispy exterior while keeping the inside soft in your Valentine’s day cookies.
Egg: 1 large egg at room temperature binds everything together. Room temperature eggs mix better with butter, creating smoother dough for your Valentine’s day cookies. Cold eggs can make the butter clump.
Vanilla Extract: 2 teaspoons of pure vanilla extract adds that classic cookie flavor. This is a higher amount than most recipes, which makes these Valentine’s day cookies taste extra delicious. Don’t use imitation vanilla.
All-Purpose Flour: 2.5 cups measured correctly (spoon and level, don’t scoop) creates the structure. Too much flour makes dry, tough cookies. Too little makes spreading disasters. Proper measurement is crucial for perfect Valentine’s day cookies.
Baking Powder: 1.5 teaspoons helps these cookies puff slightly without being cakey. Fresh baking powder is important – check the expiration date or your Valentine’s day cookies might not rise properly.
Salt: 1/2 teaspoon balances the sweetness and enhances all the other flavors in these Valentine’s day cookies. Don’t skip it even though it seems like a lot – cookies need salt.
Pink Food Coloring: Gel food coloring works better than liquid for vibrant pink Valentine’s day cookies. Start with 3-4 drops and add more until you get your desired shade. Gel won’t thin the dough like liquid does.
Optional Add-ins: Sprinkles, mini chocolate chips, or white chocolate chips can be added to the dough or used as decoration on your Valentine’s day cookies. Red and pink sprinkles are obviously perfect for the theme.
Step-by-Step Instructions for Valentine’s Day Cookies
- In a large bowl, beat softened butter with an electric mixer on medium speed for about 1 minute until smooth and creamy. Make sure your butter is truly softened – not melted, not cold, but soft enough to leave an indent when pressed.
- Add the sugar to the butter and beat on medium-high speed for 2-3 minutes until light and fluffy. This creaming process is crucial for tender Valentine’s day cookies. Don’t rush this step – proper creaming makes all the difference.
- Add the egg and vanilla extract to the butter mixture and beat until well combined, about 1 minute. Scrape down the sides of the bowl to make sure everything’s incorporated in your Valentine’s day cookies dough.
- Add pink food coloring at this stage if you want colored cookies. Start with 3-4 drops of gel food coloring and mix. Add more drops until you achieve your desired pink shade for Valentine’s day cookies.
- In a separate bowl, whisk together flour, baking powder, and salt. Make sure these dry ingredients are evenly distributed before adding to the wet ingredients for your Valentine’s day cookies.
- Add the flour mixture to the butter mixture gradually on low speed. Mix just until combined and no dry flour remains. Don’t overmix or your Valentine’s day cookies will be tough. The dough should come together and pull away from the bowl sides.
- Divide dough in half and shape each half into a flat disk. Wrap each disk tightly in plastic wrap. This makes rolling easier later and prevents the dough from drying out.
- Refrigerate for at least 1 hour or up to 3 days. Chilled dough is essential for Valentine’s day cookies that hold their shape. Don’t skip this step – warm dough spreads too much and makes misshapen cookies.
- When ready to bake, preheat oven to 350°F. Line baking sheets with parchment paper or silicone mats. Don’t skip the parchment – these Valentine’s day cookies can stick to bare pans.
- Roll out chilled dough on lightly floured surface to about 1/4 inch thickness. Too thin and your Valentine’s day cookies will be crispy crackers. Too thick and they’ll be cakey. Quarter-inch is the sweet spot.
- Cut out shapes using heart-shaped cookie cutters (or any shape you want). Press cutter straight down and lift straight up – twisting makes uneven edges on your Valentine’s day cookies. Place cut cookies on prepared baking sheets about 2 inches apart.
- Gather scraps, re-roll, and cut more cookies until all dough is used. You can re-roll scraps 2-3 times before the dough gets too warm and tough. Chill scraps if they get too soft.
- If adding sprinkles, add them now before baking. Press them gently into the dough so they stick. Sprinkles added after baking just fall off your Valentine’s day cookies.
- Bake for 10-12 minutes until edges are just barely starting to turn golden. The centers will look slightly underdone – that’s perfect. These Valentine’s day cookies continue cooking on the hot pan after removal.
- Let cookies cool on baking sheet for 5 minutes before transferring to wire rack. They’re fragile when hot but firm up as they cool. Moving them too soon breaks your Valentine’s day cookies.
- Once completely cool, decorate if desired with frosting, additional sprinkles, or sandwich two cookies with frosting between them. Warm cookies make frosting melt, so patience is key with decorated Valentine’s day cookies.

Tips for Perfect Valentine’s Day Cookies
Room temperature ingredients matter. Cold butter won’t cream properly and cold eggs can make butter clump. Let everything sit out for about an hour before starting your Valentine’s day cookies.
Don’t skip chilling the dough. This is the most skipped step and the biggest reason for cookie failures. Chilled dough holds shape, warm dough spreads into blobs. Always chill your Valentine’s day cookies dough.
Use parchment paper or silicone mats. These prevent sticking and promote even baking. Greased pans can make your Valentine’s day cookies spread too much and brown unevenly.
Rotate baking sheets halfway through. Ovens have hot spots. Rotating ensures even baking on all your Valentine’s day cookies instead of some being overdone while others are underdone.
Don’t overbake. These Valentine’s day cookies should look slightly underdone when you take them out. They firm up as they cool. Overbaked cookies are dry and hard instead of soft.
Storage and Make-Ahead for Valentine’s Day Cookies
These Valentine’s day cookies keep at room temperature in airtight containers for up to 1 week. Layer them between parchment paper to prevent sticking, especially if decorated with frosting.
Cookie dough can be made up to 3 days ahead and refrigerated, or frozen for up to 3 months. Wrap disks tightly in plastic wrap, then aluminum foil for freezing. Thaw overnight in fridge before rolling.
Baked and cooled Valentine’s day cookies freeze beautifully for up to 3 months. Freeze in single layers on baking sheets first, then transfer to freezer bags once solid. Thaw at room temperature for 30 minutes before serving.
Common Mistakes with Valentine’s Day Cookies
The biggest mistake is using melted or too-soft butter. Butter should be soft enough to indent but still hold its shape. Melted butter makes your Valentine’s day cookies spread into puddles during baking.
Not chilling the dough is the second most common error. Warm dough loses its shape in the oven. Those perfect hearts turn into blobs if you skip chilling your Valentine’s day cookies dough.
Overbaking is another frequent issue. These cookies should come out looking slightly underdone. They continue cooking on the hot pan and firm up as they cool. Overbaked Valentine’s day cookies are hard and dry.
Re-rolling dough too many times makes tough cookies. Each time you re-roll, you work more flour into the dough. After 2-3 re-rolls, make the remaining Valentine’s day cookies into balls instead of cutting shapes.
Decorating Ideas for Valentine’s Day Cookies
Simple sugar sprinkles before baking create easy decoration. Pink, red, and white sprinkles pressed into dough before baking stick perfectly and look festive on your Valentine’s day cookies.
Royal icing creates professional-looking decorated cookies. Make it thick for piping borders and thin for flooding centers of your Valentine’s day cookies. Let each layer dry before adding the next.
Buttercream frosting tastes better than royal icing and is easier to make. Pipe onto cooled cookies or spread with knife. Color it pink or red for themed Valentine’s day cookies.
Sandwich cookies by spreading frosting between two cookies. Use buttercream, cream cheese frosting, or even Nutella for filling your Valentine’s day cookies.
Chocolate drizzle melted and drizzled over cooled cookies looks elegant with minimal effort. White chocolate on pink cookies or dark chocolate on plain cookies both work beautifully for Valentine’s day cookies.
Why These Beat Store-Bought Cookies
Store-bought Valentine cookies taste artificial and are loaded with preservatives. These homemade Valentine’s day cookies use real butter and vanilla – you can actually taste the difference in quality.
The texture of homemade is incomparable to packaged cookies. These Valentine’s day cookies are soft and tender, not hard and stale-tasting like grocery store versions.
Cost-wise, making these Valentine’s day cookies at home is way cheaper than buying decorated cookies from bakeries. You get 3-4 dozen cookies for the cost of one dozen bakery cookies.
Perfect for Every Valentine Occasion
These Valentine’s day cookies work for classroom parties, office gatherings, romantic dinners, or just because. The recipe scales easily for any crowd size.
Package them in cellophane bags with ribbon for teacher gifts, neighbor treats, or friend appreciation. Homemade Valentine’s day cookies make thoughtful gifts that actually get eaten and appreciated.
Kids can help make and decorate these cookies, turning Valentine prep into quality family time. Let them add sprinkles, use cookie cutters, or help with simple frosting on Valentine’s day cookies.
These Valentine’s day cookies prove that impressive doesn’t have to mean complicated. Simple ingredients, straightforward technique, and a little pink food coloring create cookies worth making year after year 🙂
Valentine's Day Cookies
Easy Valentine's Day Cookies with soft, buttery texture and beautiful pink color. Perfect heart-shaped sugar cookies with simple decorating options. Great for parties, gifts, and celebrations!
Ingredients
- 1 cup (2 sticks) unsalted butter, softened
- 3/4 cup granulated sugar
- 1 large egg, room temperature
- 2 teaspoons vanilla extract
- 2.5 cups all-purpose flour
- 1.5 teaspoons baking powder
- 1/2 teaspoon salt
- Pink gel food coloring (3-5 drops)
- Optional: sprinkles, frosting for decorating
Instructions
-
Step 1Beat softened butter with electric mixer on medium speed for 1 minute until smooth and creamy.
-
Step 2Add sugar and beat on medium-high for 2-3 minutes until light and fluffy.
-
Step 3Add egg and vanilla extract, beat until well combined. Scrape down sides of bowl.
-
Step 4Add pink food coloring if desired, starting with 3-4 drops and adding more until desired shade.
-
Step 5In separate bowl, whisk together flour, baking powder, and salt.
-
Step 6Add flour mixture to butter mixture gradually on low speed. Mix just until combined.
-
Step 7Divide dough in half, shape into flat disks, and wrap tightly in plastic wrap.
-
Step 8Refrigerate for at least 1 hour or up to 3 days.
-
Step 9Preheat oven to 350°F. Line baking sheets with parchment paper.
-
Step 10Roll chilled dough on floured surface to 1/4 inch thickness. Cut with heart-shaped cookie cutters.
-
Step 11Place cookies on prepared baking sheets 2 inches apart. Add sprinkles now if using.
-
Step 12Bake for 10-12 minutes until edges just barely start to turn golden.
-
Step 13Cool on baking sheet for 5 minutes before transferring to wire rack.
-
Step 14Once completely cool, decorate as desired with frosting or leave plain.