
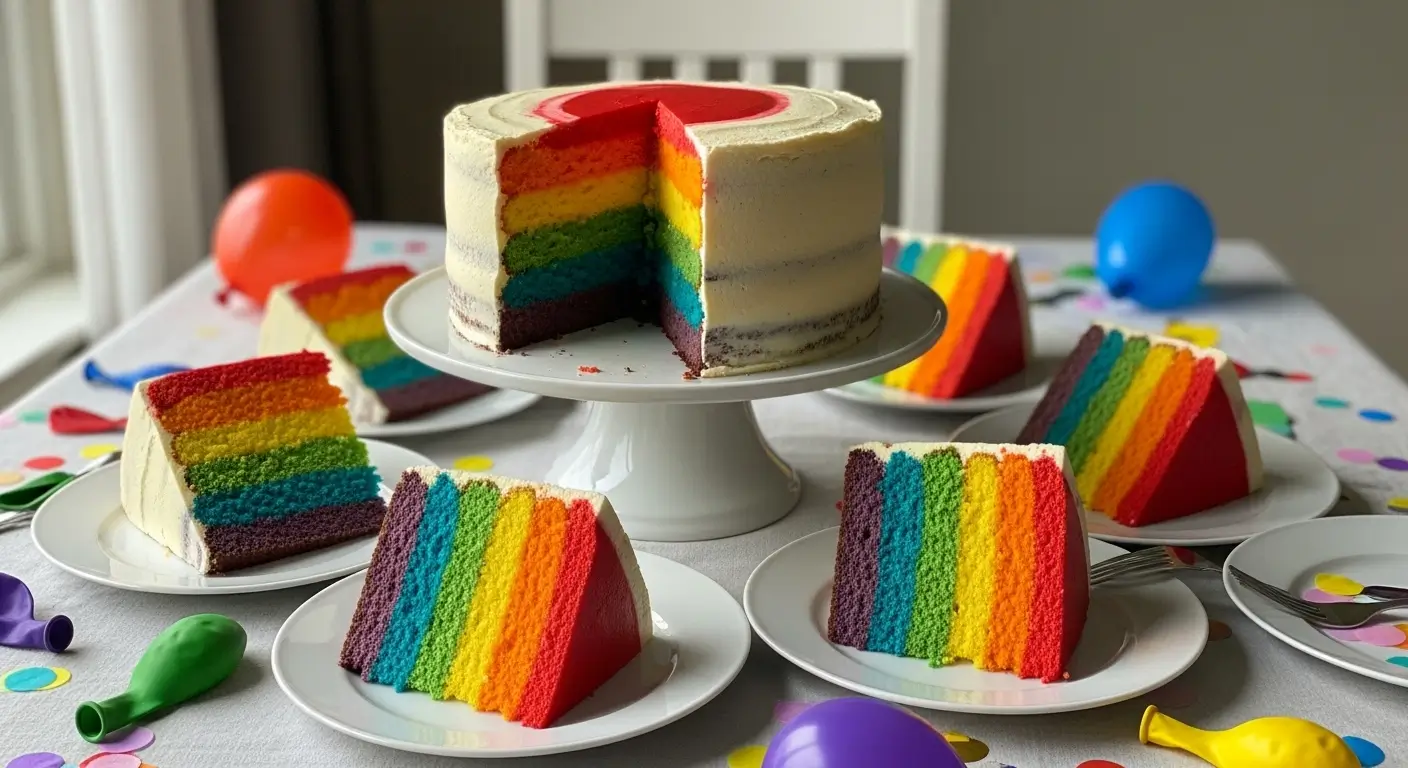
Rainbow layer surprise cake is literally the cake that changed my life as a baker, and I’m not being dramatic here. Okay, maybe I’m being a little dramatic, but seriously, this cake has gotten me more compliments than every other dessert I’ve ever made combined. The first time I cut into one and revealed those gorgeous rainbow layers, my 10-year-old nephew actually gasped and said “Mom, Aunt Sarah is magic!”
Look, I’ll be completely honest with you – rainbow layer surprise cake intimidated the heck out of me for the longest time. All those colors, all those pans, the potential for complete disaster seemed so high. But here’s what I discovered after making this beauty about twelve times: it’s actually way easier than it looks, and the wow factor is absolutely worth the extra dishes.
The secret to an incredible rainbow layer surprise cake isn’t some fancy technique or expensive equipment – it’s patience, good food coloring, and accepting that your kitchen is going to look like a unicorn exploded. And trust me, when you see people’s faces light up at that first slice reveal, you’ll agree that cleaning rainbow batter off your ceiling was totally worth it.
Why This Rainbow Layer Surprise Cake Actually Works
Here’s the thing about rainbow layer surprise cake that took me way too long to figure out: the magic isn’t in making it complicated, it’s in keeping each layer simple and letting the colors do the talking. I used to overthink every step, worrying about getting the “perfect” rainbow gradient, but honestly? Nature doesn’t make perfect rainbows either, and they’re still gorgeous.
This rainbow layer surprise cake recipe creates layers that are sturdy enough to stack without collapsing, moist enough that people actually want seconds (not just Instagram photos), and colorful enough to make everyone believe you’re some kind of baking wizard. The vanilla base is neutral enough to let those vibrant colors shine without competing flavors.
I learned the hard way that not all food colorings are created equal for rainbow layer surprise cake. Liquid food coloring will give you pastel layers at best, and nobody wants a disappointing reveal after all that work. Gel food coloring is absolutely essential – it gives you those vibrant, true colors that make people lose their minds with excitement.
Shopping for Your Rainbow Layer Surprise Cake Adventure
For the vanilla cake base (this makes a lot, but you need it):
- 4 1/2 cups all-purpose flour
- 3 3/4 teaspoons baking powder
- 3/4 teaspoon salt
- 1 1/2 cups unsalted butter, softened (buy the good stuff, you’ll taste the difference)
- 2 2/3 cups granulated sugar
- 6 large eggs, room temperature (seriously, plan ahead for this)
- 1 tablespoon vanilla extract (real vanilla, not imitation)
- 1 3/4 cups buttermilk, room temperature
For the white buttercream that lets your rainbow layer surprise cake colors shine:
- 2 cups unsalted butter, softened
- 8 cups powdered sugar, sifted (yes, sift it, I’m not kidding)
- 1/2 cup heavy cream
- 1 tablespoon vanilla extract
- 1/2 teaspoon salt
For the rainbow magic:
- Gel food coloring in red, orange, yellow, green, blue, and purple (don’t cheap out here)
- 6 matching 8-inch round cake pans (or bake in batches if you don’t have that many)
Pro shopping tip: Buy your gel food coloring from a baking supply store or online. The grocery store stuff works in a pinch, but specialty gel colors give you that Instagram-worthy vibrancy that makes rainbow layer surprise cake truly spectacular. Also, buy extra – you’ll use more than you think, especially for the red and purple layers.
Making the Perfect Rainbow Layer Surprise Cake Base
Step 1: Prep work (don’t skip this or you’ll hate yourself later)
Preheat your oven to 350°F and grease six 8-inch round pans. If you don’t have six pans, you can bake in batches, but honestly, borrowing pans from neighbors is easier than timing multiple batches for rainbow layer surprise cake success.
Line each pan with parchment paper – this is non-negotiable for rainbow layer surprise cake because you cannot have layers sticking. I learned this the hard way when half my blue layer stayed in the pan. Tragic.
Bring your eggs and buttermilk to room temperature. Put the eggs in a bowl of warm water for 15 minutes and microwave the buttermilk for 30 seconds. Temperature matters way more than you’d think for this rainbow layer surprise cake.
Step 2: Making the master batter
In a large bowl, whisk together flour, baking powder, and salt. Set aside and try not to get distracted and forget where you put it (been there).
In your largest mixing bowl or stand mixer, cream the butter and sugar until it’s light and fluffy – about 5-6 minutes. Don’t rush this step; proper creaming is crucial for tender rainbow layer surprise cake layers.
Add eggs one at a time, beating well after each addition. The mixture might look a little weird and separated – that’s totally normal. Add vanilla and beat until combined.
Step 3: Bringing it all together
Here’s where rainbow layer surprise cake can go wrong if you’re not careful. Add the flour mixture in three additions, alternating with buttermilk in two additions. Start and end with flour, and mix just until combined after each addition.
The batter should be smooth and slightly thick. Don’t overmix or your rainbow layer surprise cake will be tough, and nobody wants tough cake hidden under all that beautiful color.
Step 4: The rainbow division magic
Divide your batter into six equal portions using a kitchen scale if you have one (eyeballing works too, but scales are more accurate). I use separate bowls for each color because mixing rainbow layer surprise cake batter in the same bowl just creates muddy colors.
Now comes the fun part – coloring! Add gel food coloring to each portion:
- Red: Start with a tiny amount and build up – red can get muddy fast
- Orange: Mix red and yellow, or use orange gel
- Yellow: This one’s easy, just add yellow gel
- Green: Add green gel gradually for the perfect shade
- Blue: My personal favorite – be generous with the blue
- Purple: Mix red and blue, or use purple gel
Mix each colored batter thoroughly. The colors should be vibrant but not neon – you want rainbow layer surprise cake that looks delicious, not radioactive.
Baking Your Rainbow Layer Surprise Cake to Perfection
Step 5: The great bake-off
Divide each colored batter between your prepared pans, spreading evenly. If you’re baking in batches, keep unbaked batter covered with plastic wrap so it doesn’t dry out.
Bake for 15-20 minutes, until the centers spring back when lightly touched. Don’t overbake – these layers are thin and will dry out quickly. Set a timer for each batch because rainbow layer surprise cake waits for no one.
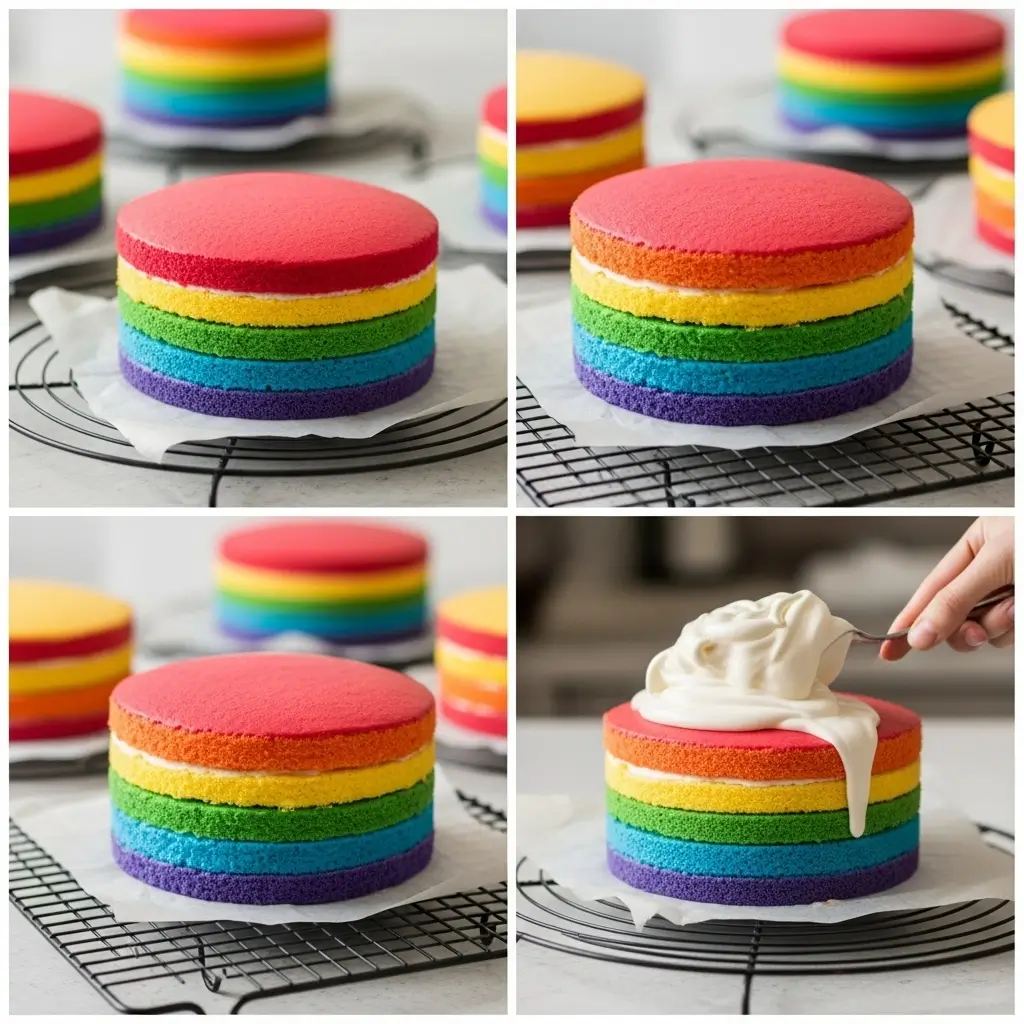
Cool in pans for 10 minutes, then turn out onto wire racks. Let them cool completely before even thinking about assembly. Warm layers will melt your buttercream and ruin the rainbow layer surprise cake reveal.
Step 6: Making buttercream that won’t compete
While your rainbow layers cool, make the white buttercream that’ll hold your rainbow layer surprise cake together. Beat the softened butter until it’s pale and fluffy – about 4-5 minutes.
Gradually add powdered sugar, beating well between additions. It’ll look like a disaster at first, but keep going. Add cream, vanilla, and salt, then beat on high speed for 4-5 minutes until the buttercream is silky smooth.
The buttercream should be white or very pale – you don’t want it competing with your rainbow layer surprise cake colors. If it’s too yellow from the butter, add a tiny drop of purple gel coloring to neutralize it.
Assembly: Where Your Rainbow Layer Surprise Cake Comes to Life
Step 7: The stacking strategy
Level your cake layers if they’re domed (or don’t, imperfect layers add character to rainbow layer surprise cake). Place your red layer on your serving plate and spread about 1/2 cup of buttercream evenly over the top.
Continue stacking in rainbow order: red, orange, yellow, green, blue, purple. Use about 1/2 cup of buttercream between each layer, spreading it evenly but not worrying about perfection – it’s all getting covered anyway.
Press each layer down gently to ensure good contact. Your rainbow layer surprise cake tower should be stable but not compressed.
Step 8: The exterior magic
Apply a crumb coat – a thin layer of buttercream all over the outside of your rainbow layer surprise cake. This seals in crumbs and gives you a smooth base for the final frosting. It doesn’t have to be perfect since you’re adding another layer.
Chill the cake for 45 minutes. This step is crucial for rainbow layer surprise cake success – the crumb coat needs to set so your final layer goes on smoothly.
Apply your final layer of buttercream, working quickly but carefully. Use an offset spatula and aim for smooth, even coverage. The anticipation is killing you at this point, but resist cutting into your rainbow layer surprise cake until you’re ready to serve.
The Big Reveal Moment
Step 9: Presentation perfection
Here’s where your rainbow layer surprise cake becomes legendary. Use a sharp, clean knife and cut straight down through all the layers. Wipe the knife clean between cuts to keep the presentation crisp.
The first slice is always the money shot – those six distinct rainbow layers revealed in perfect order. Have your camera ready because people are going to lose their minds over your rainbow layer surprise cake skills.
Serve immediately while people are still gasping over the reveal. The cake tastes amazing, but honestly, the visual impact is what makes rainbow layer surprise cake so special.
Pro Tips for Rainbow Layer Surprise Cake Success
Don’t make the layers too thick – thin layers stack better and create a more dramatic rainbow effect in your surprise cake. About 1/2 inch thick per layer is perfect.
If your colors aren’t vibrant enough, add more gel coloring before baking. You can always add more, but you can’t take it away once it’s in your rainbow layer surprise cake batter.
Make this rainbow layer surprise cake a day ahead if possible. It actually tastes better after the layers have had time to settle, and it’s less stressful when you’re not frosting under time pressure.
Store your finished rainbow layer surprise cake covered at room temperature for up to 3 days, though good luck making it last that long once people see what you’ve created.
Why Everyone Needs This Recipe
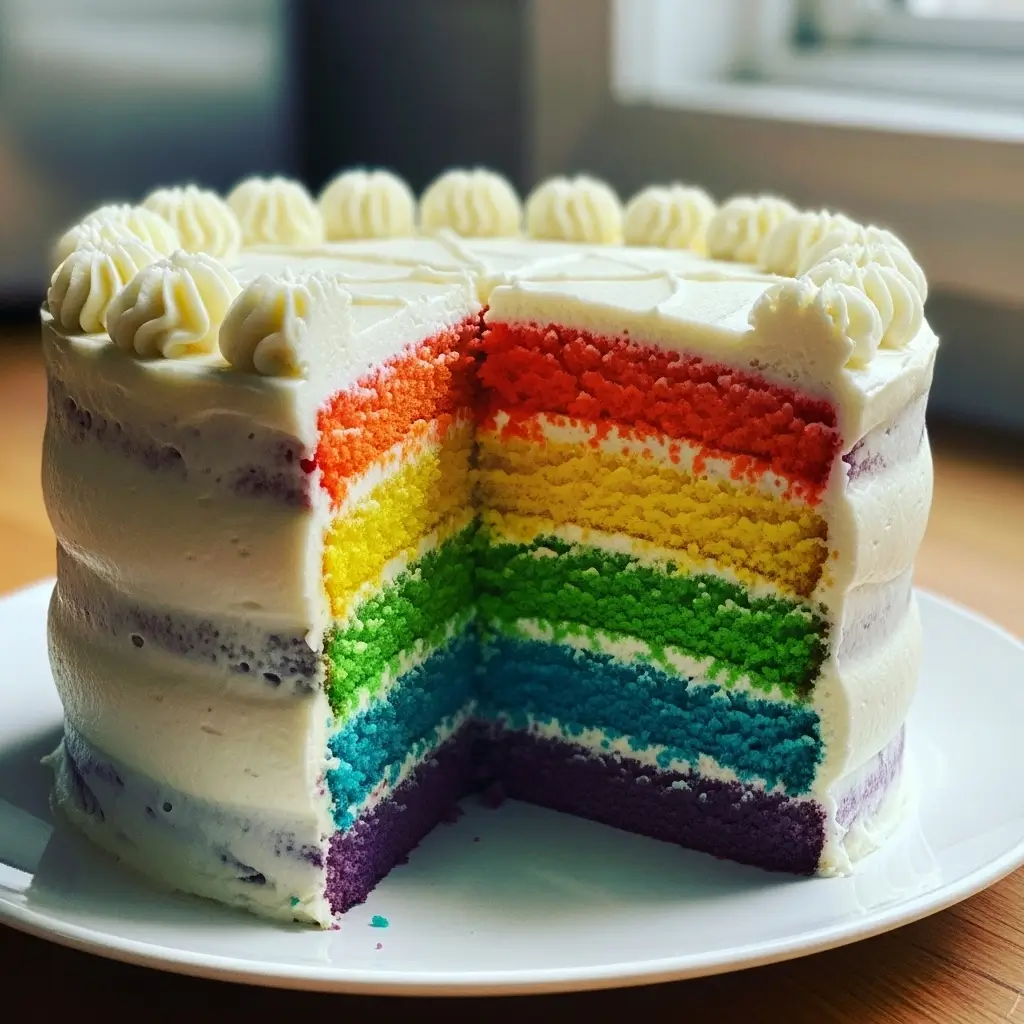
Look, I’ve made a lot of impressive desserts, but nothing gets the reaction that rainbow layer surprise cake gets. It’s pure joy in cake form – the kind of dessert that makes people believe in magic again.
Kids obviously go crazy for it, but adults are honestly even more impressed. There’s something about cutting into what looks like a regular white cake and revealing those perfect rainbow layers that just makes people happy.
This rainbow layer surprise cake has become my signature dessert. I’ve made it for birthdays, graduations, random Tuesday celebrations, and even brought one to a potluck where it completely upstaged everything else (sorry, Carol’s potato salad).
The technique translates to so many other occasions too. Christmas colors, school colors, whatever rainbow makes sense for your celebration. Once you master this rainbow layer surprise cake, you’ll find excuses to make it all the time.
So go ahead, embrace the chaos of six different colored batters and the ridiculous number of dishes. Make this rainbow layer surprise cake and watch people’s faces light up at that first slice reveal. It’s pure magic, and honestly, we could all use more magic in our lives.
And when they ask how you made such an incredible cake, just smile mysteriously and say “It’s all about the layers.” They’ll think you’re a genius! 🌈✨
Check more Birthday cakes ideas : 15 Pretty Birthday Cake Ideas That’ll Make You Look Like a Pro (Trust Me, I’m Not One)
Table of Contents
Rainbow Layer Surprise Cake
A stunning six-layer rainbow cake that reveals vibrant colored layers when sliced. This vanilla buttermilk cake features perfectly colored layers (red, orange, yellow, green, blue, purple) with white buttercream that creates the ultimate surprise dessert for any celebration.
Ingredients
- 4 1/2 cups all-purpose flour
- 3 3/4 teaspoons baking powder
- 3/4 teaspoon salt
- 1 1/2 cups unsalted butter, softened
- 2 2/3 cups granulated sugar
- 6 large eggs, room temperature
- 1 tablespoon vanilla extract
- 1 3/4 cups buttermilk, room temperature
- 2 cups unsalted butter for buttercream
- 8 cups powdered sugar, sifted
- 1/2 cup heavy cream
- 1 tablespoon vanilla extract for buttercream
- 1/2 teaspoon salt for buttercream
- Gel food coloring: red, orange, yellow, green, blue, purple
Instructions
-
Step 1Preheat oven to 350°F. Grease and line six 8-inch round cake pans with parchment paper. Bring eggs and buttermilk to room temperature.
-
Step 2In large bowl, whisk together flour, baking powder, and salt. Set aside.
-
Step 3In mixer bowl, cream 1 1/2 cups butter and sugar until light and fluffy, about 5-6 minutes. Add eggs one at a time, beating well after each addition. Mix in vanilla.
-
Step 4Add flour mixture in three additions, alternating with buttermilk in two additions, beginning and ending with flour. Mix just until combined.
-
Step 5Divide batter into 6 equal portions. Color each portion with gel food coloring: red, orange, yellow, green, blue, and purple. Mix until colors are vibrant and evenly distributed.
-
Step 6Pour each colored batter into separate prepared pans, spreading evenly. Bake 15-20 minutes until centers spring back when lightly touched.
-
Step 7Cool in pans 10 minutes, then turn out onto wire racks to cool completely.
-
Step 8For buttercream: Beat 2 cups butter until pale and fluffy. Gradually add powdered sugar, then cream, vanilla, and salt. Beat on high 4-5 minutes until smooth.
-
Step 9Stack layers in rainbow order (red, orange, yellow, green, blue, purple) with 1/2 cup buttercream between each layer.
-
Step 10Apply crumb coat all over cake, chill 45 minutes, then apply final smooth layer of white buttercream. Chill until ready to serve for best slicing results.