
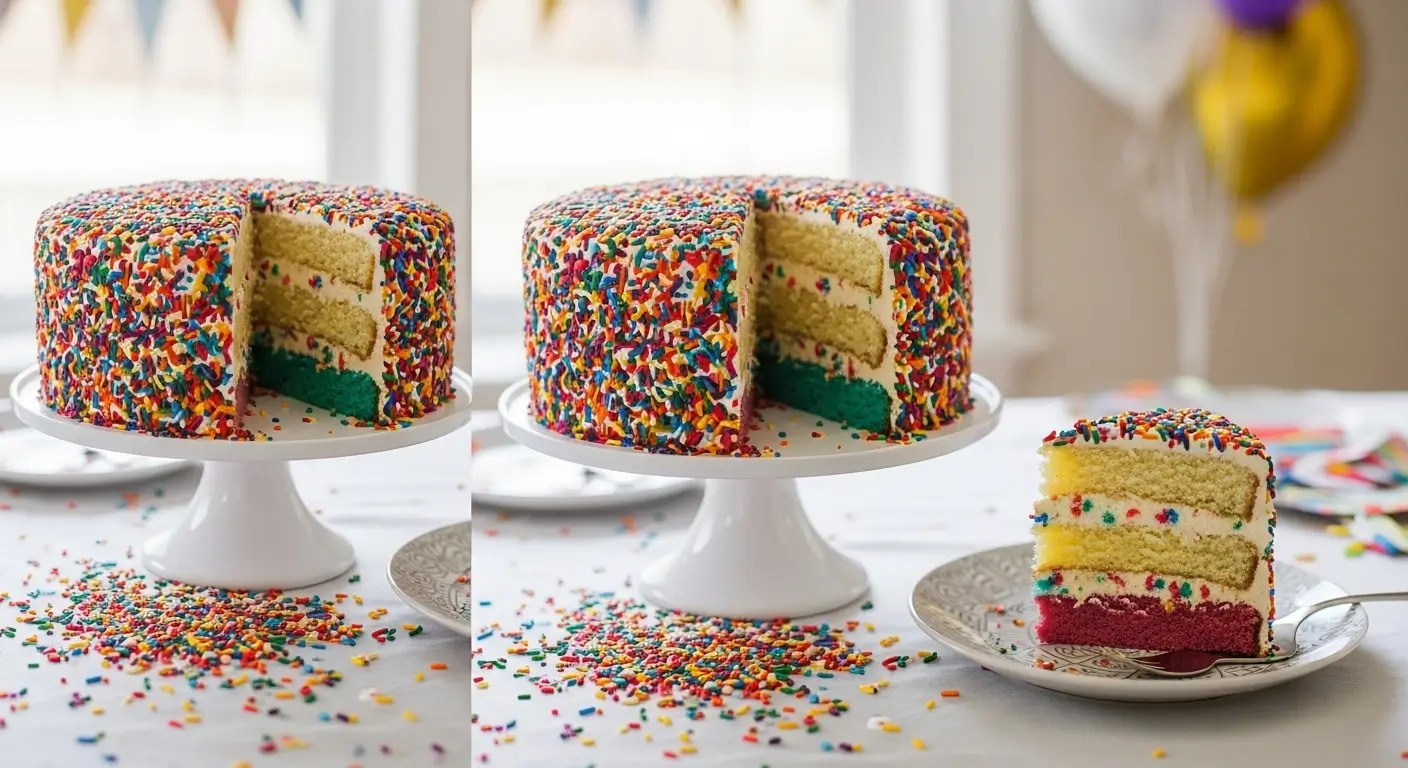
Sprinkle explosion celebration cake is hands down the happiest dessert I’ve ever made, and I’m not just saying that because my kitchen looked like a unicorn exploded afterwards. This colorful, joyful creation started as a desperate attempt to make my 6-year-old niece’s birthday cake “the most fun cake ever,” and honestly, it exceeded even her very high expectations.
Look, I’ll be real with you – before making this sprinkle explosion celebration cake, I thought sprinkles were just something you put on ice cream. But it turns out, when you cover an entire cake in layers of colorful, crunchy goodness, something magical happens. It becomes this celebration in cake form that makes everyone smile before they even take a bite.
The best part about this sprinkle explosion celebration cake? It’s literally the most forgiving cake decorating technique ever invented. Uneven frosting? Covered by sprinkles. Weird bumps or imperfections? Nobody will ever know. It’s like camouflage for amateur bakers, and I am absolutely here for it.
Why This Sprinkle Explosion Celebration Cake Works So Well
Here’s what I learned after making this sprinkle explosion celebration cake approximately seventeen times (my neighbors are very well-fed): the secret is in the timing and the sprinkle selection. You can’t just dump random sprinkles on buttercream and call it a day. Well, you could, but it won’t look nearly as spectacular.
This sprinkle explosion celebration cake technique requires fresh, soft buttercream so the sprinkles actually stick instead of just rolling off like colorful little rebels. And trust me, I learned this the hard way when half my sprinkles ended up on the floor instead of the cake. My dog was thrilled, but my cake looked sad.
The other secret to a perfect sprinkle explosion celebration cake is layering different types of sprinkles. Jimmies, nonpareils, sugar pearls, shaped sprinkles – they all have different textures and create this amazing visual depth that makes the cake look professionally decorated (even though we both know it’s not).
Shopping for Your Sprinkle Explosion Celebration Cake
For the vanilla cake base:
- 3 cups all-purpose flour
- 2 1/2 teaspoons baking powder
- 1/2 teaspoon salt
- 1 cup unsalted butter, softened (leave it out overnight, seriously)
- 1 3/4 cups granulated sugar
- 4 large eggs, room temperature
- 2 teaspoons vanilla extract (the good stuff, not imitation)
- 1 1/4 cups buttermilk, room temperature
For the buttercream that holds this sprinkle explosion celebration cake together:
- 1 1/2 cups unsalted butter, softened
- 6 cups powdered sugar, sifted (don’t skip the sifting, lumpy buttercream is not cute)
- 1/3 cup heavy cream or milk
- 2 teaspoons vanilla extract
- Pinch of salt
- Food coloring (optional – I like to tint it pale pink or yellow)
For the sprinkle explosion part (this is where it gets fun):
- 2 cups rainbow jimmies (the classic long sprinkles)
- 1 cup nonpareils (those tiny round ones)
- 1/2 cup sugar pearls in various sizes
- 1/2 cup shaped sprinkles (stars, hearts, whatever makes you happy)
- 1/2 cup different colored jimmies for variety
- Extra sprinkles for inevitable spillage and snacking
Pro shopping tip: Buy your sprinkles from a baking supply store if possible. The grocery store ones work fine, but specialty sprinkles make your sprinkle explosion celebration cake look next-level amazing. Also, buy more than you think you need. This technique uses A LOT of sprinkles.
Making the Perfect Base for Your Sprinkle Explosion Celebration Cake
Step 1: Cake prep (the boring but necessary part)
Preheat your oven to 350°F and grease two 9-inch round pans. I line mine with parchment because I’m paranoid about sticking, especially with a sprinkle explosion celebration cake that needs to look perfect.
Bring your eggs and buttermilk to room temperature. If you forgot (like I always do), put the eggs in warm water for 10 minutes and microwave the buttermilk for 20 seconds. Temperature matters more than you think for this sprinkle explosion celebration cake base.
Step 2: Mixing the cake batter
In a medium bowl, whisk together flour, baking powder, and salt. Set it aside and try not to knock it over – I’ve done this multiple times and cleaning flour off everything is not fun.
In your stand mixer bowl (or large bowl if you’re using a hand mixer), cream the butter and sugar until it’s light and fluffy. This takes about 4-5 minutes and is crucial for a tender sprinkle explosion celebration cake. Don’t rush this step.
Add eggs one at a time, beating well after each addition. The mixture might look a little weird – that’s totally normal. Then add vanilla and beat until combined.
Step 3: Bringing the batter together
Now comes the part where you can totally mess up your sprinkle explosion celebration cake if you’re not careful. Add the flour mixture in three additions, alternating with the buttermilk in two additions. Start and end with flour.
Mix JUST until combined. Overmixing makes tough cake, and nobody wants tough cake under all those beautiful sprinkles. The batter should be smooth but don’t go crazy with it.
Step 4: Baking your sprinkle explosion celebration cake layers
Divide the batter evenly between your prepared pans. Bake for 25-30 minutes, until a toothpick inserted in the center comes out clean or with just a few moist crumbs.
Cool in the pans for 10 minutes, then turn out onto wire racks. Let them cool completely before even thinking about buttercream. Warm cake melts buttercream, and melted buttercream won’t hold sprinkles. Trust me on this one.
The Buttercream That Makes Magic Happen
While your cakes are cooling, make the buttercream that’s going to hold your sprinkle explosion celebration cake together. This needs to be perfect – not too stiff, not too soft, just right for sprinkle adhesion.
Beat the softened butter in your mixer until it’s pale and fluffy – about 4 minutes. Gradually add the powdered sugar, beating well between additions. It’ll look like a mess at first, but keep going.
Add the cream and vanilla, then beat on high speed for 3-4 minutes until the buttercream is smooth and pipeable. If you want to tint it for your sprinkle explosion celebration cake, add a tiny bit of food coloring now. I usually go with pale yellow or pink – something that won’t compete with the sprinkles.
The buttercream should hold its shape but still be soft enough to spread easily. Too stiff and it won’t look smooth under the sprinkles. Too soft and the sprinkles will sink in. It’s a delicate balance, but you’ll figure it out.
Assembly and the Great Sprinkle Application
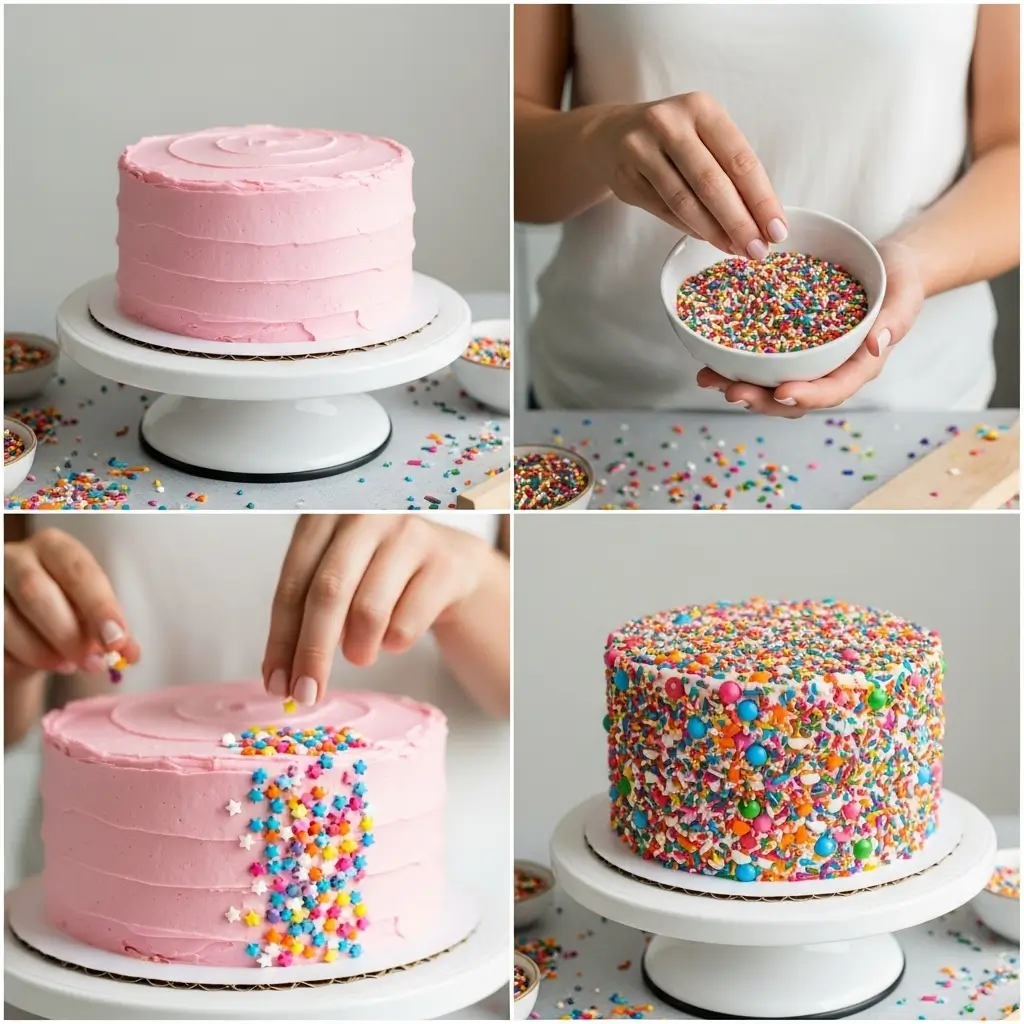
Step 5: Building your sprinkle explosion celebration cake
Level your cake layers if they’re domed (or don’t, I’m not the cake police), then place the first layer on your serving plate. Add about 1/2 cup of buttercream and spread it evenly. Top with the second layer.
Now comes the crumb coat – a thin layer of buttercream all over the outside of your sprinkle explosion celebration cake. This seals in crumbs and gives you a smooth base for the final frosting. It doesn’t have to be perfect since it’s getting covered anyway.
Chill the cake for 30 minutes. This step is non-negotiable for a perfect sprinkle explosion celebration cake. The crumb coat needs to set so your final layer goes on smoothly.
Step 6: The final frosting layer
Apply your final layer of buttercream, working quickly but carefully. You want it smooth and even because any imperfections will show through the sprinkles (just kidding, they totally won’t, but aim for smooth anyway).
Use an offset spatula and take your time. The buttercream should be thick enough to hold the sprinkles but smooth enough to look professional. This is where your sprinkle explosion celebration cake starts to come together.
Step 7: The sprinkle explosion magic
Here’s where things get messy and magical. Set up a large sheet pan or parchment paper around your cake to catch falling sprinkles (there will be many).
Working quickly while the buttercream is still soft, start applying sprinkles. I like to start with the jimmies as a base layer, gently pressing handfuls into the sides and sprinkling them over the top.
Next, add the nonpareils – they’ll fill in gaps and add texture. Then the sugar pearls for elegance, and finally the shaped sprinkles for fun. Don’t be shy – this is a sprinkle explosion celebration cake, after all!
Step 8: The finishing touches
Gently press all the sprinkles into the buttercream to make sure they’re secure. You can use a clean, dry hand or a large spoon to pat them down gently.
Step back and admire your sprinkle explosion celebration cake. Add more sprinkles anywhere that looks sparse. The goal is complete, joyful coverage that screams celebration.
Pro Tips for Sprinkle Explosion Celebration Cake Success
Temperature is everything with this sprinkle explosion celebration cake. If your buttercream gets too warm while you’re working, the sprinkles will slide right off. If it gets too cold, they won’t stick. Room temperature is your friend.
Don’t try to be precious about the sprinkle application. This sprinkle explosion celebration cake is supposed to look abundant and joyful, not perfectly placed. Embrace the chaos – it’s part of the charm.
Buy way more sprinkles than you think you need. I cannot stress this enough. You’ll use more than expected, some will fall on the floor, and you’ll want extras for touch-ups.
Serving Your Sprinkle Explosion Celebration Cake
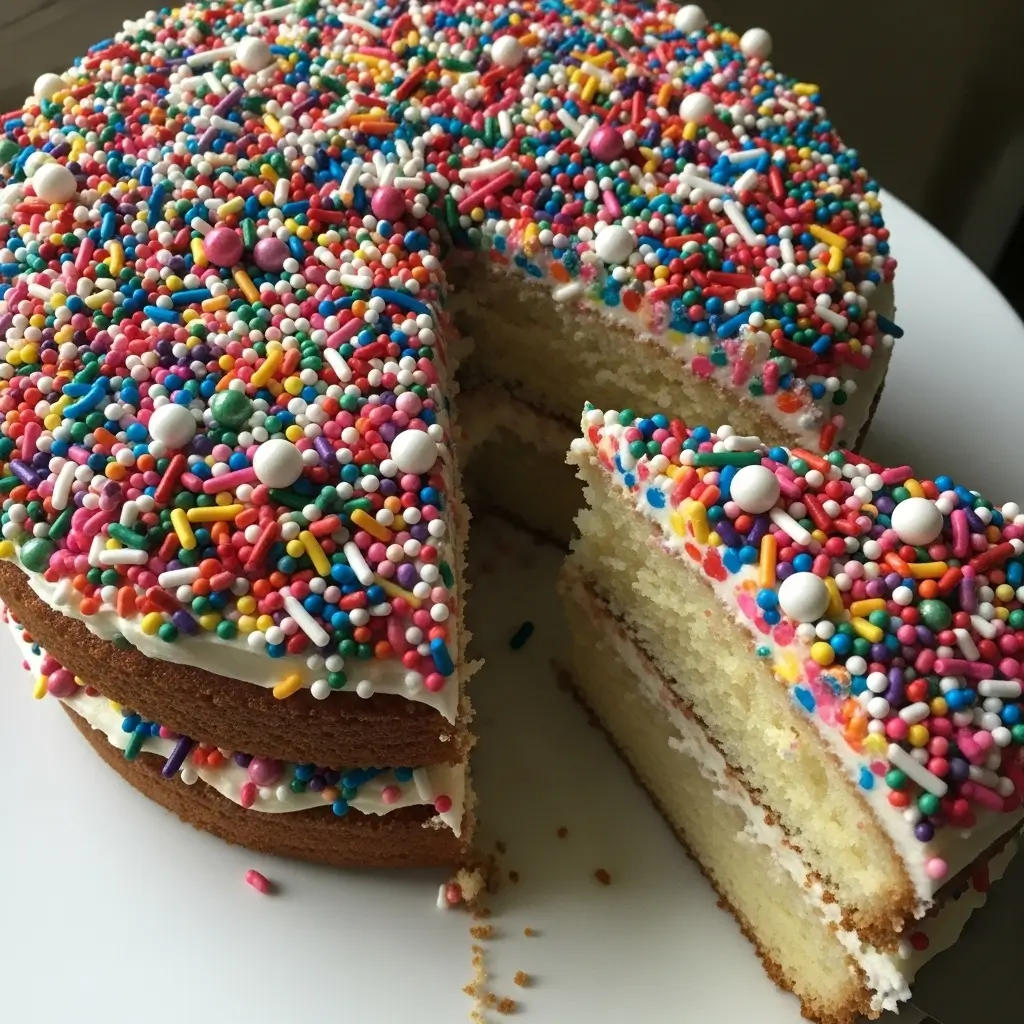
This cake is pure joy on a plate, and it tastes as good as it looks. The vanilla cake is moist and tender, the buttercream is rich but not too sweet, and the sprinkles add this amazing textural element that makes every bite different.
Cut with a sharp knife, wiping it clean between slices to keep the presentation neat. Though honestly, messy slices of sprinkle explosion celebration cake are just as delightful as perfect ones.
Store covered at room temperature for up to 3 days, though good luck making it last that long. This sprinkle explosion celebration cake has a way of disappearing quickly at any celebration.
Why Everyone Needs This Recipe
Look, I’ve made a lot of fancy cakes with complicated techniques and expensive ingredients. But this sprinkle explosion celebration cake brings more pure happiness than any of them. It’s the cake equivalent of a party – loud, colorful, and impossible not to love.
Kids go absolutely wild for it (obviously), but adults love it too. There’s something about all those sprinkles that brings out everyone’s inner child. It’s celebration in cake form, and honestly, we could all use more of that in our lives.
So make this sprinkle explosion celebration cake. Make it for birthdays, graduations, random Tuesdays when you need more joy. Make it because life is short and sprinkles make everything better.
And when people ask how you made such a gorgeous cake, just smile and say it’s all about embracing the explosion. They’ll think you’re way more talented than you actually are! 🌈✨
Also Check other ideas here >>>> 15 Pretty Birthday Cake Ideas That’ll Make You Look Like a Pro (Trust Me, I’m Not One)
Sprinkle Explosion Celebration Cake
A joyful vanilla layer cake completely covered in colorful sprinkles that creates the ultimate celebration dessert. This moist, tender cake with rich buttercream and abundant sprinkles brings happiness to any special occasion.
Ingredients
- 3 cups all-purpose flour
- 2 1/2 teaspoons baking powder
- 1/2 teaspoon salt
- 1 cup unsalted butter, softened
- 1 3/4 cups granulated sugar
- 4 large eggs, room temperature
- 2 teaspoons vanilla extract
- 1 1/4 cups buttermilk, room temperature
- 1 1/2 cups unsalted butter for buttercream
- 6 cups powdered sugar, sifted
- 1/3 cup heavy cream or milk
- 2 teaspoons vanilla extract for buttercream
- Pinch of salt for buttercream
- 2 cups rainbow jimmies
- 1 cup nonpareils
- 1/2 cup sugar pearls
- 1/2 cup shaped sprinkles
- 1/2 cup additional colored jimmies
- Food coloring (optional)
Instructions
-
Step 1Preheat oven to 350°F. Grease two 9-inch round pans and line with parchment paper. Bring eggs and buttermilk to room temperature.
-
Step 2In medium bowl, whisk together flour, baking powder, and salt. Set aside.
-
Step 3In mixer bowl, cream 1 cup butter and sugar until light and fluffy, about 4-5 minutes. Add eggs one at a time, beating well after each addition. Mix in vanilla.
-
Step 4Add flour mixture in three additions, alternating with buttermilk in two additions, beginning and ending with flour. Mix just until combined.
-
Step 5Divide batter between prepared pans. Bake 25-30 minutes until toothpick comes out clean. Cool in pans 10 minutes, then turn out onto wire racks to cool completely.
-
Step 6For buttercream: Beat 1 1/2 cups butter until pale and fluffy. Gradually add powdered sugar, beating well. Add cream and vanilla, beat on high 3-4 minutes until smooth.
-
Step 7Level cake layers if needed. Stack with buttercream between layers. Apply thin crumb coat all over cake, chill 30 minutes.
-
Step 8Apply final smooth layer of buttercream all over cake while working quickly.
-
Step 9While buttercream is still soft, apply sprinkles in layers: start with jimmies, add nonpareils, then sugar pearls, and finally shaped sprinkles. Gently press to secure.
-
Step 10Add more sprinkles to any sparse areas. The cake should be completely covered in a joyful explosion of colorful sprinkles.