
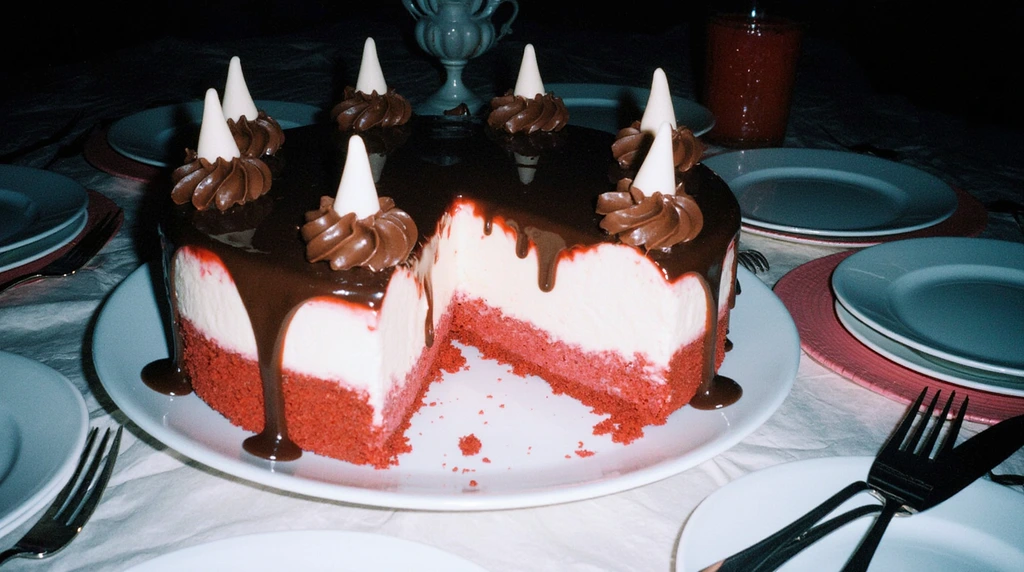
Vampire bite red velvet cheesecake is the most extra dessert I’ve ever made, and I’m not even sorry about it. Like, this vampire bite red velvet cheesecake has layers of red velvet cake, creamy cheesecake, chocolate ganache dripping down the sides like blood, and literal fang marks on top. It’s ridiculous. It’s over the top. People lose their absolute minds when they see it.
I made my first red velvet cheesecake two Halloweens ago for my friend’s party, and I kid you not, three people asked if I was a professional baker. I was like, no, I just have anxiety and express it through elaborate baking projects. But seriously, this vampire bite red velvet cheesecake became my signature Halloween dessert overnight. Now people literally text me in September asking if I’m making “that vampire cake” again.
First attempt was… well, it was an adventure. The cheesecake cracked (major crack, like earthquake-level), the ganache was too thick and just sat there like a blob instead of dripping, and my “vampire bites” looked more like someone poked the cake with a chopstick. My roommate walked in, assessed the situation, and said “Is it supposed to look like that?” The answer was no. No, it was not. I ate my feelings and half the failed vampire bite red velvet cheesecake that night.
But I learned. I watched YouTube videos, I read forums about preventing cheesecake cracks, I practiced my ganache drip technique on paper towels (yes, really). By attempt three, I had a vampire bite red velvet cheesecake that actually looked intentional and spooky instead of like a baking disaster. Now I can make it with my eyes closed. Well, not literally, but you get the point.
Why Vampire Bite Red Velvet Cheesecake Is The Ultimate Halloween Dessert
Here’s the thing—this vampire bite red velvet cheesecake combines two amazing desserts into one dramatic Halloween showstopper. You’ve got the tanginess of red velvet, the creaminess of cheesecake, and then all the spooky decorations on top. It’s like three desserts had a baby and that baby is gorgeous and slightly terrifying.
The red color is perfect for Halloween. Even before you add the vampire bite details to this red velvet cheesecake, it already looks dramatic when you cut into it. That bright red cake layer against the white cheesecake? Chef’s kiss. Very vampire-appropriate for a vampire bite red velvet cheesecake.
And look, I’m not gonna lie—this is a project dessert for your vampire bite red velvet cheesecake. This is not something you whip up in 30 minutes on a Tuesday night. This is a “I’m meal prepping my weekend and making an elaborate dessert” situation. But the reactions you get make it SO worth it. People will talk about your vampire bite red velvet cheesecake for months. I have friends who still bring it up a year later.
I tried making a simpler version once with just box mix red velvet cake and store-bought cheesecake. It was fine, but it didn’t have the same wow factor as the full homemade vampire bite red velvet cheesecake. Sometimes you gotta commit to the chaos.
What You Need For Vampire Bite Red Velvet Cheesecake
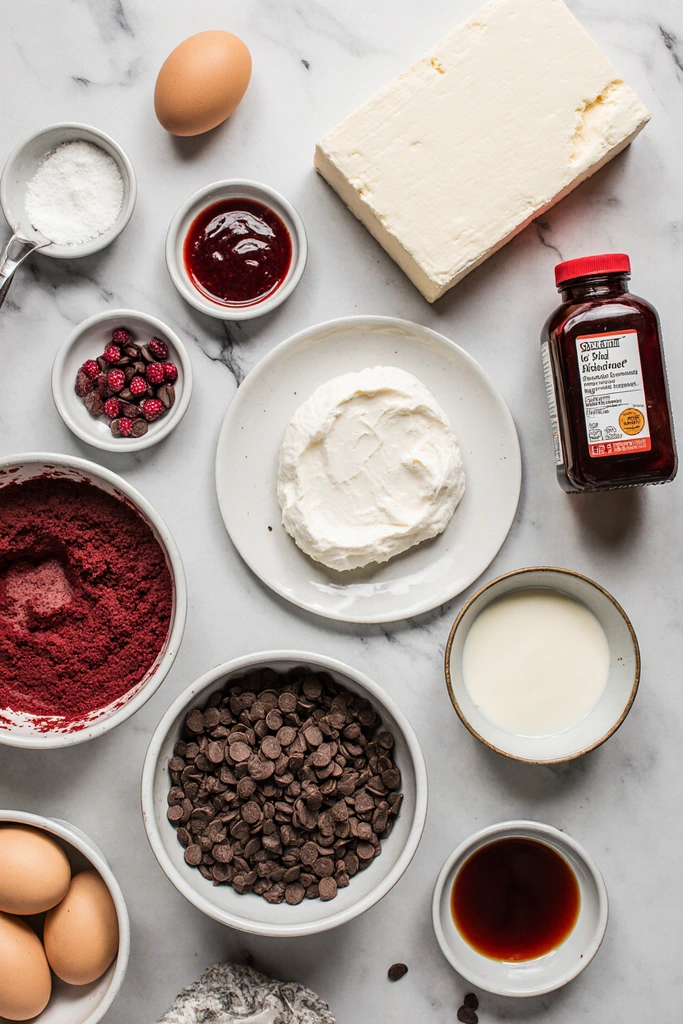
For the red velvet cake layer:
- 1 1/2 cups all-purpose flour
- 1 cup granulated sugar
- 1 tablespoon cocoa powder
- 1 teaspoon baking soda
- 1/2 teaspoon salt
- 1 cup vegetable oil
- 1 cup buttermilk (room temperature)
- 2 large eggs (room temperature)
- 2 tablespoons red food coloring (the gel kind works best)
- 1 teaspoon white vinegar
- 1 teaspoon vanilla extract
For the cheesecake layer:
- 24 oz cream cheese (three 8-oz blocks, room temperature—this is CRUCIAL)
- 3/4 cup granulated sugar
- 3 large eggs (room temperature)
- 1/2 cup sour cream
- 1 teaspoon vanilla extract
- Pinch of salt
For the chocolate ganache “blood” drip:
- 1 cup semi-sweet chocolate chips
- 1/2 cup heavy cream
- Red food coloring (to make it blood-red)
For vampire bite decoration:
- White chocolate melts or candy melts
- Plastic vampire fangs (from dollar store) or make your own with white chocolate
- Red food coloring or raspberry jam for “blood”
- Optional: candy eyeballs, plastic spiders, whatever Halloween stuff you have
You’ll also need:
- 9-inch springform pan
- Aluminum foil (for water bath)
- Large roasting pan (for water bath)
- Parchment paper
Quick note about the cream cheese for vampire bite red velvet cheesecake—it MUST be room temperature. Like, actually soft when you press it. Cold cream cheese will give you lumps and nobody wants lumpy cheesecake in their vampire bite red velvet cheesecake. I leave mine out for at least 2 hours before I start.
The red food coloring is important. Get the gel kind, not the liquid stuff. You need less gel to get a vibrant red for your vampire bite red velvet cheesecake, and it won’t water down your batter. I use Americolor Super Red or Wilton Red No-Taste. Don’t cheap out on this—the color is the whole point.
For the water bath (don’t skip this for cheesecake layer), you need to wrap your springform pan in foil. Like, really wrap it. Three layers of heavy-duty foil. Water getting into your vampire bite red velvet cheesecake will ruin everything. Ask me how I know.
Making The Red Velvet Cake Layer
1. Preheat oven to 350°F. Grease your 9-inch springform pan and line the bottom with parchment paper. This helps the cake release easily for your vampire bite red velvet cheesecake.
2. Mix dry ingredients. In a medium bowl, whisk together flour, sugar, cocoa powder, baking soda, and salt. The cocoa powder is subtle but adds depth to the red velvet layer of your vampire bite red velvet cheesecake.
3. Mix wet ingredients. In a large bowl (or stand mixer), combine oil, buttermilk, eggs, red food coloring, vinegar, and vanilla. Beat until smooth. The vinegar reacts with the baking soda and makes the cake tender for your vampire bite red velvet cheesecake.
4. Combine wet and dry. Add dry ingredients to wet ingredients and mix until just combined. Don’t overmix—you’ll make it tough. The batter will be thin, that’s normal for red velvet in your vampire bite red velvet cheesecake.
5. Pour and bake. Pour batter into prepared pan. Bake for 25-30 minutes until a toothpick comes out clean. The top might crack a little—that’s fine, the cheesecake will cover it in your vampire bite red velvet cheesecake.
6. Cool completely. Let it cool in the pan for 10 minutes, then carefully run a knife around the edge but DON’T release the springform. The cake needs to stay in the pan for the cheesecake layer of your vampire bite red velvet cheesecake. Let it cool completely, like at least an hour.
Making The Cheesecake Layer (The Tricky Part)
1. Reduce oven to 325°F. Lower temp is crucial for creamy cheesecake in your vampire bite red velvet cheesecake. High heat causes cracks.
2. Beat cream cheese. In a stand mixer (or with hand mixer), beat room temperature cream cheese on medium speed for 2-3 minutes until completely smooth and fluffy. Scrape down the bowl. No lumps allowed in this vampire bite red velvet cheesecake.
3. Add sugar. Add sugar and beat for another 2 minutes until well combined and fluffy for your vampire bite red velvet cheesecake filling.
4. Add eggs ONE AT A TIME. This is important. Add one egg, beat on LOW speed until just combined, then add the next. Don’t overbeat once the eggs are in—this incorporates air and causes cracks in your vampire bite red velvet cheesecake. I learned this the hard way.
5. Add sour cream, vanilla, and salt. Beat on low until just combined. The sour cream makes it extra creamy for your vampire bite red velvet cheesecake.
6. Pour over cooled cake. Pour the cheesecake batter over your completely cooled red velvet cake layer. Smooth the top with a spatula. It should come pretty close to the top of the pan for your vampire bite red velvet cheesecake.
7. Wrap in foil. Wrap the outside of your springform pan in three layers of heavy-duty foil. Make sure it goes up the sides and covers the bottom completely. Water bath time for proper vampire bite red velvet cheesecake.
8. Prepare water bath. Place wrapped springform pan in a large roasting pan. Fill the roasting pan with hot water until it comes about halfway up the sides of the springform pan. This prevents cracks in your vampire bite red velvet cheesecake.
9. Bake for 60-70 minutes. The edges should be set but the center should still jiggle slightly when you gently shake the pan. It will firm up as it cools for your vampire bite red velvet cheesecake. Don’t overbake or it’ll be dry.
10. Cool gradually. Turn off the oven and crack the door open. Let the cheesecake sit in the oven for 1 hour. This gradual cooling prevents cracks in your vampire bite red velvet cheesecake. Then remove from oven and water bath, remove foil, and let cool to room temperature.
11. Refrigerate overnight. Cover and refrigerate for at least 8 hours, preferably overnight. The cheesecake needs to fully set before decorating your vampire bite red velvet cheesecake. I know waiting is hard, but this step is mandatory.
Making The Chocolate Ganache Blood Drip
1. Heat cream. Heat heavy cream in microwave for 45-60 seconds until it just starts to steam. Don’t let it boil for your vampire bite red velvet cheesecake ganache.
2. Add chocolate. Pour hot cream over chocolate chips in a bowl. Let sit for 2 minutes, then stir until completely smooth and glossy for your vampire bite red velvet cheesecake.
3. Add red food coloring. Add red gel food coloring a little at a time, stirring until you get a blood-red color. I usually use about 1/4 teaspoon of red gel for the vampire bite red velvet cheesecake ganache. You want it dark red, not bright red—more realistic “blood” color.
4. Let it cool. Let the ganache cool for about 10-15 minutes until it’s thick enough to drip but not so thick that it just sits there. Test the consistency on the side of a glass before putting it on your vampire bite red velvet cheesecake. I’ve ruined batches by using it too hot (runs everywhere) or too cold (doesn’t drip).
Decorating Your Vampire Bite Red Velvet Cheesecake (The Fun Part)
1. Release from pan. Run a warm knife around the edge of your completely chilled cheesecake. Carefully release the springform. Transfer to your serving plate or cake stand for the vampire bite red velvet cheesecake presentation.
2. Make vampire fangs. If you bought plastic fangs, great. If not, melt white chocolate and pipe fang shapes on parchment paper, let them harden. For the vampire bite red velvet cheesecake, I usually make 4-6 sets of fangs to place around the top.
3. Create bite marks. Use the back of a spoon or your knuckles (clean hands!) to make two indentations on top of the cheesecake, about 2 inches apart. These are your fang puncture wounds for the vampire bite red velvet cheesecake. Press gently—you’re just making marks, not holes.
4. Add “blood” to bites. Drizzle raspberry jam or red gel food coloring into the bite marks and let it drip down slightly. This is the blood from the vampire bites on your vampire bite red velvet cheesecake. Very dramatic.
5. Drip the ganache. Pour some ganache on the center top of your cheesecake. Use an offset spatula to push it towards the edges. Then use a spoon to create drips down the sides. Do a few drips, then move around the cake. You want uneven drips for that melting blood look on your vampire bite red velvet cheesecake. Some short, some long. Looks more realistic.
6. Add decorations. Place your vampire fangs around the top edge of the cheesecake, maybe sticking out of the ganache like they’re embedded. Add candy eyeballs, plastic spiders, whatever Halloween decorations you want on your vampire bite red velvet cheesecake. Go crazy. This is not the time for minimalism.
7. Chill before serving. Put the decorated vampire bite red velvet cheesecake back in the fridge for at least 30 minutes so the ganache sets. This makes it easier to slice.
Tips That’ll Save Your Vampire Bite Red Velvet Cheesecake
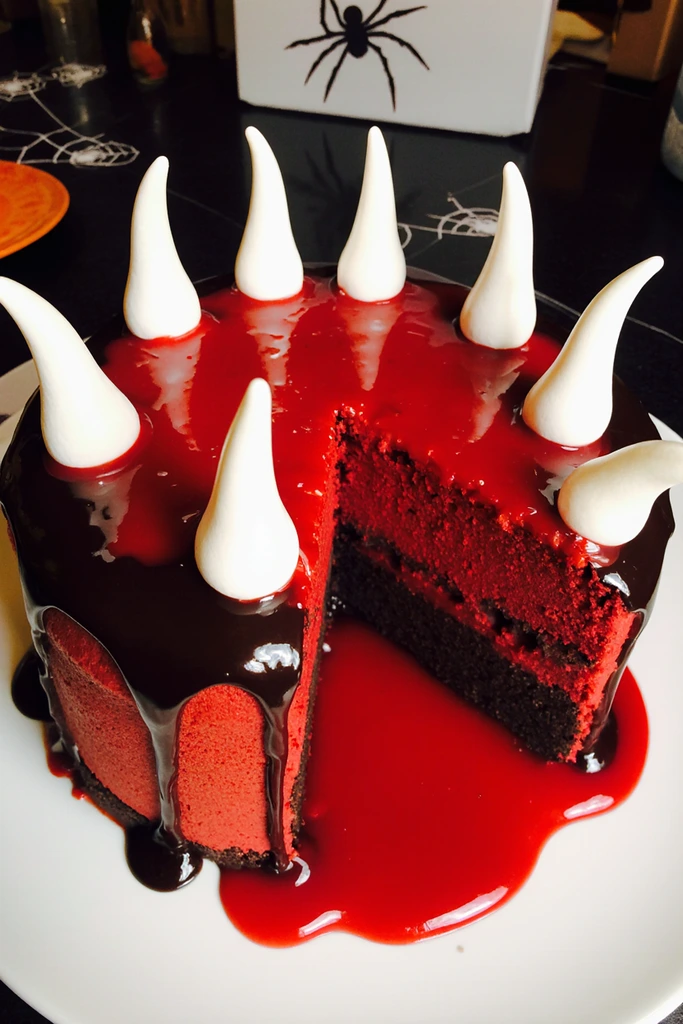
Make this the day before your party. Seriously. The cheesecake needs to chill overnight anyway, and you don’t want to be decorating a cake an hour before guests arrive while having a stress meltdown. Made that mistake with my vampire bite red velvet cheesecake once, will not repeat.
Room temperature ingredients are non-negotiable for the cheesecake layer. Cold ingredients = lumpy batter = sad cheesecake in your vampire bite red velvet cheesecake.
Don’t skip the water bath. I know it seems fussy, but it prevents cracks and makes your cheesecake creamy. Worth it for the perfect vampire bite red velvet cheesecake.
If your cheesecake cracks anyway (it happens), the ganache will cover it. That’s the beauty of the vampire bite red velvet cheesecake design—the toppings hide imperfections.
Use a hot knife to cut clean slices. Run your knife under hot water, wipe it dry, then cut. Clean the knife between each slice of vampire bite red velvet cheesecake. Your slices will look professional.
The ganache can be reheated if it gets too thick. Just microwave for 10 seconds and stir before applying to your vampire bite red velvet cheesecake.
Why This Vampire Bite Red Velvet Cheesecake Is Worth The Effort
I’m not gonna sugarcoat it—this takes TIME. Between baking, cooling, chilling, and decorating, you’re looking at two days of prep for your vampire bite red velvet cheesecake. But the payoff is incredible. This is THE dessert that makes people stop talking and just stare when you bring it out.
Last year I made this vampire bite red velvet cheesecake for my office Halloween party and my boss literally asked if she could commission me to make one for her daughter’s birthday. (I said yes and charged her $75. She paid without hesitating. Know your worth, people.)
It’s also surprisingly delicious? Like, I know it looks wild with all the decorations, but underneath the vampire bite red velvet cheesecake is actually an incredible dessert. The tangy red velvet with the creamy cheesecake is such a good combination. People who were skeptical based on appearance came back for seconds.
My sister made me teach her how to make this vampire bite red velvet cheesecake over video call last Halloween. It took three hours and she called me crying twice (once when her cheesecake cracked, once happy tears when the ganache drip worked perfectly). Now she makes it every year and her in-laws think she’s a baking goddess.
Variations I’ve Seen (Or Want To Try)
Oreo crust vampire bite red velvet cheesecake: Add a crushed Oreo crust under the red velvet layer. Haven’t tried this but it sounds amazing.
White chocolate vampire bite cheesecake: Use white chocolate cake instead of red velvet, add black food coloring to the ganache for a different look. More goth, less gory for the vampire bite cheesecake.
Mini vampire bite red velvet cheesecakes: Make these in cupcake tins for individual servings. Way easier to serve at parties. The vampire bite red velvet cheesecake concept works perfectly in mini form.
Chocolate vampire bite cheesecake: Some people do chocolate cake instead of red velvet. Not as visually dramatic in my opinion for a vampire bite cheesecake, but chocolate lovers would appreciate it.
Blood orange vampire bite red velvet cheesecake: My friend suggested adding blood orange zest to the cheesecake layer. Very on-theme and probably delicious for the vampire bite red velvet cheesecake.
Real Talk Before You Attempt This
This is an advanced recipe. If you’ve never made cheesecake before, maybe practice a simple one first before attempting the full vampire bite red velvet cheesecake. Or just go for it and embrace potential failure. Both approaches are valid.
You will use every dish in your kitchen. I’m talking multiple bowls, mixers, pans, spatulas. My kitchen looks like a tornado hit it after making vampire bite red velvet cheesecake. Factor in cleanup time.
This is expensive. Between cream cheese, chocolate, food coloring, and decorations, you’re probably spending $30-40 on ingredients for the vampire bite red velvet cheesecake. Worth it for a special occasion, but don’t make this if you’re on a tight budget.
It’s also not a “healthy” dessert. This is pure indulgence. One slice of vampire bite red velvet cheesecake probably has a million calories. Eat it anyway. It’s Halloween. Calories don’t count on Halloween. (They do, but we’re pretending they don’t.)
But if you pull off this vampire bite red velvet cheesecake, you will be a LEGEND. People will talk about it for years. You’ll become known as “that person who made the vampire cake.” Is that the legacy you want? Because it’s the legacy you’ll get with a vampire bite red velvet cheesecake.
Let me know if you make this! I desperately want to see other people’s vampire bite red velvet cheesecakes. What decorations did you use? Did your ganache drip perfectly? Did you cry at any point? (It’s okay if you did.) Drop a comment because I love seeing creative variations.
Happy baking! (And may your cheesecake be crack-free and your ganache drip perfectly like blood.) 🧛♂️🍰
Check also : The Best Halloween Vampire Bite Cupcakes
Table of Contents
Vampire Bite Red Velvet Cheesecake
A stunning vampire bite red velvet cheesecake featuring layers of vibrant red velvet cake and creamy cheesecake, topped with blood-red chocolate ganache drips and vampire fang decorations. The ultimate Halloween showstopper dessert that looks terrifying but tastes incredible.
Ingredients
- 1 1/2 cups all-purpose flour
- 1 cup granulated sugar
- 1 tablespoon cocoa powder
- 1 teaspoon baking soda
- 1/2 teaspoon salt
- 1 cup vegetable oil
- 1 cup buttermilk, room temperature
- 2 large eggs, room temperature
- 2 tablespoons red gel food coloring
- 1 teaspoon white vinegar
- 1 teaspoon vanilla extract
- 24 oz cream cheese (3 blocks), room temperature
- 3/4 cup granulated sugar
- 3 large eggs, room temperature
- 1/2 cup sour cream
- 1 teaspoon vanilla extract
- Pinch of salt
- 1 cup semi-sweet chocolate chips
- 1/2 cup heavy cream
- Red gel food coloring
- White chocolate for fangs or plastic vampire fangs
- Raspberry jam or red food coloring for blood effect
- Halloween decorations (candy eyeballs, plastic spiders)
Instructions
-
Step 1Preheat oven to 350°F. Grease 9-inch springform pan and line bottom with parchment paper.
-
Step 2Make red velvet layer: Whisk together flour, sugar, cocoa powder, baking soda, and salt. In separate bowl, combine oil, buttermilk, eggs, red food coloring, vinegar, and vanilla. Mix wet into dry until just combined.
-
Step 3Pour batter into prepared pan. Bake 25-30 minutes until toothpick comes out clean. Cool completely in pan.
-
Step 4Reduce oven to 325°F. Make cheesecake: Beat room temperature cream cheese for 2-3 minutes until smooth. Add sugar and beat 2 minutes.
-
Step 5Add eggs one at a time on low speed, beating just until combined after each. Mix in sour cream, vanilla, and salt on low speed.
-
Step 6Pour cheesecake batter over completely cooled red velvet layer in pan. Smooth top.
-
Step 7Wrap outside of springform pan in 3 layers heavy-duty foil. Place in roasting pan and fill with hot water halfway up the sides of springform pan.
-
Step 8Bake 60-70 minutes until edges are set but center still jiggles slightly. Turn off oven, crack door, and let sit 1 hour.
-
Step 9Remove from oven and water bath. Cool to room temperature, then refrigerate uncovered overnight (at least 8 hours).
-
Step 10Make ganache: Heat cream until steaming. Pour over chocolate chips, let sit 2 minutes, stir until smooth. Add red food coloring to create blood-red color. Cool 10-15 minutes until thick but still pourable.
-
Step 11Release cheesecake from pan and transfer to serving plate. Use back of spoon to create two bite mark indentations on top about 2 inches apart.
-
Step 12Fill bite marks with raspberry jam or red food coloring to create blood effect.
-
Step 13Pour ganache on center of cheesecake top and spread toward edges. Create drips down sides with spoon for blood drip effect.
-
Step 14Decorate with vampire fangs, candy eyeballs, and Halloween decorations. Refrigerate 30 minutes to set ganache before serving.
-
Step 15Slice with hot knife, cleaning between cuts for neat slices.