

Sugar free chia pudding was not something I came to voluntarily. I want to be upfront about that. I didn’t wake up one morning with a wellness epiphany and decide to eliminate sugar from my breakfast out of joy and enthusiasm. I did it because my doctor looked at my bloodwork in February, looked at me, looked back at the bloodwork, and said some things that made me rethink my morning routine.
I’d been adding maple syrup to basically everything. My chia pudding, my yogurt, my oatmeal. A drizzle here, a drizzle there. Drizzles add up. Apparently my drizzles had been adding up for quite some time.
So. Sugar free chia pudding. Here we are.
And look — I’m going to be honest with you the way I wish someone had been honest with me when I started trying to make this work. The first version I made was not good. It tasted like slightly nutty water with seeds floating in it and I ate it standing at the kitchen counter with the expression of someone doing something medicinal. It was not enjoyable. It was not something I looked forward to.
But I kept at it because I had to, and somewhere around attempt four or five I figured out the actual secret to making sugar free chia pudding taste genuinely good — not just acceptable, not just tolerable, but good. Like something you’d choose to eat even if nobody told you to.
That’s what I’m giving you today.
Also check : Extra Thick Chia Pudding — Because Watery Chia Pudding Is a Crime and I Won’t Apologize for Saying That
The Real Secret — Natural Sweetness From the Right Sources
Here’s what took me too long to figure out: sugar free does not mean flavor free. It means you have to be smarter about where the sweetness comes from. And there are actually quite a few places it can come from that don’t involve adding any sweetener at all.
The sugar free chia pudding that actually tastes good is built on three things working together. First, the right milk — some milks have natural sweetness that others don’t, and choosing correctly makes a massive difference. Second, vanilla — and more vanilla than you think, not a timid half teaspoon but a full generous teaspoon of real vanilla extract that adds warmth and sweetness perception without any actual sugar. And third, the toppings — because very ripe fresh fruit brings natural fructose that your tongue reads as sweetness, which means a properly topped bowl of sugar free chia pudding tastes sweet even though technically nothing sweet was added.
This sounds like a trick. It’s not a trick. It’s just understanding how flavor works. And once I understood it, making sugar free chia pudding went from a grim obligation to something I actually look forward to pulling out of the fridge in the morning.
Choosing the Right Milk
This matters more in sugar free chia pudding than in any other version because without added sweetener, the milk flavor is front and center. There’s nowhere for bad milk flavor to hide.
My top choices ranked honestly:
Unsweetened vanilla oat milk: This is my everyday choice. Oat milk has natural sweetness from the oats — they contain natural sugars that survive the milk-making process — and the vanilla-flavored version adds an extra layer of warmth that makes the sugar free chia pudding taste almost dessert-like without any added sugar. Oatly makes a good one. Califia Farms oat barista blend is also excellent.
Full-fat coconut milk from a can: Rich, naturally slightly sweet from the coconut, and produces the thickest, most luxurious sugar free chia pudding you can make. This is my weekend version. My special occasion version. The version I make when I want to feel like the sugar free breakfast is actually indulgent. Shake the can before opening. Always shake the can.
Unsweetened almond milk: Lighter, slightly nutty, works well but has the least natural sweetness of the three. If you use almond milk, lean harder on the vanilla and the fruit toppings to compensate.
I’ve tried regular dairy milk — full fat. It’s fine. Creamy. Not as naturally sweet as oat milk. Works perfectly well if that’s what you have.
What I’d avoid for this specific recipe: sweetened versions of any plant milk that have added sugar listed in the ingredients. Those aren’t truly sugar free. Read the label. Some “vanilla” flavored plant milks have added sugar and some don’t — it varies by brand.
What You Need

For 2 servings of sugar free chia pudding:
- 1 cup unsweetened vanilla oat milk — or full-fat coconut milk for the richest version
- 4 tablespoons chia seeds — black or white, I use black because that’s what my store carries
- 1 teaspoon vanilla extract — a full teaspoon, not a half, the vanilla is doing real sweetness work here
- 1/4 teaspoon cinnamon — this adds warmth that your brain associates with sweetness, it’s not nothing
- Tiny pinch of salt — I know I say this every time but this is especially true in sugar free recipes where you need every flavor tool available to you
- Optional: 1/4 teaspoon pure monk fruit sweetener OR a few drops of pure liquid stevia if you want a touch of sweetness without sugar — both are zero glycemic index and I’ll talk more about these below
Topping ideas that bring natural sweetness:
- Very ripe mango — ripe mango is genuinely sweet and pairs beautifully with vanilla
- Fresh strawberries — particularly ripe ones, the more red they are all the way through the sweeter they’ll be
- Sliced very ripe banana — the ripest banana you have, the more natural sweetness it contributes
- Blueberries — slightly tart but their natural sweetness works well against the neutral base
- A thin drizzle of pure unsweetened nut butter — almond or cashew butter adds richness that reads as indulgence
- Unsweetened toasted coconut flakes
- A sprinkle of cinnamon on top — again, warmth equals perceived sweetness, this is a real thing
A Word on Sugar Substitutes — Honest Opinion
Since we’re making sugar free chia pudding, I should talk about this because there are options and they’re not all equal in my experience.
Monk fruit sweetener: My preference if I want a tiny bit of added sweetness. It’s derived from a fruit, has zero effect on blood sugar, and doesn’t have the bitter aftertaste that some artificial sweeteners have. I use a tiny amount — 1/4 teaspoon of the concentrated kind. Lakanto is the brand I use. It dissolves well in cold liquid which matters for chia pudding.
Pure liquid stevia: Works well, zero sugar, zero calories. The key is pure stevia — some stevia products have added ingredients that taste strange. A few drops is enough. Don’t overdo stevia. I overdid stevia once. It tasted like I’d made chia pudding in a garden. Floral in a bad way. A few drops. That’s it.
Date syrup or coconut sugar: These are natural but they ARE still sugar — they affect blood sugar similarly to regular sugar. If you’re avoiding sugar for health reasons specifically, these don’t qualify as sugar free. If you’re avoiding refined sugar specifically but are okay with natural sugars, these work beautifully and taste excellent.
Artificial sweeteners like aspartame or sucralose: I don’t personally use these and won’t tell you to. Some people are fine with them. Some people find the aftertaste unpleasant. Up to you. They work technically in this recipe but I’d rather rely on natural sweetness from the milk, vanilla, and fruit.
My actual recommendation for the first time you make sugar free chia pudding: try it without any sweetener at all first. Use unsweetened vanilla oat milk, a full teaspoon of vanilla, cinnamon, and ripe fruit toppings. You might be surprised. I was surprised. I expected to need the monk fruit and I didn’t — the combination of vanilla oat milk and very ripe mango was sweet enough that I didn’t miss anything.
How to Make It
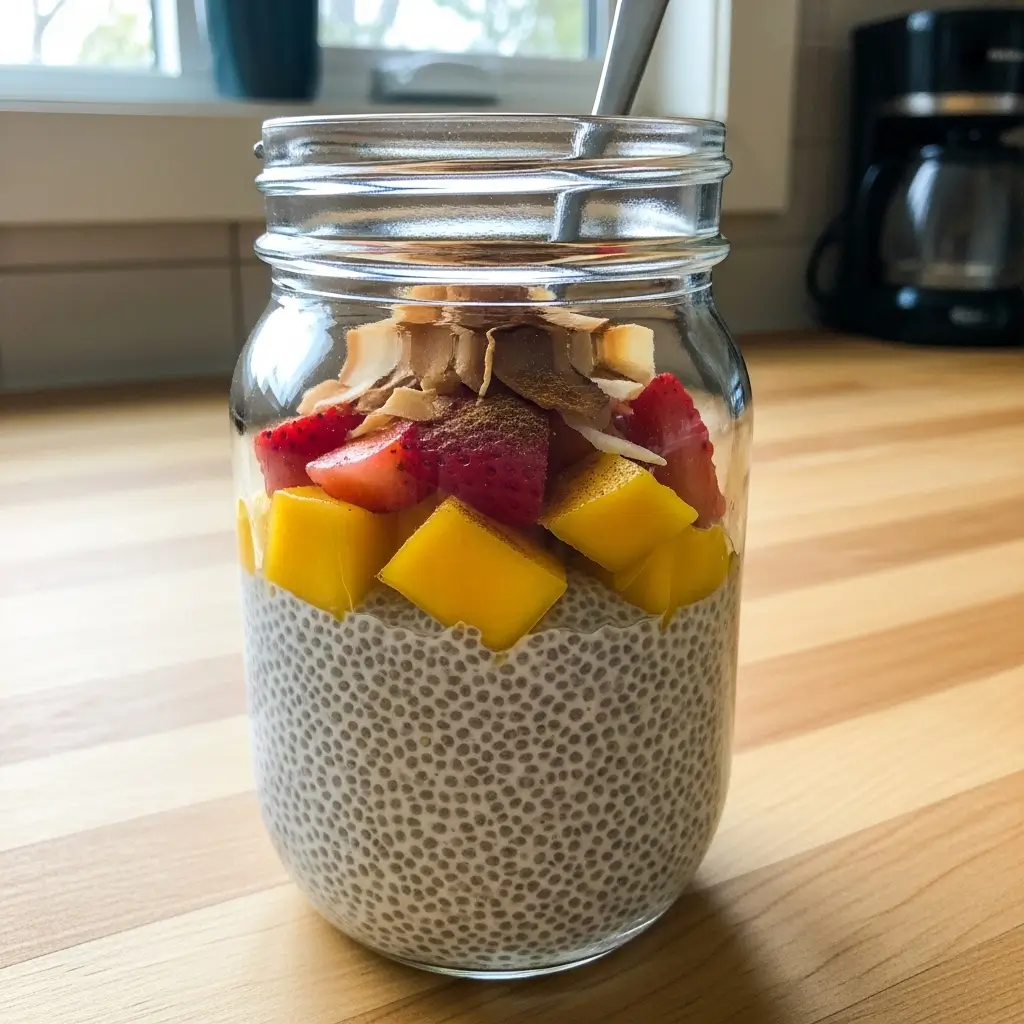
Sugar free chia pudding follows the same basic process as any chia pudding, but the details matter more because you’re relying on subtler flavors rather than sweetener to carry everything.
Step 1: Pour your oat milk — or coconut milk — into a wide mouth mason jar or container with a lid. Wide mouth matters. I’ve said this before in other chia pudding recipes and I’ll say it again because it’s genuinely important for the stirring process. Narrow jars make proper stirring almost impossible and you get clumping.
Step 2: Add the chia seeds, vanilla extract, cinnamon, salt, and monk fruit or stevia if using. Stir everything together really thoroughly — scrape the bottom of the jar, make sure nothing is sitting undissolved at the bottom.
Step 3: Wait 15 minutes. Come back. Stir again, vigorously, for about 45 seconds. This second stir is — and I cannot overstate this — the single most important technique step in any chia pudding recipe. In the first 10 to 15 minutes the seeds start absorbing liquid and gelling and they want to clump together in little seed clusters. Breaking those clusters up before they fully set means your sugar free chia pudding will be evenly thick throughout rather than having a gel blob in the middle surrounded by thin liquid. I know I’ve said this before. I’ll keep saying it because people keep skipping it.
Step 4: Cover and refrigerate. Minimum 5 hours for sugar free chia pudding — I actually recommend 5 hours over the usual 4 because without sugar, the flavors need a bit more time to meld and develop. Overnight is genuinely ideal. I make mine at 9:30pm after cleaning up the kitchen and eat it at 7am. Perfect every time.
Step 5: In the morning — open the jar before you add anything and taste it. Just a plain spoonful before the toppings. Notice whether it tastes good to you as-is or whether you want a small addition of monk fruit or stevia. This is important because once you add fruit toppings everything changes flavor-wise and you won’t be able to assess the base accurately.
Step 6: If you want it thicker — which for sugar free chia pudding I especially recommend because thickness makes it feel more satisfying and indulgent — add a tablespoon of Greek yogurt and stir it through. Plain unsweetened Greek yogurt. It adds a slight tang, extra creaminess, and extra protein. It also makes a barely-there sweetness from the milk seem more pronounced somehow. I don’t fully understand the science of this. I just know it works.
Step 7: Add your toppings right before eating. Not the night before. Fruit releases moisture overnight and makes the pudding loose and watery. Toppings at the last minute. Always.
The Failures in My Sugar Free Journey
Because it wasn’t smooth. Not remotely smooth.
The plain unsweetened almond milk mistake: Used plain unsweetened almond milk, no vanilla, no cinnamon. The pudding tasted like nothing. Genuinely like thickened neutral liquid with seeds. I added half a banana on top and that helped but the base was just… absent. Flavor in the base matters. Use vanilla milk or add vanilla extract generously.
The stevia overdose: Added too much liquid stevia trying to make it taste sweet quickly. The result had this intensely floral, slightly bitter aftertaste that I couldn’t eat past the third spoonful. Less is more with stevia. Much less.
The unripe fruit topping situation: Used strawberries that weren’t very ripe — pale pink inside, slightly firm, barely sweet. The whole bowl tasted tart and flat. For sugar free chia pudding especially, your fruit has to be properly ripe. The fruit is providing the sweetness. Underripe fruit provides none. Buy fruit a few days early and let it ripen on the counter.
The skipped second stir: Skipped the 15-minute restir because I was tired and just wanted to go to bed. Woke up to chia pudding with a solid gel disk in the center surrounded by thin liquid. Stirred it aggressively in the morning and it mostly incorporated but the texture was uneven. Stir twice. Always twice.
The too-little vanilla attempt: Used 1/4 teaspoon of vanilla because I was being conservative. The sugar free chia pudding tasted flat and slightly savory in a confusing way. Vanilla is doing real flavor work here — a full teaspoon minimum, maybe even 1.25 teaspoons if you like a pronounced vanilla flavor like I do.
Flavor Variations That Keep It Interesting
Once you’ve got the base sugar free chia pudding working, variations help a lot with staying interested in eating the same breakfast repeatedly — which is the real challenge with any meal prep breakfast:
Chocolate sugar free version: Add 1 teaspoon of unsweetened cocoa powder and 1/4 teaspoon extra vanilla to the base. The cocoa adds depth and a slight bitterness that actually reduces the need for sweetness. Top with sliced banana and a few cacao nibs. This version genuinely tastes like dessert. My husband, who was very skeptical of this whole sugar free project, ate this version and asked for it again.
Matcha version: Whisk 1 teaspoon of ceremonial grade matcha into the milk before adding the chia seeds. Matcha has a natural slight sweetness and a grassy depth that works beautifully in sugar free chia pudding. Top with sliced mango and toasted coconut. This is my current obsession. I’ve made it five times in the last two weeks.
Spiced chai version: Add 1/4 teaspoon cinnamon, 1/8 teaspoon cardamom, 1/8 teaspoon ginger, and a tiny pinch of black pepper to the base mixture. Use coconut milk as your liquid. Top with sliced banana and chopped dates — dates are high in natural sugar but a single chopped date scattered on top adds sweetness with minimal overall sugar impact. This one tastes like the inside of a chai latte and it’s extraordinary.
Berry version: Blend 1/3 cup of very ripe fresh or frozen raspberries into the milk before adding the chia seeds. The blended raspberries add color, natural sweetness from ripe fruit, and a slight tartness that’s genuinely lovely. The pudding turns this beautiful pink color and looks impressive even though it added about ninety seconds to the prep.
Peanut butter version: Stir 1 tablespoon of natural peanut butter directly into the milk before adding the chia seeds. Whisk well to incorporate. The peanut butter adds fat, protein, and a richness that makes the sugar free chia pudding feel genuinely indulgent. Top with sliced banana. This is the most filling version I’ve made — I was full until 1pm the day I tested this and that almost never happens.
After Three Months of Eating This
Here’s where I landed, honestly and without drama: sugar free chia pudding became something I genuinely look forward to eating. Not because I’ve somehow stopped wanting sugar — I haven’t, I still think about maple syrup regularly and I don’t feel great about it — but because this version is actually good enough that I don’t feel like I’m missing something every morning.
The doctor was pleased at my follow-up appointment. My bloodwork improved. I feel better in the mornings than I did when I was starting every day with sweetened everything.
And the weird thing is, after about six weeks of eating sugar free chia pudding most mornings, I tried adding a small drizzle of maple syrup back to a bowl and it tasted overpoweringly sweet. My palate had adjusted. I didn’t finish it. I actually didn’t finish a bowl of sweetened chia pudding because it was too sweet, which is something I never would have believed about myself four months ago.
So. Make this. Start with the unsweetened vanilla oat milk version, use a full teaspoon of vanilla, add very ripe mango on top, and eat it without prejudging it based on the words “sugar free.” Give it a real chance. You might surprise yourself.
And please let me know in the comments which variation becomes your favorite — I’m especially curious whether anyone else is as obsessed with the matcha mango version as I currently am 🥄💚
Table of Contents
Sugar Free Chia Pudding
A genuinely delicious sugar free chia pudding that relies on natural sweetness from vanilla oat milk, real vanilla extract, warming cinnamon, and ripe fresh fruit toppings — no maple syrup, honey, or added sugar required. Thick, creamy, and deeply satisfying with zero blood sugar impact. Perfect for diabetics, low sugar diets, or anyone cutting back on added sugar without wanting to sacrifice flavor.
Ingredients
- 1 cup unsweetened vanilla oat milk (or full-fat canned coconut milk for richest version)
- 4 tablespoons chia seeds (black or white)
- 1 teaspoon pure vanilla extract
- 1/4 teaspoon ground cinnamon
- Tiny pinch of salt
- 1/4 teaspoon pure monk fruit sweetener OR a few drops pure liquid stevia (optional)
- 1 tablespoon plain unsweetened Greek yogurt (optional, for extra thickness)
- Very ripe fresh mango chunks for topping
- Fresh ripe strawberries for topping
- Sliced very ripe banana for topping (optional)
- Fresh blueberries for topping (optional)
- Unsweetened toasted coconut flakes for topping (optional)
- Unsweetened almond or cashew butter drizzle for topping (optional)
Instructions
-
Step 1Pour oat milk or coconut milk into a wide-mouth mason jar or airtight container.
-
Step 2Add chia seeds, vanilla extract, cinnamon, salt, and monk fruit sweetener or stevia if using. Stir thoroughly, scraping the bottom of the jar to ensure everything is fully combined.
-
Step 3Wait 15 minutes, then stir vigorously again for 45 seconds to break up any early seed clusters and redistribute evenly throughout the mixture.
-
Step 4Cover the jar with a lid and refrigerate for a minimum of 5 hours or overnight for best flavor and texture development.
-
Step 5In the morning, taste the plain base before adding toppings and adjust with a small addition of monk fruit or stevia if desired.
-
Step 6Stir in one tablespoon of plain unsweetened Greek yogurt if using, for extra thickness and creaminess.
-
Step 7If pudding seems too thick add a small splash of oat milk and stir to desired consistency.
-
Step 8Add toppings of very ripe fresh fruit, coconut flakes, and nut butter drizzle just before serving. Serve immediately. Store remaining jars covered in the refrigerator for up to 5 days.